- Home
- Getting Started
- Documentation
- Release Notes
- Tour the Interface
- Tour the Layers
- JMARS Video Tutorials
- Lat/Lon Grid Layer
- Map Scalebar
- Nomenclature
- Crater Counting
- 3D
- Shape Layer
- Mosaics
- Map
- Advanced/Custom Maps
- Graphic/Numeric Maps
- Custom Map Sharing
- Stamp
- THEMIS
- MOC
- Viking
- CRISM Stamp Layer
- CTX
- HiRise
- HiRISE Anaglyph
- HiRISE DTM
- HRSC
- OMEGA
- Region of Interest
- TES
- THEMIS Planning
- Investigate Layer
- Landing Site Layer
- Tutorials
- Video Tutorials
- Displaying the Main View in 3D
- Finding THEMIS Observation Opportunities
- Submitting a THEMIS Region of Interest
- Loading a Custom Map
- Viewing TES Data in JMARS
- Using the Shape Layer
- Shape Layer: Intersect, Merge, and Subtract polygons from each other
- Shape Layer: Ellipse Drawing
- Shape Layer: Selecting a non-default column for circle-radius
- Shape Layer: Selecting a non-default column for fill-color
- Shape Layer: Add a Map Sampling Column
- Shape Layer: Adding a new color column based on the values of a radius column
- Shape Layer: Using Expressions
- Using JMARS for MSIP
- Introduction to SHARAD Radargrams
- Creating Numeric Maps
- Proxy/Firewall
- JMARS Shortcut Keys
- JMARS Data Submission
- FAQ
- Open Source
- References
- Social Media
- Podcasts/Demos
- Download JMARS
JMARS ›
Advanced formula field: Stamp Layer
Using the Stamp Layer and Formula Field
Step 1: Open the Stamp Layer
- Launch JMARS and navigate to the "Layers" panel on the left hand side.
- Click the "+" icon under the "Layers" section.
- Select any stamp layer you'd like. In this tutorial, we will be selecting the TES Stamp Layer.
- You may want to zoom in to 128.


Step 2: Add Stamps to the Layer
- To add stamps to the mainview, first add stamps to the layer. Double click the stamp layer in the layer manager.
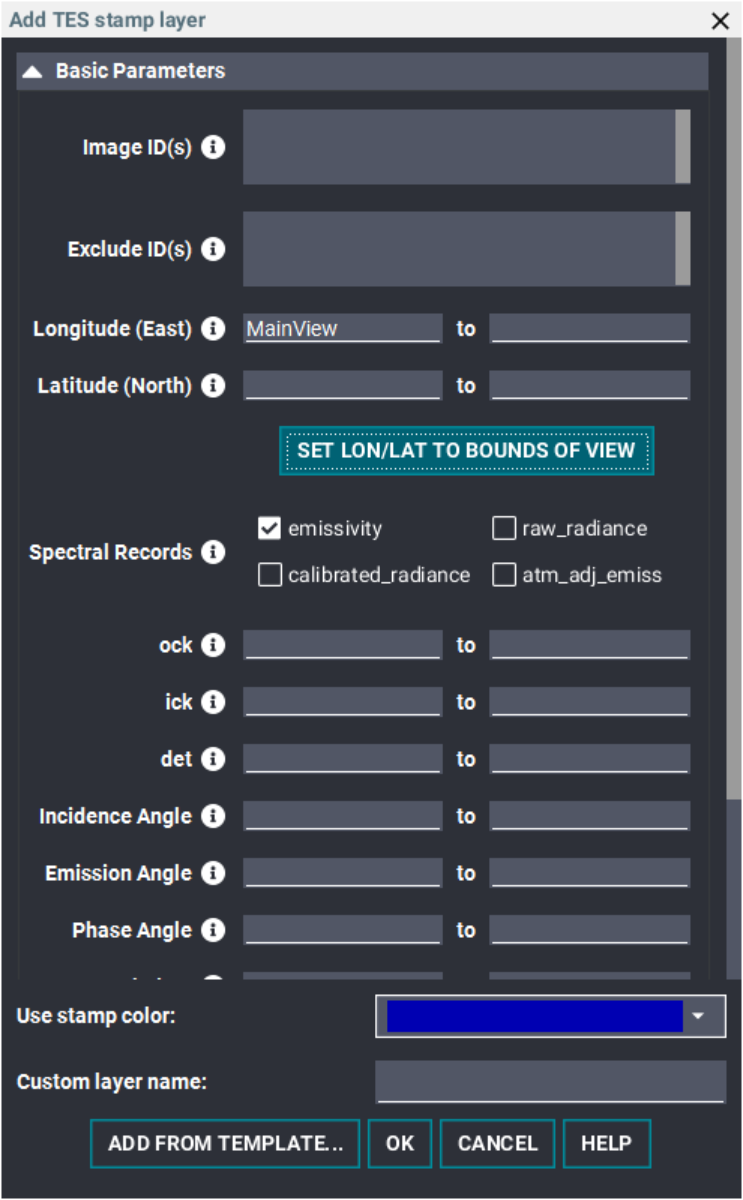
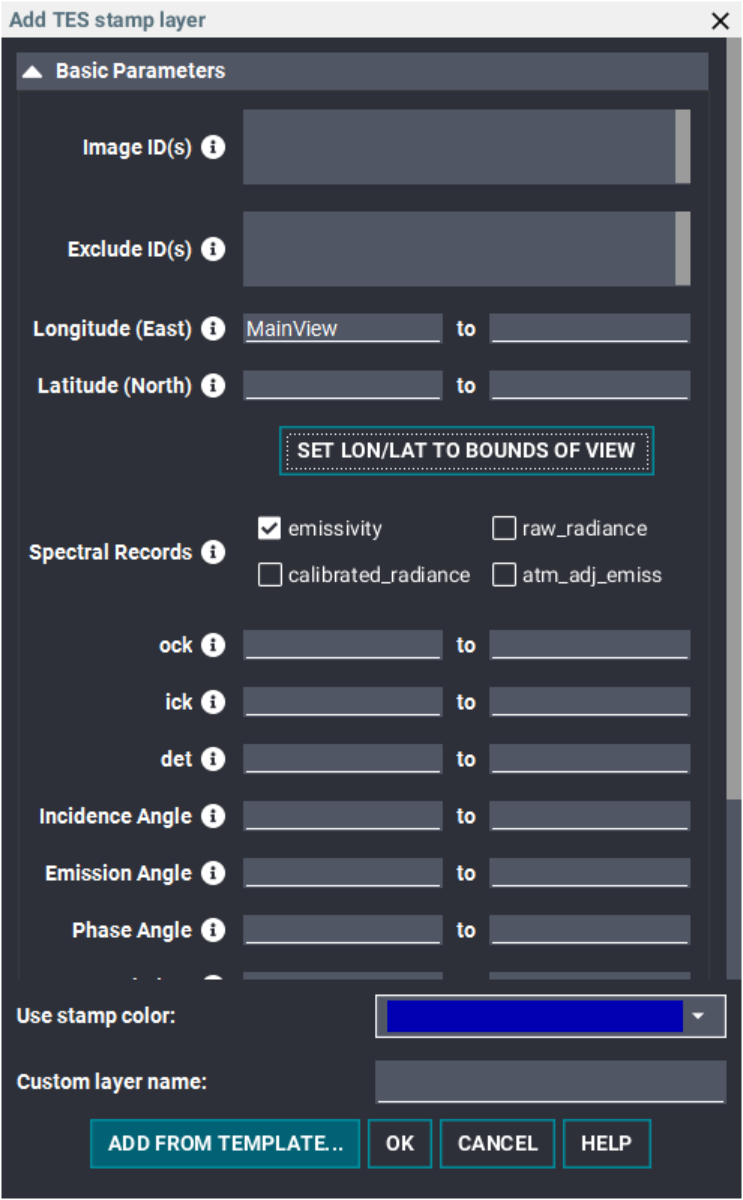
- For this tutorial, we are going to add stamps by filtering Lon/Lat based on the Mainview.:
- Click the "Set lon/lat to bounds of view"
- Once you click that button, you will notice the Longitude (East) box now says, "MainView"
- Make sure the "emissivity" check box is selected in the "Spectral Records" section under the "Set Lon/Lat To Bounds of View" button
- Click the "Add From Template..." button. The "TES Query Templates" window should open.
- In the first drop down, select "Predefined". In the second drop down, click "Spectra: Warm Surface, High Quality, Clear Atmosphere". Then click the "Apply" button.
- Now click "OK" at the bottom to add the stamps.

Step 3: Open the Formula Window
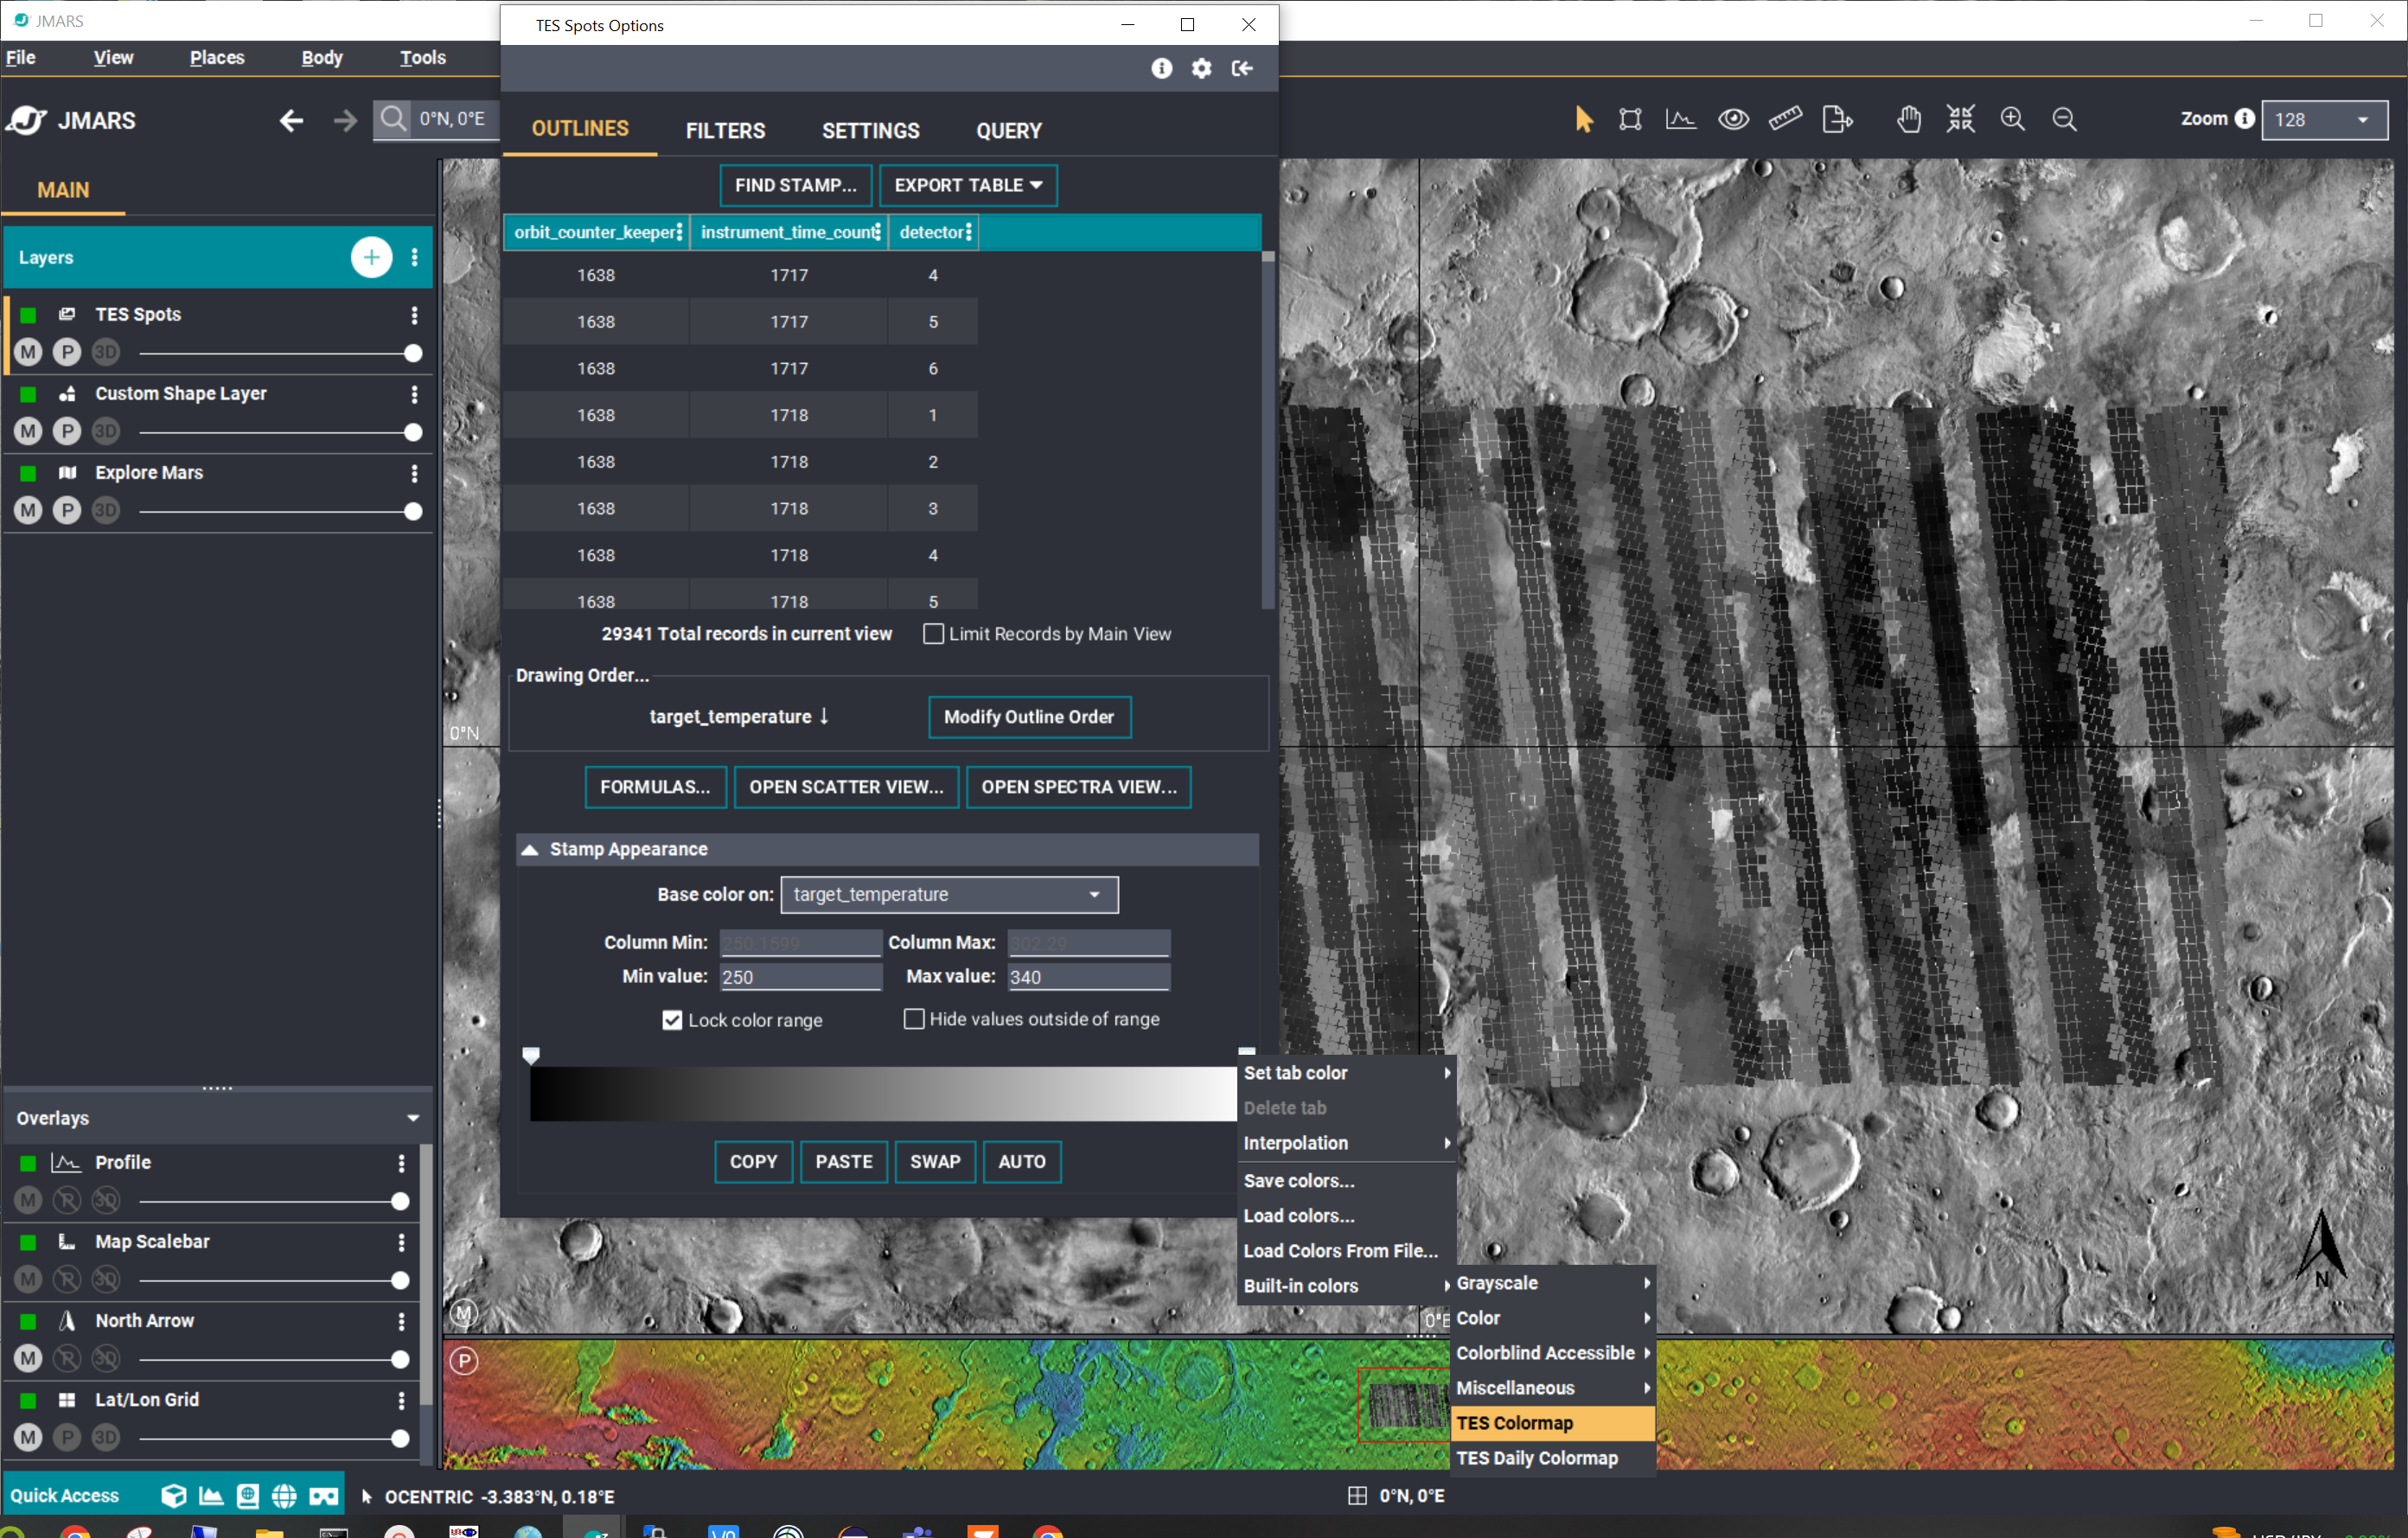
- Double click the layer. The TES Stamps Options window should open.
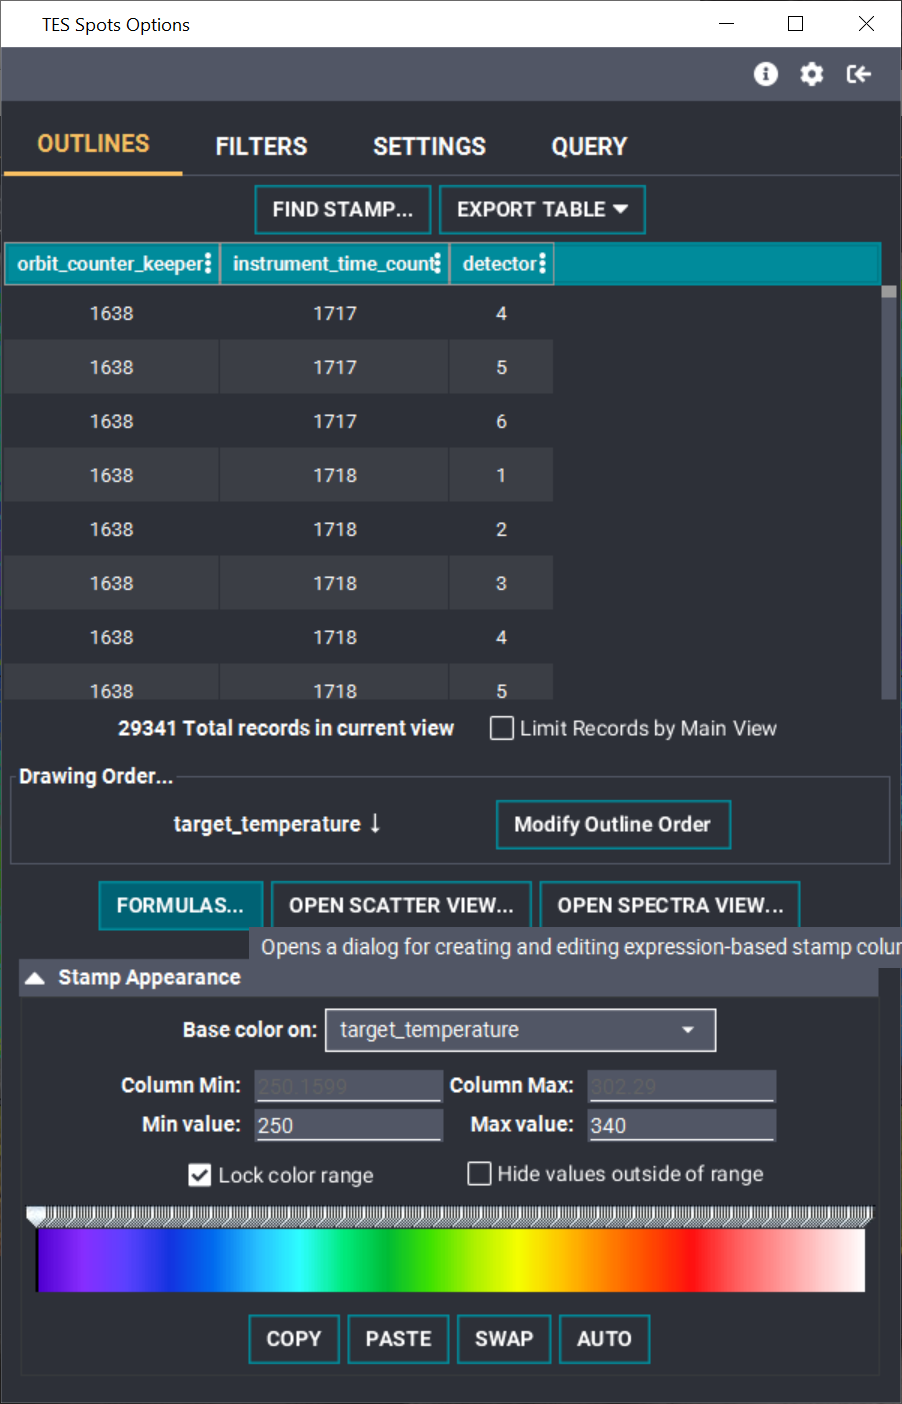
- First, lets colorize the TES spots. At the bottom of the window, you should see a gray colored scale bar. Right click on the colored scale bar or tab, select "Built-in Colors" --> TES Colormap. The color bar should change to have colors.
- Click the "Formulas..." button at the bottom of the window to open the "Column Formulas" window.
Step 4: Create the Formula
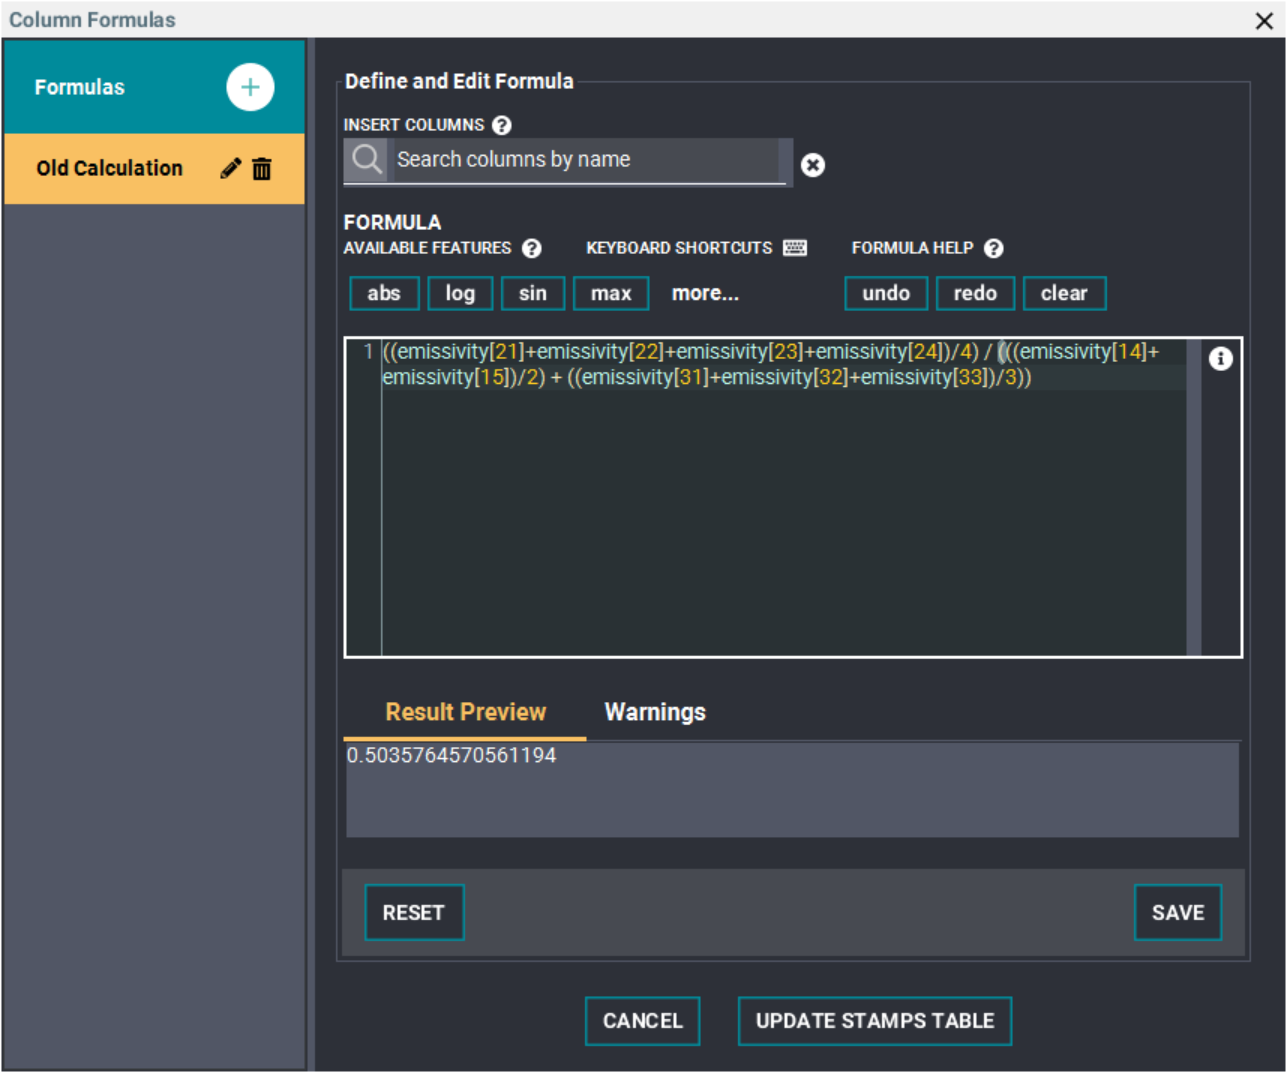
- First, if you'd like to change the name of your column, you can click the "Formula2" tab and rename it. In this tutorial, I will be using two tabs. One for the Old Calculation and one for the New Calculation.
- Next, notice the icons next to various sections of the Formula Editor. To learn more about this visit the introduction tutorial, "Using the formula field: Stamp Layer". For formula help, click the "Formula" text.
- Let's start with the way JMARS used to implement calculations. Here is an example of the calculation we are going to use: (emissivity[14]+emissivity[15])/2 (emissivity[21]+emissivity[22]+emissivity[23]+emissivity[24])/4 (emissivity[31]+emissivity[32]+emissivity[33])/3
- In the first tab you can see how JMARS used to implement this calculation.
- Make sure you Click "Save" and then "Update Stamps Table" to add the columns for each tab that you create.
- Now, lets implement using the updated features in JMARS. Type: emissivity[21:24] / (emissivity[14:15] + emissivity[31:33])
- You'll notice that the new formula doesn't require the user to divide by the number of items, it does it automatically.
- If you look at the result preview in both tabs, the preview of the first row is identical but the calculation is much easier to implement.
- Click "Save" and then "Update Stamps Table" to add the columns which can be viewed in the TES Spots Options window.
- The mainview stamps have now been updated to match your calculation. The first image is the before and the second image is the after calculation.


You have successfully used the JMARS formula field to add a new column to your stamps layer!


