
- Home
- Getting Started
- Documentation
- Release Notes
- Tour the Interface
- Tour the Layers
- JMARS Video Tutorials
- Lat/Lon Grid Layer
- Map Scalebar
- Nomenclature
- Crater Counting
- 3D
- Shape Layer
- Mosaics
- Map
- Advanced/Custom Maps
- Graphic/Numeric Maps
- Custom Map Sharing
- Stamp
- THEMIS
- MOC
- Viking
- CRISM Stamp Layer
- CTX
- HiRise
- HiRISE Anaglyph
- HiRISE DTM
- HRSC
- OMEGA
- Region of Interest
- TES
- THEMIS Planning
- Investigate Layer
- Landing Site Layer
- Tutorials
- Video Tutorials
- Displaying the Main View in 3D
- Finding THEMIS Observation Opportunities
- Submitting a THEMIS Region of Interest
- Loading a Custom Map
- Viewing TES Data in JMARS
- Using the Shape Layer
- Shape Layer: Intersect, Merge, and Subtract polygons from each other
- Shape Layer: Ellipse Drawing
- Shape Layer: Selecting a non-default column for circle-radius
- Shape Layer: Selecting a non-default column for fill-color
- Shape Layer: Add a Map Sampling Column
- Shape Layer: Adding a new color column based on the values of a radius column
- Shape Layer: Using Expressions
- Using JMARS for MSIP
- Introduction to SHARAD Radargrams
- Creating Numeric Maps
- Proxy/Firewall
- JMARS Shortcut Keys
- JMARS Data Submission
- FAQ
- Open Source
- References
- Social Media
- Podcasts/Demos
- Download JMARS
SHARAD Radargrams
SHARAD (SHAllow RADar sounder) Radargram functionality is now in JMARS. SHARAD data comes from the Mars Reconnaissance Orbiter. MRO sends radar pings to the surface of mars to get the reflection of surface and subsurface layers. This tutorial will show the steps to view a radiogram and how to draw horizons.
Step 1: Opening JMARS, Navigate to an area of interest. For this tutorial, we will be located at the North Pole.
- Double-click the JMARS icon on your desktop to open JMARS.
- Enter your JMARS user name and password. If you do not have a user name and password, follow the instruction under the appropriate "Getting Started" link on the Main Page.
- At this point, the Layer Manager should only have the MOLA Shaded Relief Layer and the Lat/Lon Layer loaded.
- In the Lon/Lat box in the upper-left corner of the Viewing Window, enter the coordinates "270E, 90"
- The Main View should now be centered over the North Pole. Re-project (ctrl + r).
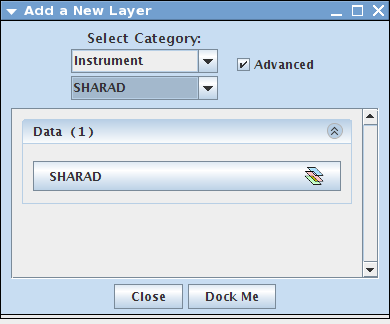
- In the Layer Manager, click "Add New Layer".
- Change the first drop down menu to "Instrument" and the drop down menu below it to "SHARAD"
- When the "Add SHARAD stamp layer" dialog box opens, either enter the known Image ID or click "MainView" --> Update Search [keep in mind that this may return many SHARAD lines]. For the purpose of this tutorial, we will be using ID: S_00588401
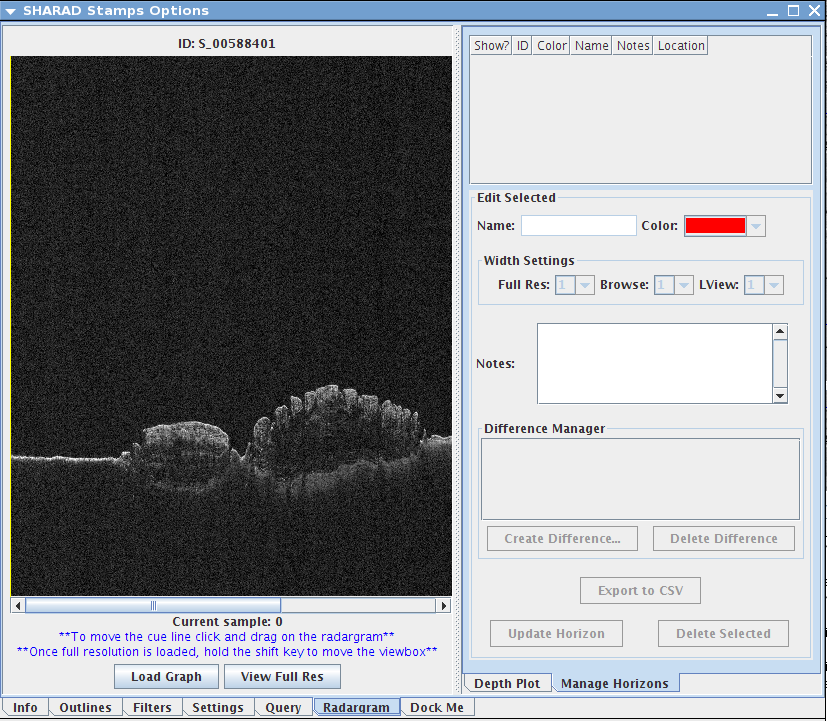
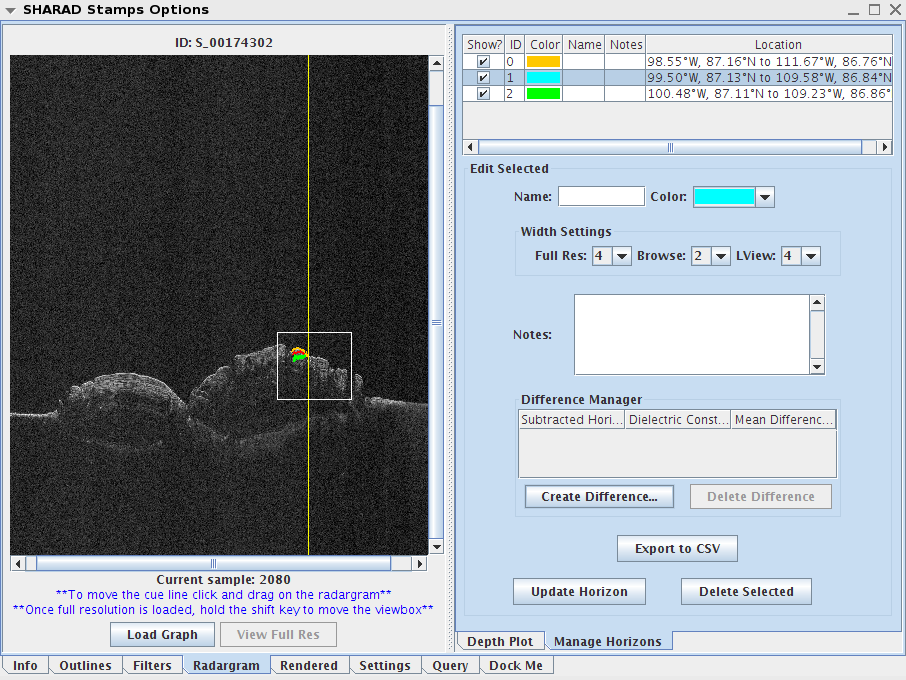
- Double click the SHARAD Layer in your Layer Manager. Make sure the Radargram tab is selected. Also, make sure the Manage Horizons tab is selected.
Step 2: Load and view SHARAD Data
- When the "Add SHARAD stamp layer" dialog box opens, either enter the known Image ID or click "MainView" --> Update Search [keep in mind that this may return many SHARAD lines]. For the purpose of this tutorial, we will be using ID: S_00588401
- Double click the SHARAD Layer in your Layer Manager. Make sure the Radargram tab is selected. Also, make sure the Manage Horizons tab is selected.
- On the SHARAD Stamps Options box, click the "View Full Res" button at the bottom. The Full Resolution window should open.
Step 3: Drawing Horizons
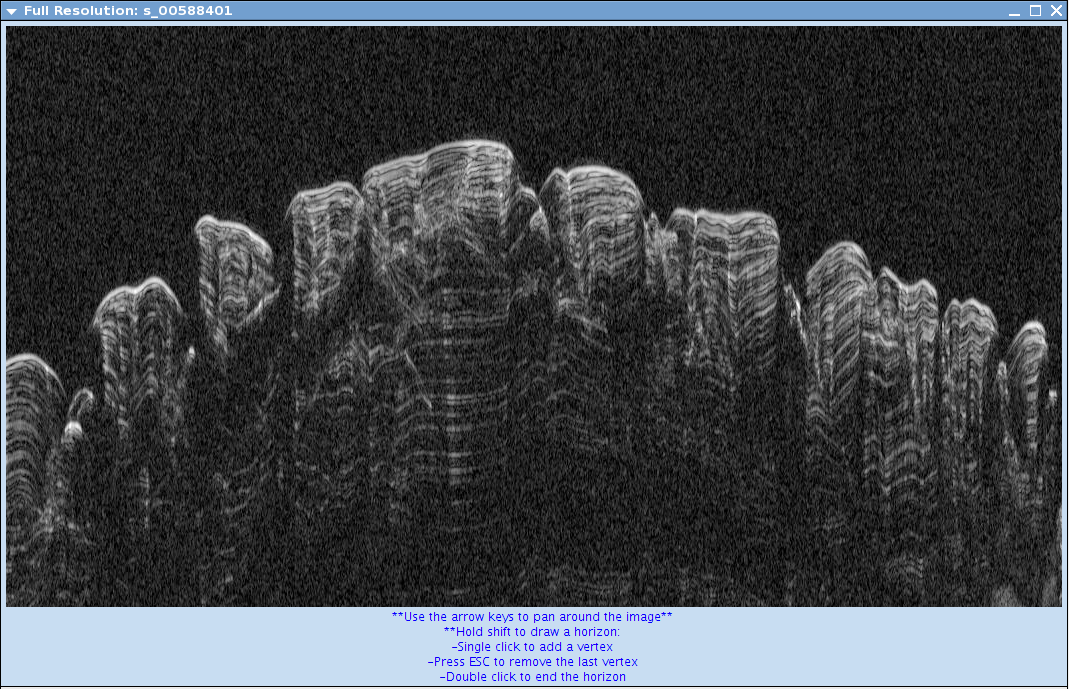
- Your Full Resolution box should be open. You may notice that a small white box appeared on the SHARAD Stamp Options window. Hold shift down and place your mouse arrow where you would like to draw your horizons.
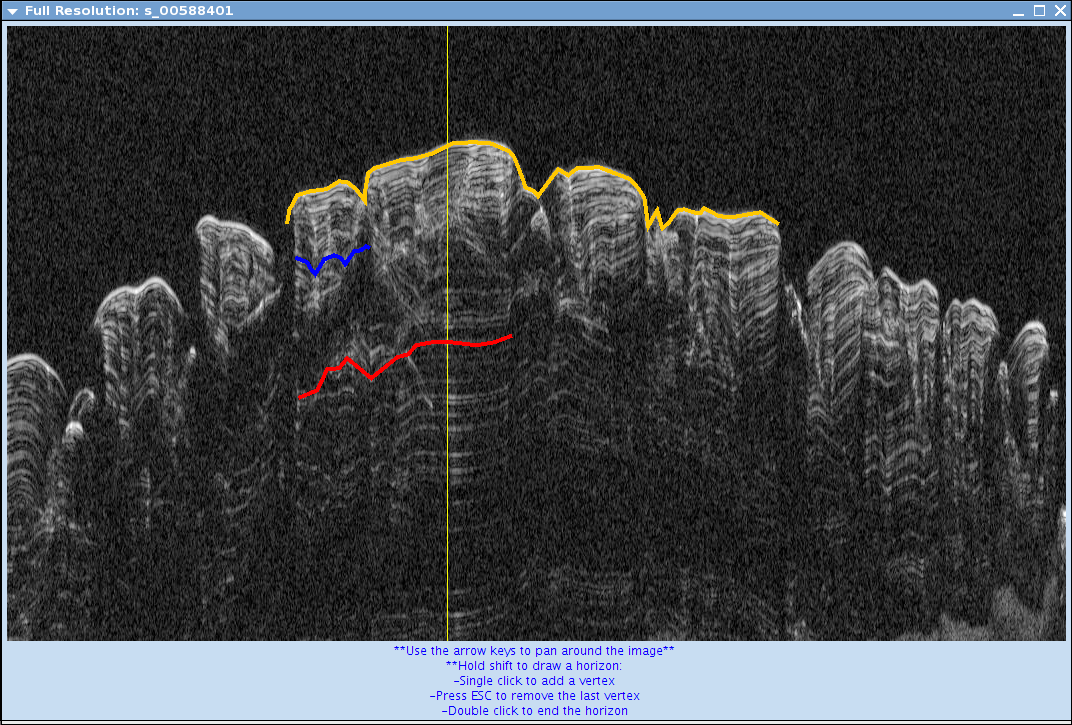
- Your full resolution window should now show the area your white box is outlining.
- You can adjust the window size on the Full Resolution window to see more area.
- On the Full Resolution window, the instructions to moving around and drawing horizons are below the image.
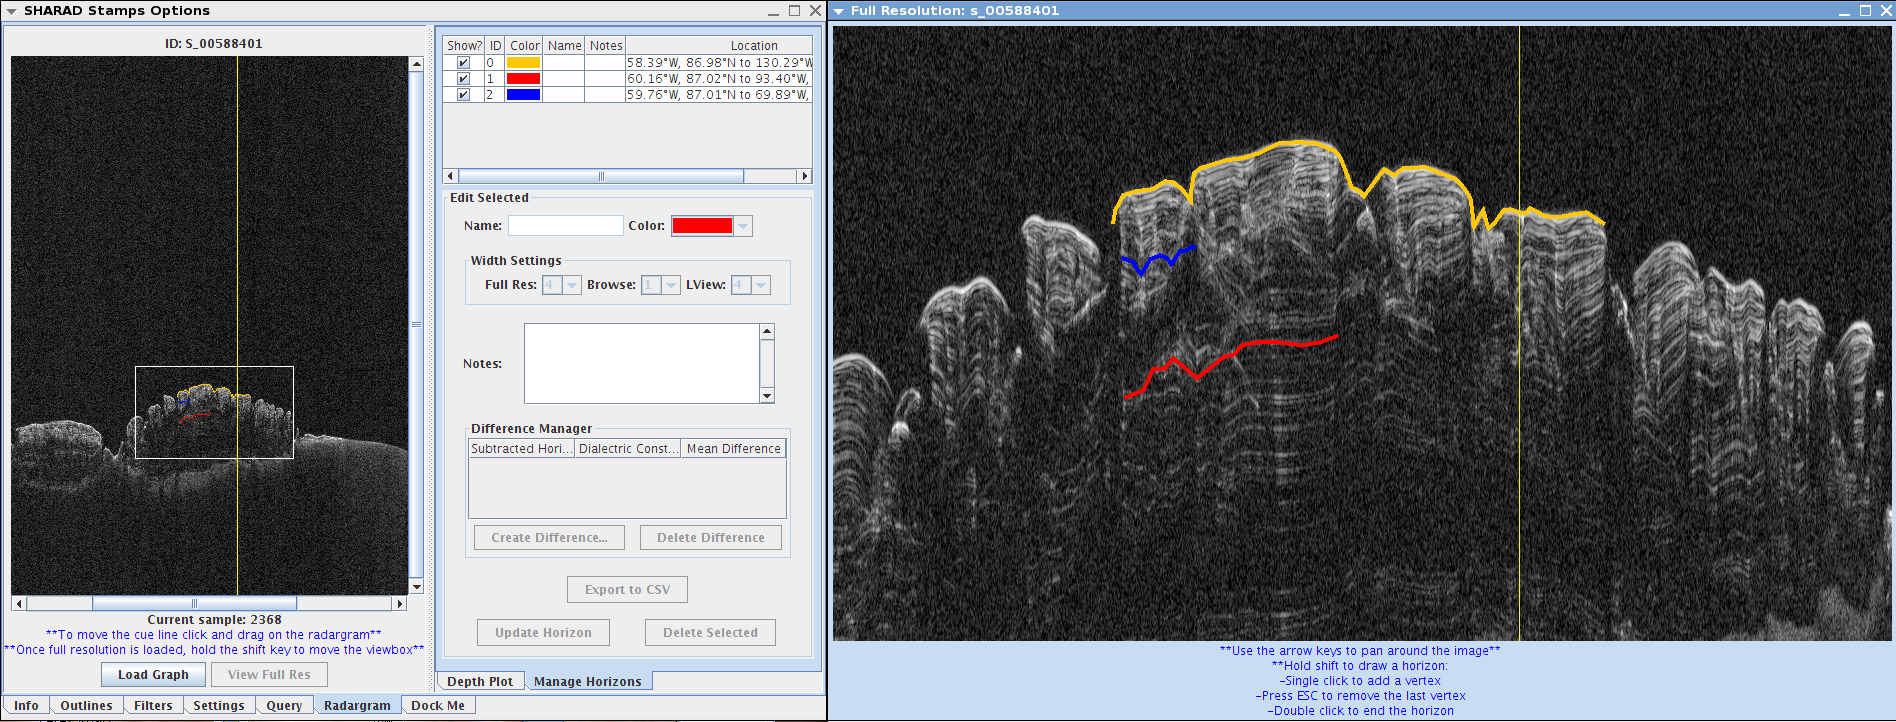
- To draw a horizon: hold shift and click on the full resolution window. Press ESC to remove the last vertex. When you are done with the horizon, double click your last vertex to end the horizon.
- After you draw a horizon, you can edit the horizon line thickness so it shows up more. You can also change the color. After you make your edits, click "Update Horizon"
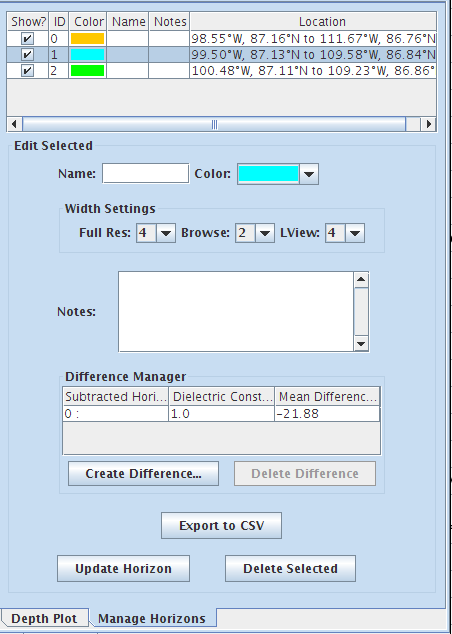
- The Difference Manager allows the user to calculate a Mean Difference (in pixels), by finding the difference in one horizon from another. By finding the average number of pixels in the y direction, the physical distance can be calculated when a dielectric constant is assigned. This helps the user get the thickness of a subsurface layer. The dielectric constant is the rate used at which the radar pulse travels through the material.
- The resulting calculation includes the y difference (pixels), a one way time difference (nanoseconds) which is calculated by delta_t = delta_y*37.5ns/2, and a depth difference (m) based on the user entered dialectric constant which is calculated by delta_d = c*delta_t*10^-9/sqrt(er). C is the speed of light and er is the dialectric constant
- First, select a horizon at the top of the "SHARAD Stamp Options". This is the starting horizon.
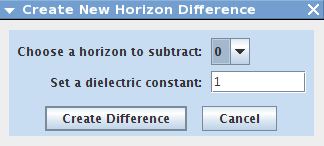
- Next, Click the "Create Difference" button. This will open the "Create New Horizon Difference" dialog.
- When the dialog box opens, choose a horizon to subtract from your already selected horizon, and enter an appropriate dielectric constant for the area. When you are done, click "Create Difference"
- When the process is done, the Difference Manager will show the Subtracted Horizon, the Dielectric Constant that you entered in the previous step, and the calculated Mean Difference.
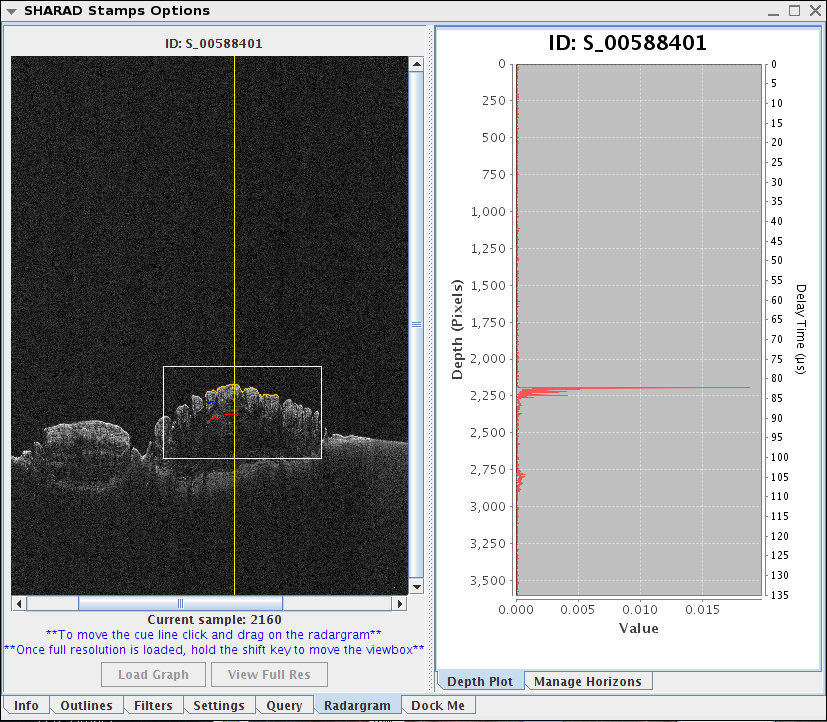
- To see the Depth Plot profile. Adjust the yellow line on your Full Resolution window by clicking where you want the line to go.
- To load the depth chart, you must click "Load Graph" on the SHARAD Stamps Options window. To view the data, make sure the "Depth Plot" tab is selected instead of "Manage Horizons".

Step 4: Difference Manager
Step 5: Depth Plot
Congratulations! You have finished the SHARAD tutorial!
PREVIOUS: JMARS MSIP