- Home
- Getting Started
- Documentation
- Release Notes
- Tour the Interface
- Tour the Layers
- JMARS Video Tutorials
- Lat/Lon Grid Layer
- Map Scalebar
- Nomenclature
- Crater Counting
- 3D
- Shape Layer
- Mosaics
- Map
- Advanced/Custom Maps
- Graphic/Numeric Maps
- Custom Map Sharing
- Stamp
- THEMIS
- MOC
- Viking
- CRISM Stamp Layer
- CTX
- HiRise
- HiRISE Anaglyph
- HiRISE DTM
- HRSC
- OMEGA
- Region of Interest
- TES
- THEMIS Planning
- Investigate Layer
- Landing Site Layer
- Tutorials
- Video Tutorials
- Displaying the Main View in 3D
- Finding THEMIS Observation Opportunities
- Submitting a THEMIS Region of Interest
- Loading a Custom Map
- Viewing TES Data in JMARS
- Using the Shape Layer
- Shape Layer: Intersect, Merge, and Subtract polygons from each other
- Shape Layer: Ellipse Drawing
- Shape Layer: Selecting a non-default column for circle-radius
- Shape Layer: Selecting a non-default column for fill-color
- Shape Layer: Add a Map Sampling Column
- Shape Layer: Adding a new color column based on the values of a radius column
- Shape Layer: Using Expressions
- Using JMARS for MSIP
- Introduction to SHARAD Radargrams
- Creating Numeric Maps
- Proxy/Firewall
- JMARS Shortcut Keys
- JMARS Data Submission
- FAQ
- Open Source
- References
- Social Media
- Podcasts/Demos
- Download JMARS
JMARS ›
Shape Layer: Intersect, Merge, and Subtract polygons from each other
This functionality was released in version 3.6.3 of JMARS. The purpose of this tutorial is to learn polygon functionality. This tutorial will introduce Intersecting, Merging, Subtracting polygons from one another using the shape layer.
Step 1: Opening JMARS and adding the Shape Layer
- Double-click the JMARS icon on your desktop to open JMARS
- Enter your JMARS user name and password. If you do not have a user name and password, follow the instruction under the appropriate "Getting Started" link on the Main Page.
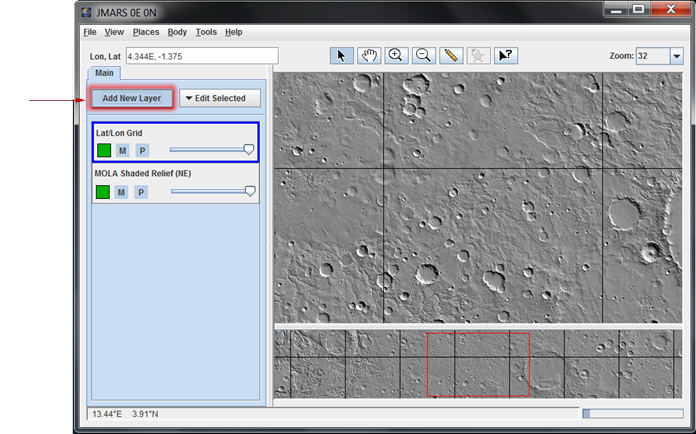
- At this point, the Layer Manager should only have the MOLA Shaded Relief Layer and the Lat/Lon Layer loaded.
- In the Layer Manager, click "Add New Layer" -> "Custom Shape Layer"
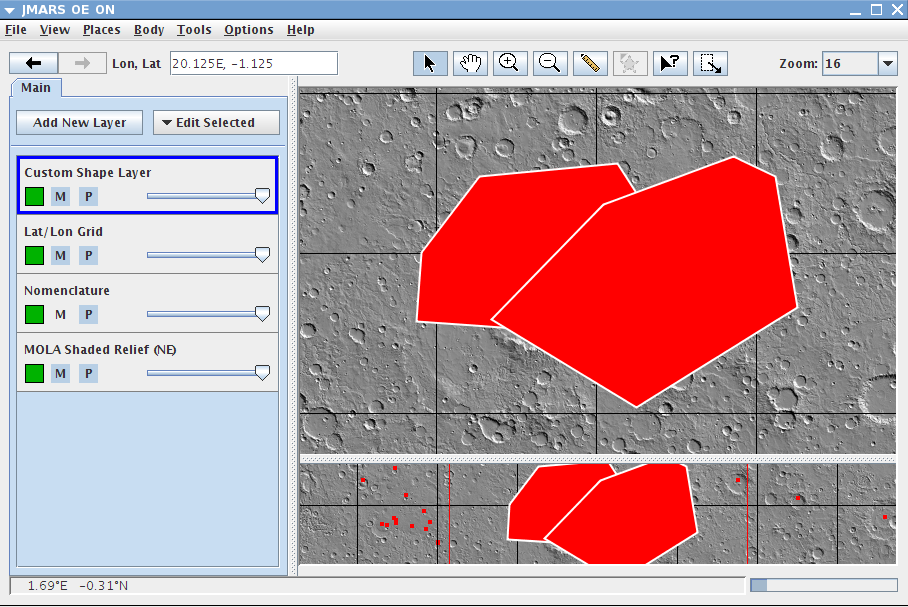
- Right click the main screen and select "Add Polygons"
- Draw two polygons on the main screen and make sure they are overlapping one another. NOTE: Intersect and Merge both allow the user to use 2 or more polygons.


Tool #1: Intersect Polygons Tool
The intersect polygons tool will allow the user to find the common area between two or more overlapping polygons.
- Right click the main screen and click "Select Features"
- Select both polygons by either clicking on one, then ctrl + click on the other OR draw a quick box over both polygons. When the polygons are selected, they will both be outlined in yellow.
- Right click the main screen again --> "Polygon Functions" --> "Intersect polygons"
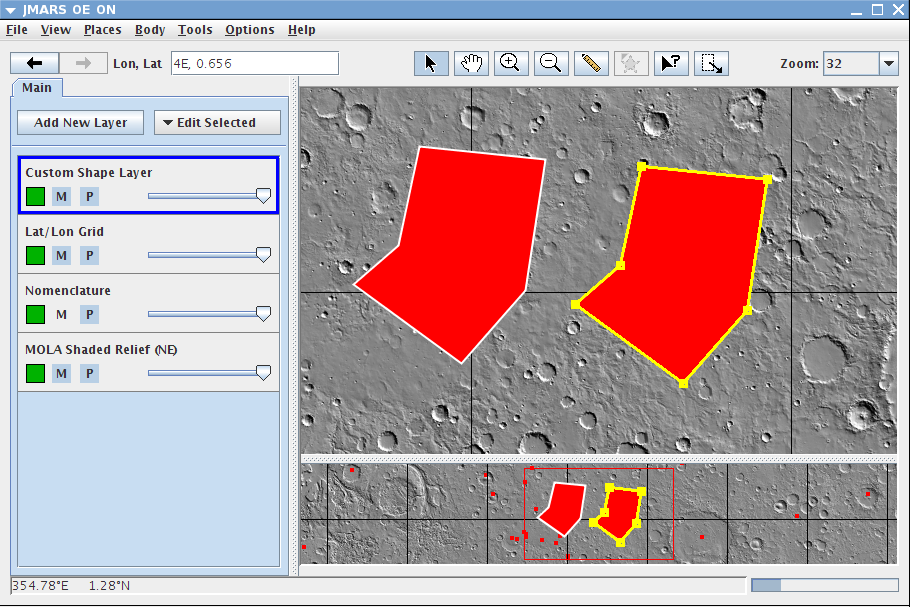
- The original polygons should still be selected. Move the original polygons or erase them if they are no longer needed. When the original polygons are moved, you can see another polygon. This polygon is the product of the Intersect Polygon Tool. The remaining polygon should match the overlapping area of the original polygons.


Tool #2: Subtract Polygons Tool
This tool has the opposite functionality of the intersect tool. Subtracting polygons takes the overlapping area and deletes the common area. This functionality only works with two polygons.
- Make sure you have two polygons drawn on the main view that are overlapping.
- Right click the main screen and click "Select Features"
- Select both polygons by either clicking on one, then ctrl + click on the other OR draw a quick box over both polygons. When the polygons are selected, they will both be outlined in yellow.
- Right click the main screen again --> "Polygon Fuctions" --> "Subtract polygons"
- The original polygons should still be selected. Move the original polygons or erase them if they are no longer needed. When the original polygons are moved, you can see another polygon. This polygon is the product of the Subtract Polygon Tool. The remaining polygon should have the common area removed.
- Start with two overlapping polygons as we did in step 2.
- Select the polygons by either clicking on one, then ctrl + click on the other OR draw a quick box over both polygons. When the polygons are selected, they will both be outlined in yellow.
- Right click the main screen again --> "Polygon Fuctions" --> "Merge Polygons Together"
- Click the polygon on the screen. Your new polygon is on top while your original polygons is underneath the new merged shape.
- Draw one or more polygons on the main screen.
- Right click the screen and select "Select Features"
- Select the polygons by either clicking on one, then ctrl + click on the other OR draw a quick box over both polygons. When the polygons are selected, they will both be outlined in yellow.
- Right click the main screen again --> Polygon Functions --> Duplicate Polygons
- The new polygon will be pasted on top of the original polygon. To see your results, drag one polygon off the other and you will see that the polygon has been duplicated


Tool #3: Learning the Merge Polygon Tool
The Merge Polygon Tool allows the user to take two or more overlapping polygons and create one polygon from them.


Tool #4: Learning the Duplicate Polygon Tool
The Duplicate Polygon Tool is a copy and paste feature. It allows the user to select one or more polygons and make a copy of the polygons.


Congratulations! You have finished the eighth JMARS tutorial!


