
- Home
- Getting Started
- Documentation
- Release Notes
- Tour the Interface
- Tour the Layers
- JMARS Video Tutorials
- Lat/Lon Grid Layer
- Map Scalebar
- Nomenclature
- Crater Counting
- 3D
- Shape Layer
- Mosaics
- Map
- Advanced/Custom Maps
- Graphic/Numeric Maps
- Custom Map Sharing
- Stamp
- THEMIS
- MOC
- Viking
- CRISM Stamp Layer
- CTX
- HiRise
- HiRISE Anaglyph
- HiRISE DTM
- HRSC
- OMEGA
- Region of Interest
- TES
- THEMIS Planning
- Investigate Layer
- Landing Site Layer
- Tutorials
- Video Tutorials
- Displaying the Main View in 3D
- Finding THEMIS Observation Opportunities
- Submitting a THEMIS Region of Interest
- Loading a Custom Map
- Viewing TES Data in JMARS
- Using the Shape Layer
- Shape Layer: Intersect, Merge, and Subtract polygons from each other
- Shape Layer: Ellipse Drawing
- Shape Layer: Selecting a non-default column for circle-radius
- Shape Layer: Selecting a non-default column for fill-color
- Shape Layer: Add a Map Sampling Column
- Shape Layer: Adding a new color column based on the values of a radius column
- Shape Layer: Using Expressions
- Using JMARS for MSIP
- Introduction to SHARAD Radargrams
- Creating Numeric Maps
- Proxy/Firewall
- JMARS Shortcut Keys
- JMARS Data Submission
- FAQ
- Open Source
- References
- Social Media
- Podcasts/Demos
- Download JMARS
Custom Map Sharing
The "Manage Groups" functionality allows:
- Addition or deletion of custom map sharing groups.
- Addition or deletion of users within a custom map sharing group.
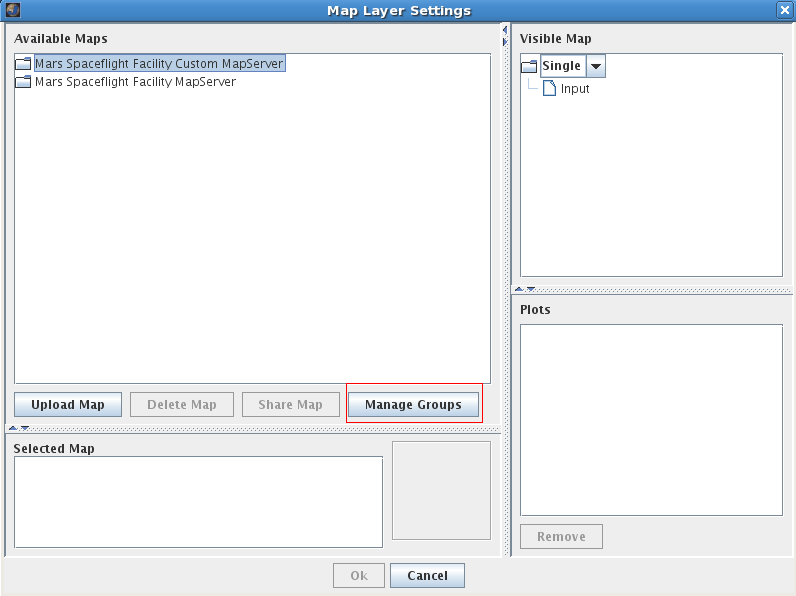
- To create a custom map sharing group, begin by clicking on the "Manage Groups" button.
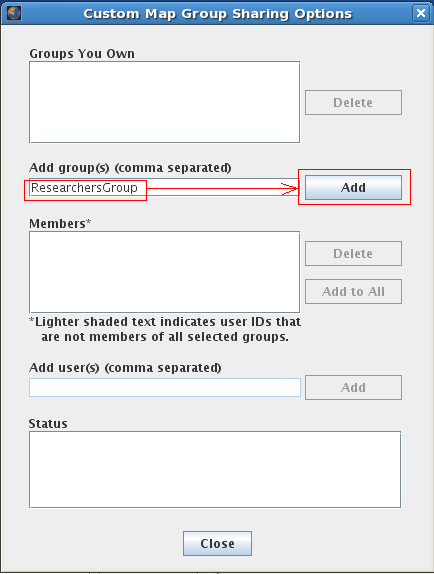
- Alphabets.
- Digits.
- Hyphens.
- Underscores.
- Period.
- @ symbol.
- Spaces.
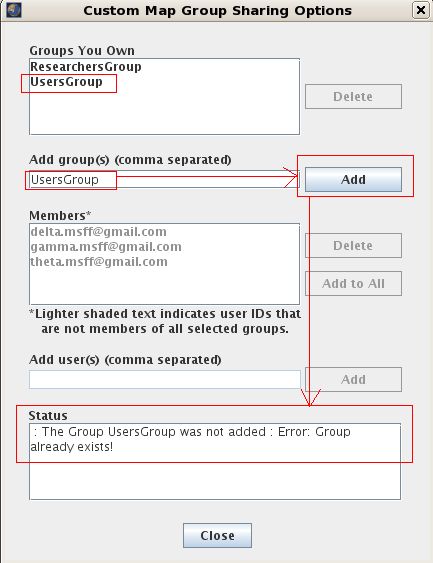
- Group names must be unique to the JMARS user creating the group. If a user does try to create a group with a group name they have previously used to create a group, JMARS will display an error message. In the image below, the user tries to create a new group named UsersGroup, which is the name of a group they have previously created. As a result, an error message is displayed in the status window.
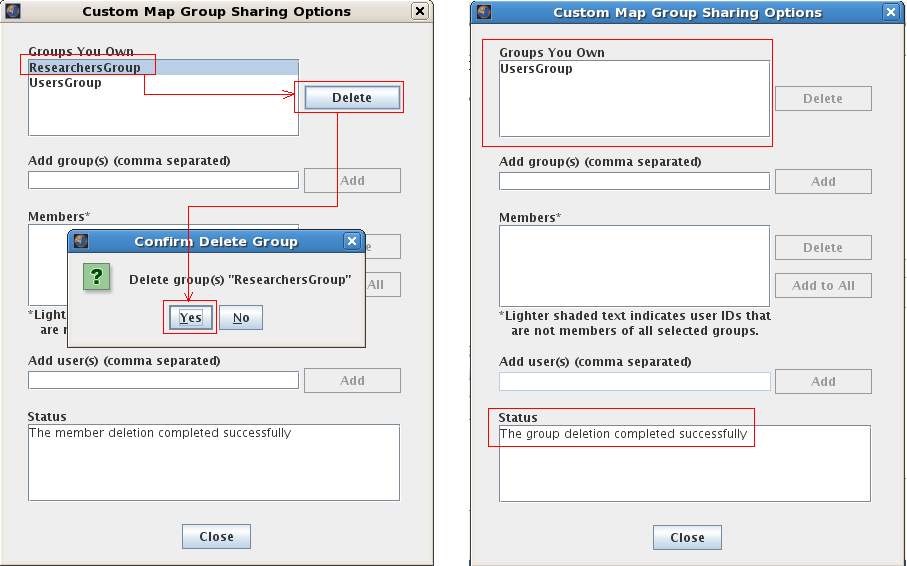
- Deleting groups: A user can delete a group by simply selecting the group (that needs to be deleted) and clicking on "Delete". Once the selection is highlighted (from "Custom Map Sharing Options") and the "Delete" button is clicked, a confirmation box will be displayed requesting you to confirm your action. If you click on "Yes" and if the deletion is successful, a success message is displayed in the "Status" box. Refer to the screen shots below.
- Adding users to a group: In the example below, adding users to the "ResearchersGroup" group is demonstrated. Once the group name is highlighted, users may be added to that group. Multiple users may be added by separating the user names by commas in the "Add user(s)" input field. Only registered JMARS users may be added to the selected group. The user or users are added when the "Add" button is clicked.
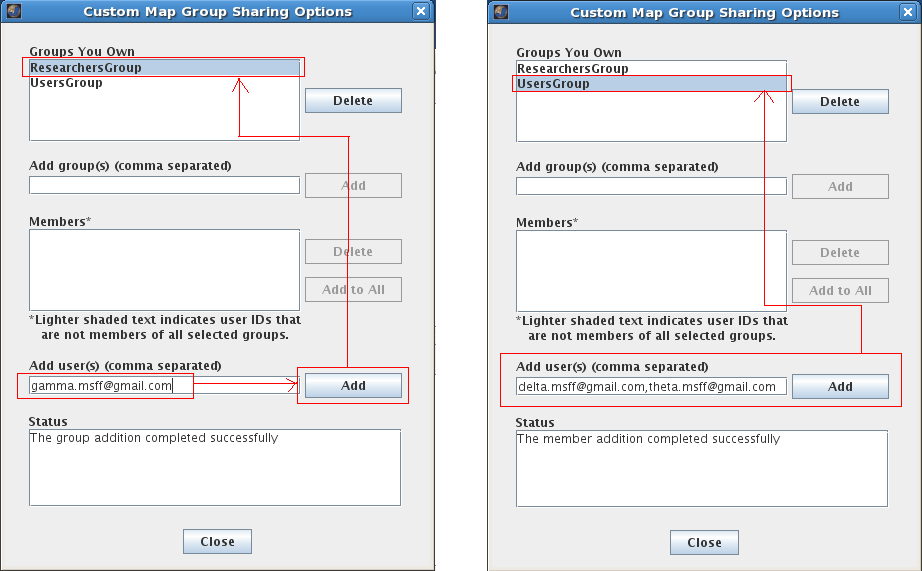
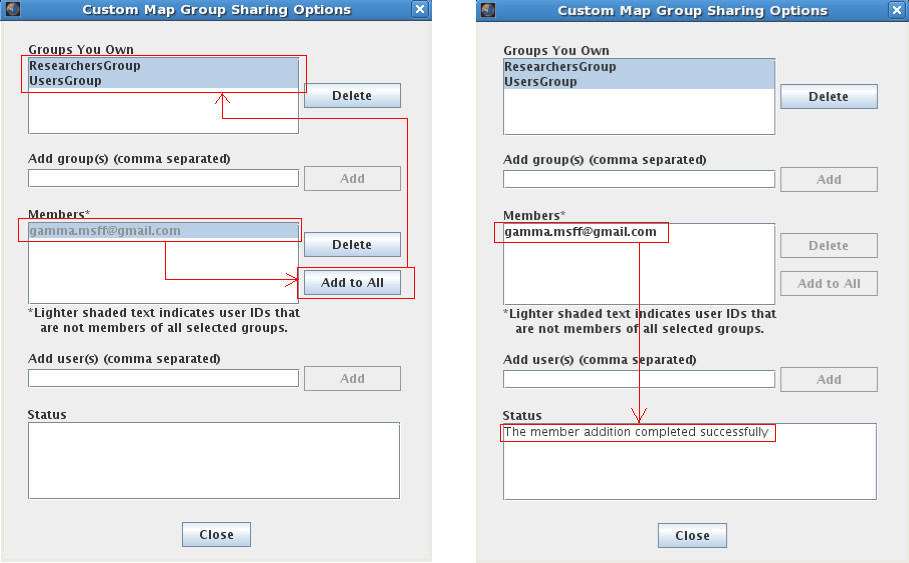
- Adding a user to multiple groups: When multiple groups are selected, users that are members of one or more of the groups but are not members of all groups will appear in a gray font. In order to add any of these members to all the selected groups, the desired member(s) should be selected and the "Add to All" button clicked. In the screen shot below (left), two groups were selected, the user name "gamma.msff@gmail.com" appears in gray font as it is present in only one of the groups. By selecting the groups "ResearchersGroup" and "UsersGroup", selecting the user to add, (gamma.msff@gmail.com), and finally clicking on "Add to All" the user will be added to all the groups and appear in a black font. The result can be seen in the image below (right).
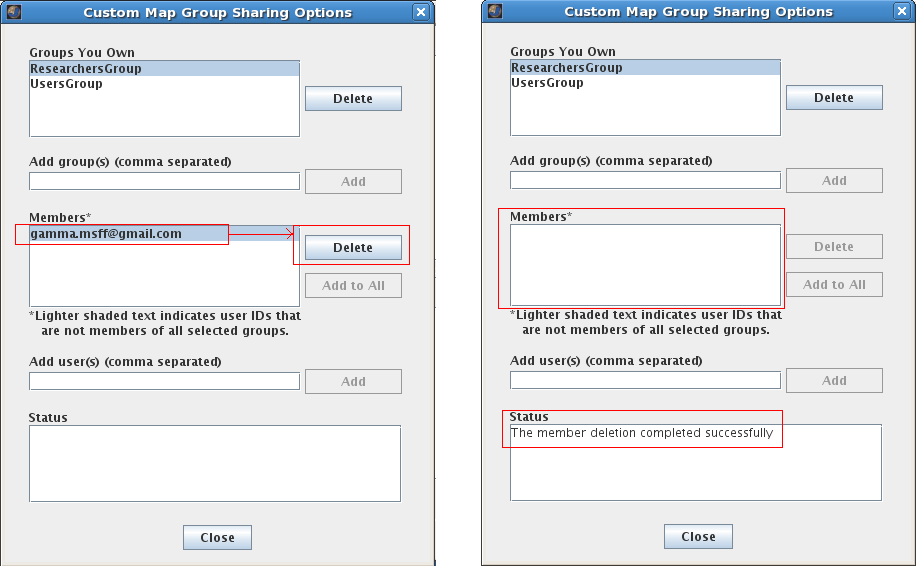
- Deleting individual users from groups: A user can delete a particular user by selecting the user (who needs to be deleted) and clicking on "Delete". Once the selection is highlighted (from "Custom Map Sharing Options") and the "Delete" button is clicked, the user will get deleted. If the deletion is successful, a success message is displayed in the "Status" box. Refer to the screen shots below.
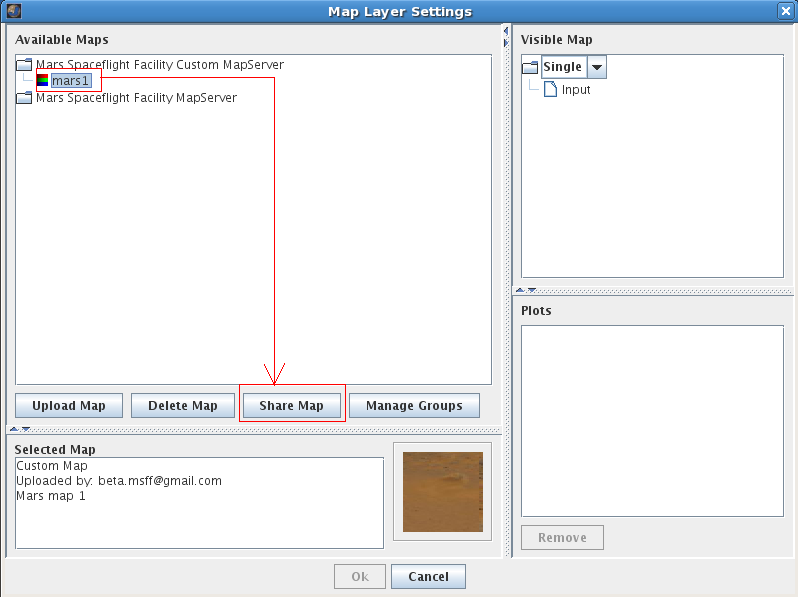
- Share a map with another registered JMARS user: First upload a map (see the Advanced/Custom Maps documentation) and then click on the "Share Map" button. Note: only the map owner has the ability to share the map or delete the map. The user(s) with whom the map is shared will neither be able to re-share the map nor delete the map.
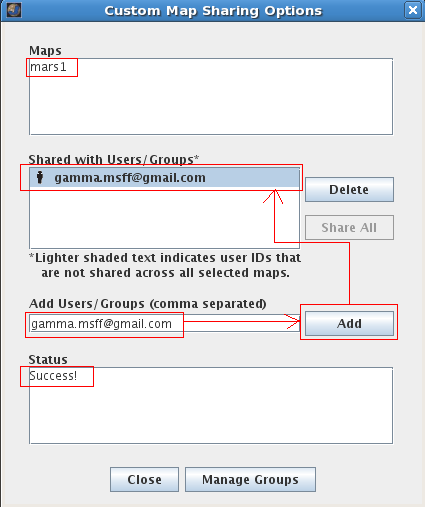
- Sharing a map: To share a map with a registered JMARS user, enter the users name in the text box "Add Users/Groups" (near the "Add" button) and then click on "Add". If the user is registered, the file will be shared with that user and will appear in the users custom map list with the map owners name appended to the right of the map name. In the image below, the user "beta.msff@gmail.com" has shared the map "map1" with the user "gamma.msff@gmail.com".
- When the user "gamma.msff@gmail.com" logs in, they will be able to view the shared map but will not be able to re-share or delete the map. This is shown in the image below.
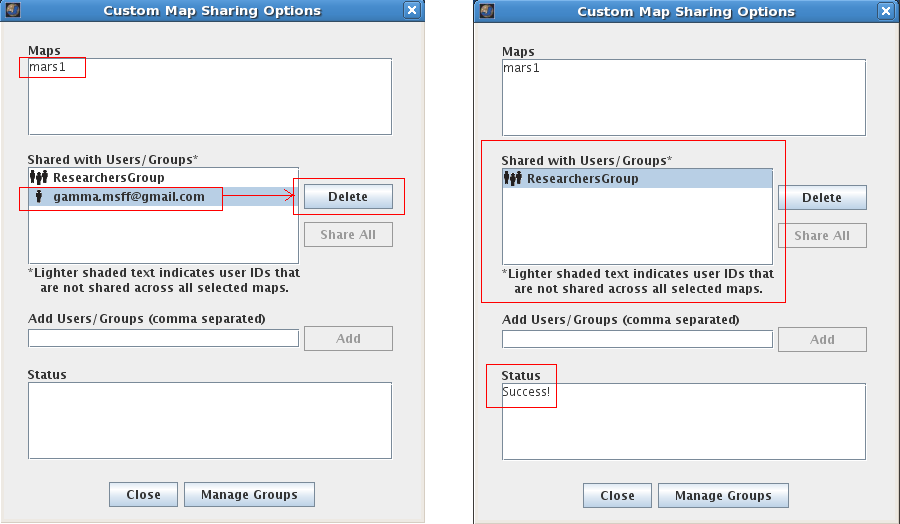
- Un-sharing maps shared with an individual: A user can un-share maps by simply "deleting" the users with whom the map was initially shared. To revoke the share permissions, at least one user (whose permissions you want to revoke) needs to be selected (from the "Custom Map Sharing Options"). Once the selection is highlighted, simply click on the "Delete" button. If the deletion is successful, a success message is displayed in the "Status" box. Refer to the screen shots below.
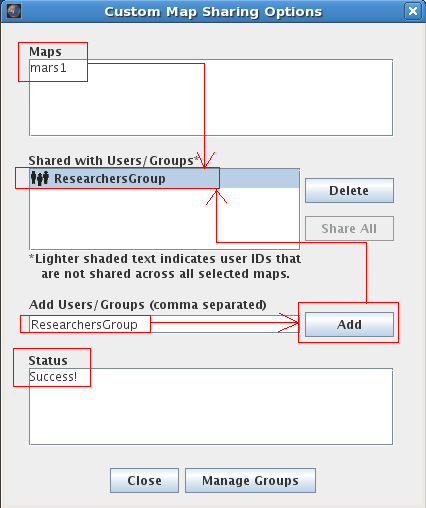
- Group map sharing: A map may also be shared with an entire group by entering the name of the group in the text box "Add Users/Groups" (near the "Add" button) and by clicking on the "Add" button. In the image below, the map named "map1" is shared with all the members of "ResearchersGroup".
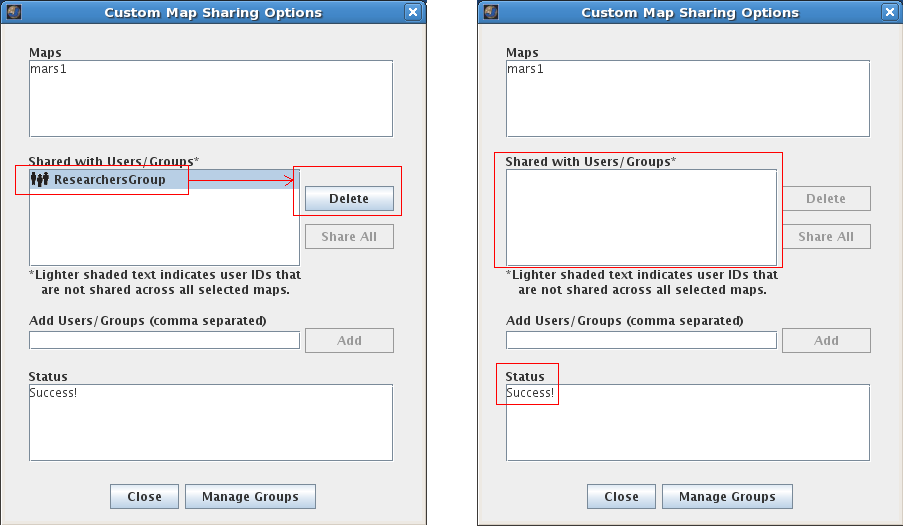
- Un-sharing maps shared with groups: A user can un-share maps by simply "deleting" the groups with whom the map was initially shared. To revoke the share permissions, at least one group (whose permissions you want to revoke) needs to be selected (from the "Custom Map Sharing Options"). Once the selection is highlighted, simply click on the "Delete" button. If the deletion is successful, a success message is displayed in the "Status" box. Refer to the screen shots below.
Adding groups: A new group can be created by typing in a name for the group in the "Add group(s)" field as shown in the screen shot below. Multiple groups may be added by separating the group names by with commas. The group name may contain the following:


Back to Advanced/Custom Maps