
- Home
- Getting Started
- Documentation
- Release Notes
- Tour the Interface
- Tour the Layers
- JMARS Video Tutorials
- Lat/Lon Grid Layer
- Map Scalebar
- Nomenclature
- Crater Counting
- 3D
- Shape Layer
- Mosaics
- Map
- Advanced/Custom Maps
- Graphic/Numeric Maps
- Custom Map Sharing
- Stamp
- THEMIS
- MOC
- Viking
- CRISM Stamp Layer
- CTX
- HiRise
- HiRISE Anaglyph
- HiRISE DTM
- HRSC
- OMEGA
- Region of Interest
- TES
- THEMIS Planning
- Investigate Layer
- Landing Site Layer
- Tutorials
- Video Tutorials
- Displaying the Main View in 3D
- Finding THEMIS Observation Opportunities
- Submitting a THEMIS Region of Interest
- Loading a Custom Map
- Viewing TES Data in JMARS
- Using the Shape Layer
- Shape Layer: Intersect, Merge, and Subtract polygons from each other
- Shape Layer: Ellipse Drawing
- Shape Layer: Selecting a non-default column for circle-radius
- Shape Layer: Selecting a non-default column for fill-color
- Shape Layer: Add a Map Sampling Column
- Shape Layer: Adding a new color column based on the values of a radius column
- Shape Layer: Using Expressions
- Using JMARS for MSIP
- Introduction to SHARAD Radargrams
- Creating Numeric Maps
- Proxy/Firewall
- JMARS Shortcut Keys
- JMARS Data Submission
- FAQ
- Open Source
- References
- Social Media
- Podcasts/Demos
- Download JMARS
Delivery 5
Delivery 5 - TAT 26.11.0
This tutorial shows where to find some of the updates to the Clipper Pointing Validation layer and how to use them.
Observations
Load the Layer and Select Orbit 8
- In the Layer Manager, click + and add the Clipper Pointing Validation layer.
- Set Kernel to latest and leave Start Orbit set to 01G01[1].
- For End Orbit, select 08E03[8], the last option for this kernel set. The dialog shows the range 2031-134T18:38:49.998 to 2031-158T01:52:49.998.
- Click Continue to load the layer.
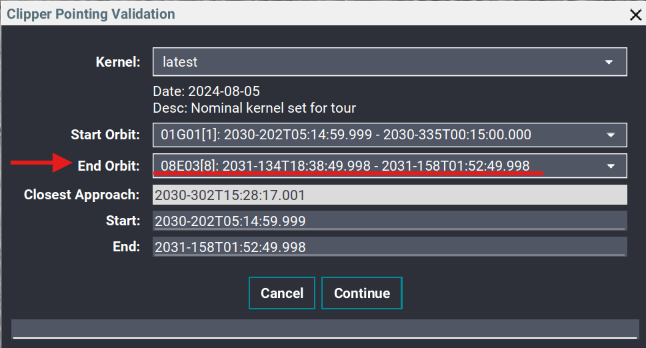
Select 08E03[8] as the end orbit.
- Double-click the layer in the Layer Manager to open Clipper Pointing Validation Options. If needed, select the Time tab.
- Under Adjust Range, set Orbit to 08E03.

Select 08E03 in the Orbit menu.
- Click UPDATE. The active time range and the displayed tracks update to reflect Orbit 8.
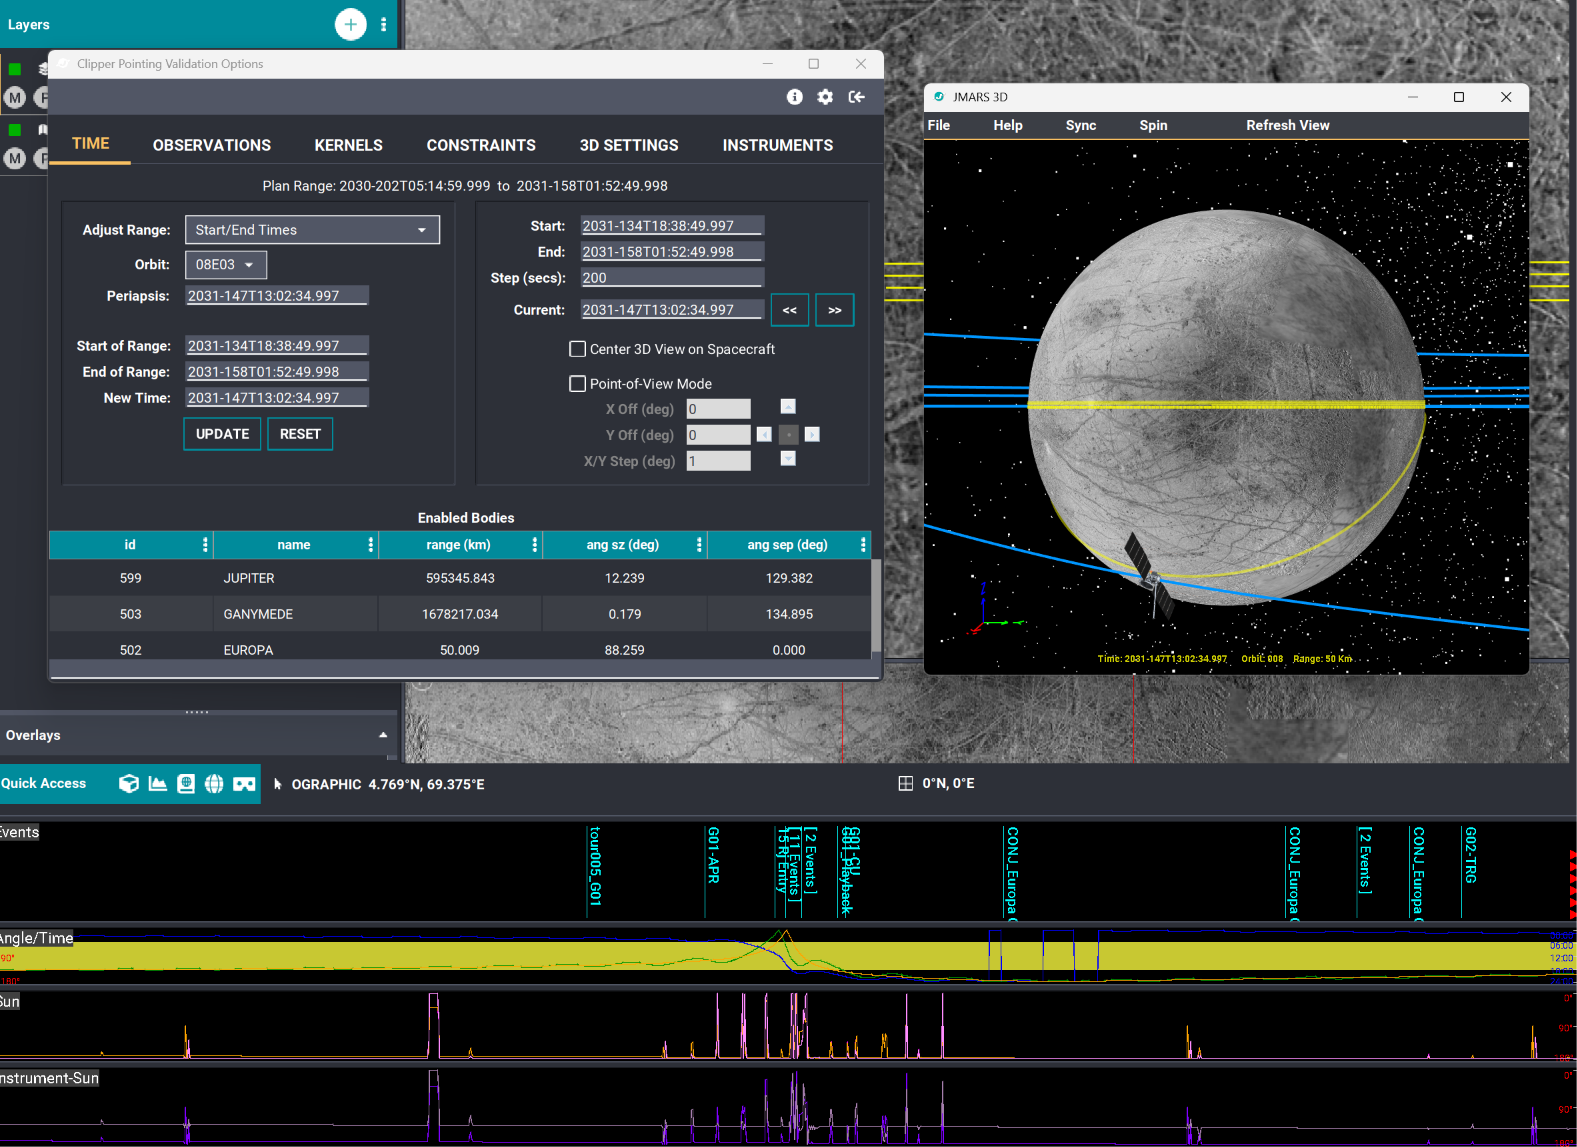
The Time tab and 3D view after the update.
Create Point-and-Stare Observations
- Open the Observations tab next to Time.
- From Observation Type, select Point and Stare. This example uses Europa as the target and ETHEMIS as the instrument.
- Click Copy Current SC Time to fill in Observation Time, then click Generate Observation.
- Move the current spacecraft time, then copy it and generate another observation. Repeat to create a few observations at different times.
- Select multiple rows in Observation Results to see multiple observations in the 3D view.

Select multiple result rows to view their observations together.
Include an Observation in the Pointing Profile
Previously, the pointing profile came from the NAIF C-kernels (CK), which provide spacecraft orientation. You can now select observations whose pointing overrides the CK pointing for those observations.
- In Observation Results, select the last row. Leave its Pnt Profile checkbox clear to see the view before applying the observation’s pointing.

Before the observation is included in the pointing profile.
- Check Pnt Profile for that row. Compare the spacecraft and footprint orientation in the 3D view.

After the observation is included in the pointing profile.
The updated pointing profile is reflected across the data views. The spacecraft model also reflects the profile in the 3D view.
Note: Pointing Constraints do not use the updated pointing profile in this release. Support is planned for a future release.
Choose a Named Star or Custom Target
At the top of the Observations tab, open the Target menu. You can select a named star or choose Custom to create a custom observation by specifying your own RA/Dec (right ascension and declination).
NOTE: Named stars are listed by their full names, with common names where available, such as Beta Orionis (Rigel) and Beta Leonis (Denebola).

The Target menu now includes named stars and a Custom option.
Other Highlights
Arrows for Named Stars in Point-of-View Mode
With Point-of-View Mode enabled, open 3D Settings and select a star under Named Stars. An arrow in the 3D view points toward the selected star.

The arrow points toward the selected named star.
Ruler Properties in the Main Menu
From the JMARS main menu, select Rulers > Properties to open the ruler settings.
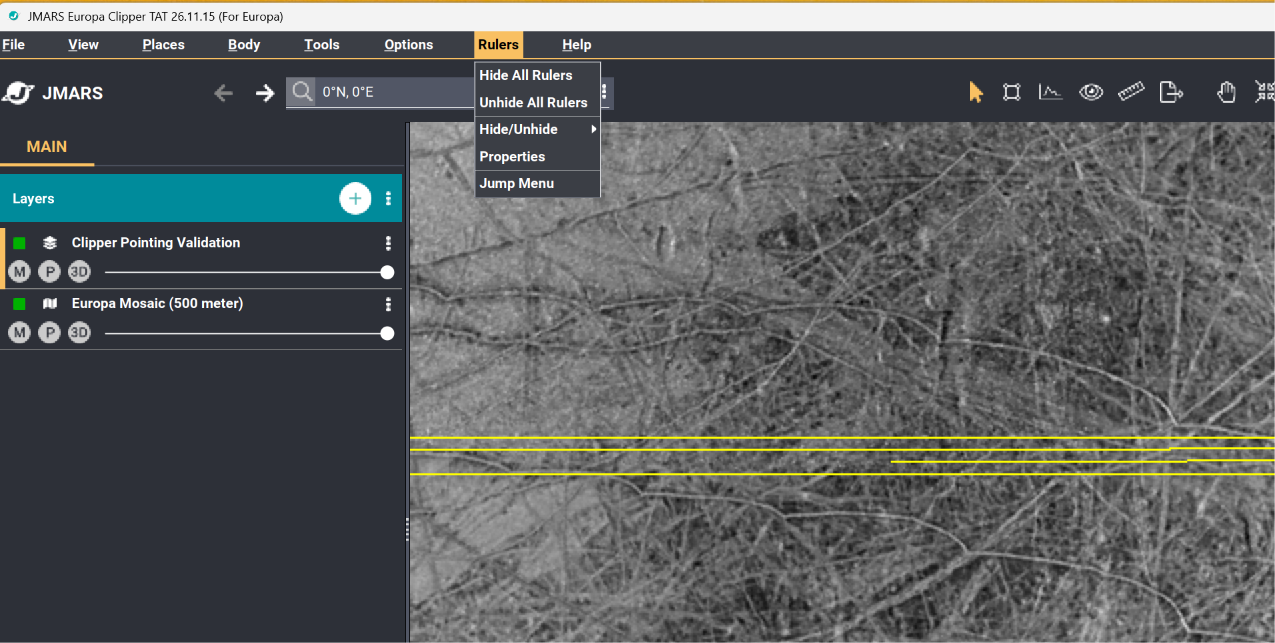
Open Rulers and select Properties.
Finer Point-of-View Steps
In the Time tab, enable Point-of-View Mode. You can now enter a value smaller than 0.1° in X/Y Step (deg) for finer adjustments.

Use X/Y Step (deg) to set the size of each adjustment.
Separate 3D Settings and Instruments Tabs
The Focus Panel is more compact. Instrument controls now have their own Instruments tab next to 3D Settings.
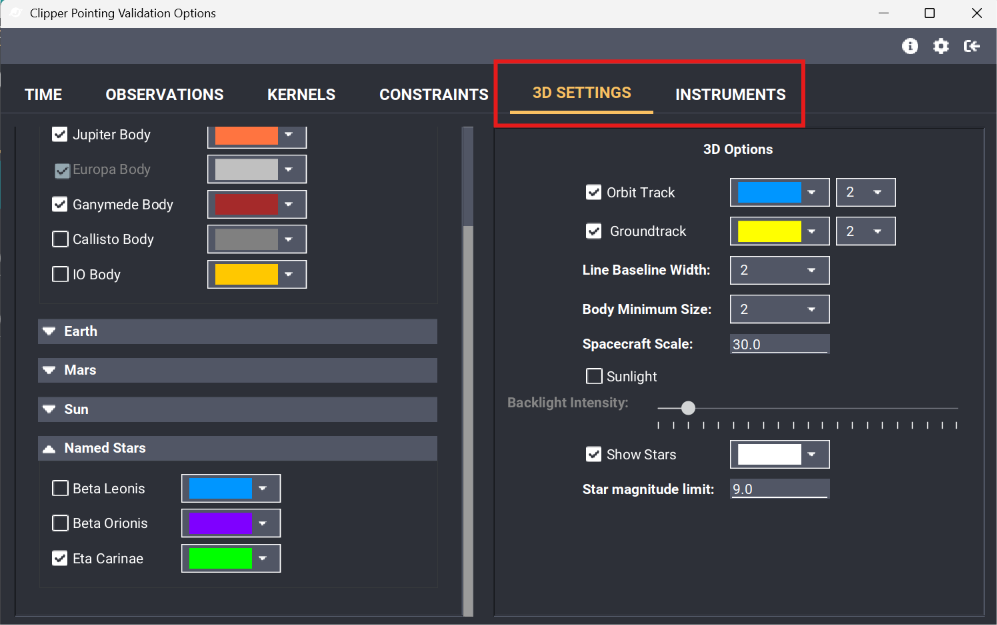
Use the Instruments tab to find instrument controls.
Copy Read-Only Time Values
You can now select and copy values from some read-only fields in the Time tab, such as End of Range.

Select a supported time value to copy it.
Spacecraft Time When Limiting Orbit Tracks
Changing the orbit track bounds keeps the current spacecraft time if it falls within the new range. The time changes only if the new bounds exclude it.