- Home
- Getting Started
- Documentation
- Release Notes
- Tour the Interface
- Tour the Layers
- JMARS Video Tutorials
- Lat/Lon Grid Layer
- Map Scalebar
- Nomenclature
- Crater Counting
- 3D
- Shape Layer
- Mosaics
- Map
- Advanced/Custom Maps
- Graphic/Numeric Maps
- Custom Map Sharing
- Stamp
- THEMIS
- MOC
- Viking
- CRISM Stamp Layer
- CTX
- HiRise
- HiRISE Anaglyph
- HiRISE DTM
- HRSC
- OMEGA
- Region of Interest
- TES
- THEMIS Planning
- Investigate Layer
- Landing Site Layer
- Tutorials
- Video Tutorials
- Displaying the Main View in 3D
- Finding THEMIS Observation Opportunities
- Submitting a THEMIS Region of Interest
- Loading a Custom Map
- Viewing TES Data in JMARS
- Using the Shape Layer
- Shape Layer: Intersect, Merge, and Subtract polygons from each other
- Shape Layer: Ellipse Drawing
- Shape Layer: Selecting a non-default column for circle-radius
- Shape Layer: Selecting a non-default column for fill-color
- Shape Layer: Add a Map Sampling Column
- Shape Layer: Adding a new color column based on the values of a radius column
- Shape Layer: Using Expressions
- Using JMARS for MSIP
- Introduction to SHARAD Radargrams
- Creating Numeric Maps
- Proxy/Firewall
- JMARS Shortcut Keys
- JMARS Data Submission
- FAQ
- Open Source
- References
- Social Media
- Podcasts/Demos
- Download JMARS
Import a raster into QGIS from JMARS
This tutorial will show how a user can import images into QGIS from JMARS and apply a projection and corner points to the image.

Using JMARS is QGIS
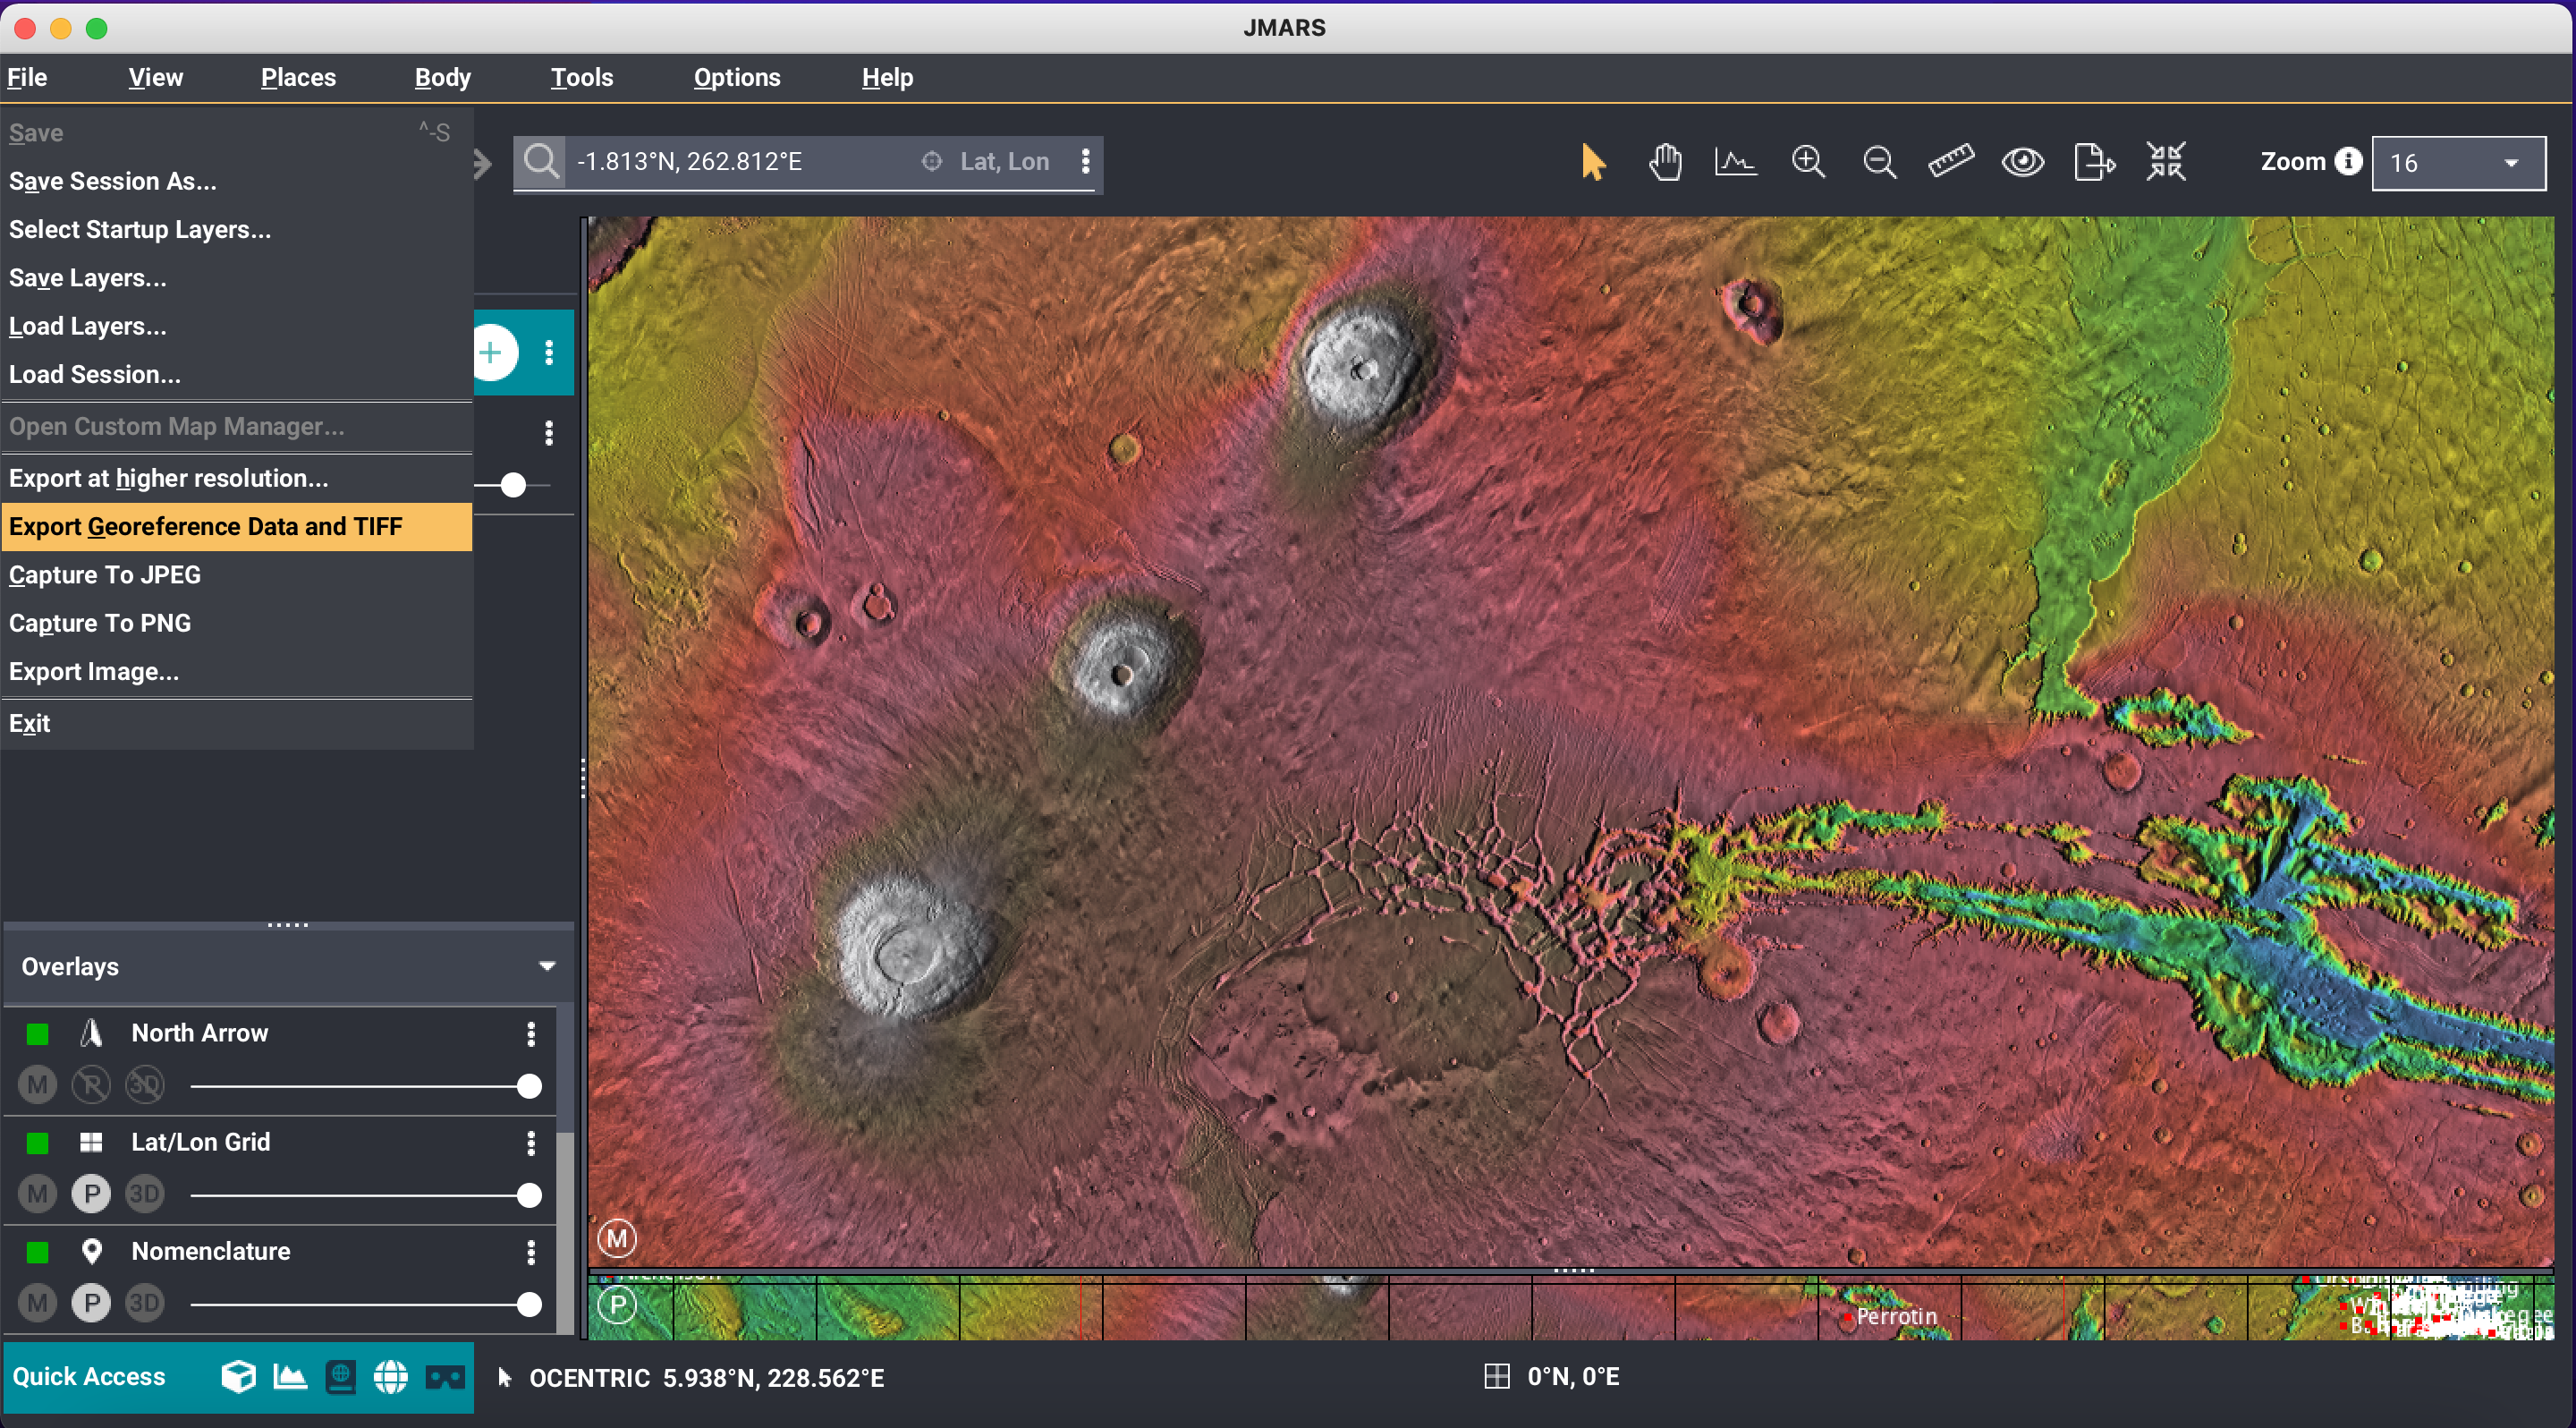
- Export an image from JMARS:
- Locate the area you want to export in JMARS. Navigate to "File" --> "Export Georeference Data and tiff" to export the mainview.
- When you export from JMARS with the georeference export, 3 files will export. Those files are a .tif, a .prj file that contains the wkt CRS information and a .txt file that holds the geospatial point information.
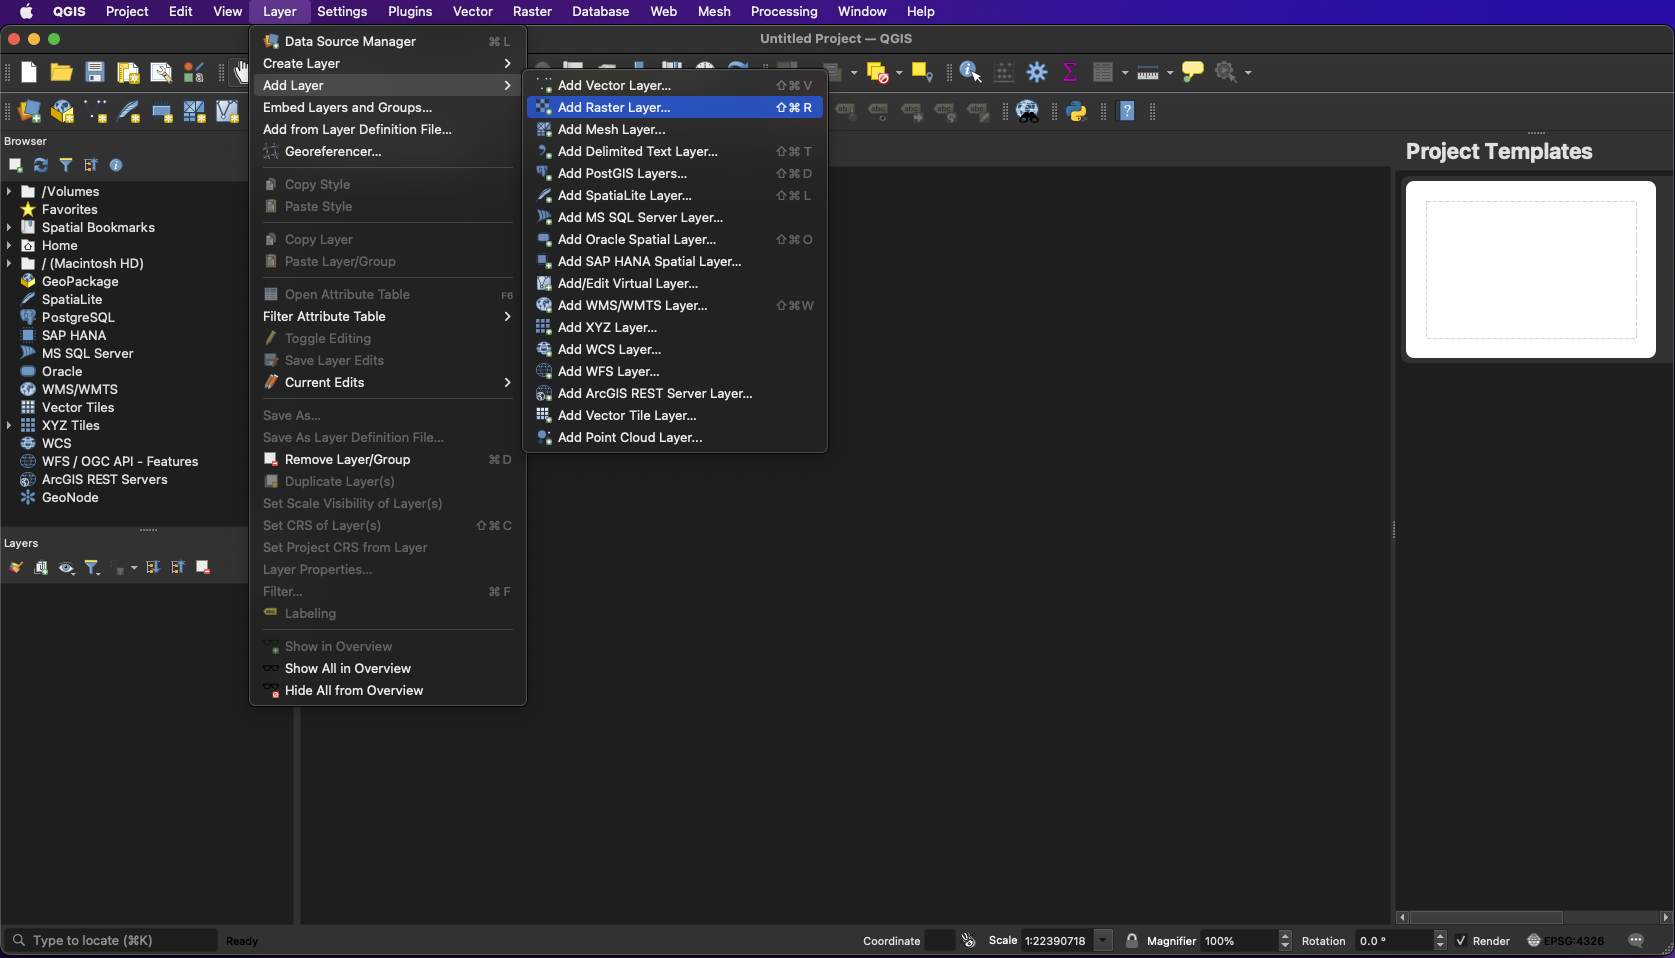
- Add the map to QGIS: Open QGIS to add your tiff file
- You can drag and drop the tiff file in the QGIS mainview or you can go to "Layer" --> "Add Layer" --> "Add Raster" . If you go through the Add Raster, a pop up dialog will appear. Locate your image to add it to the mainview.
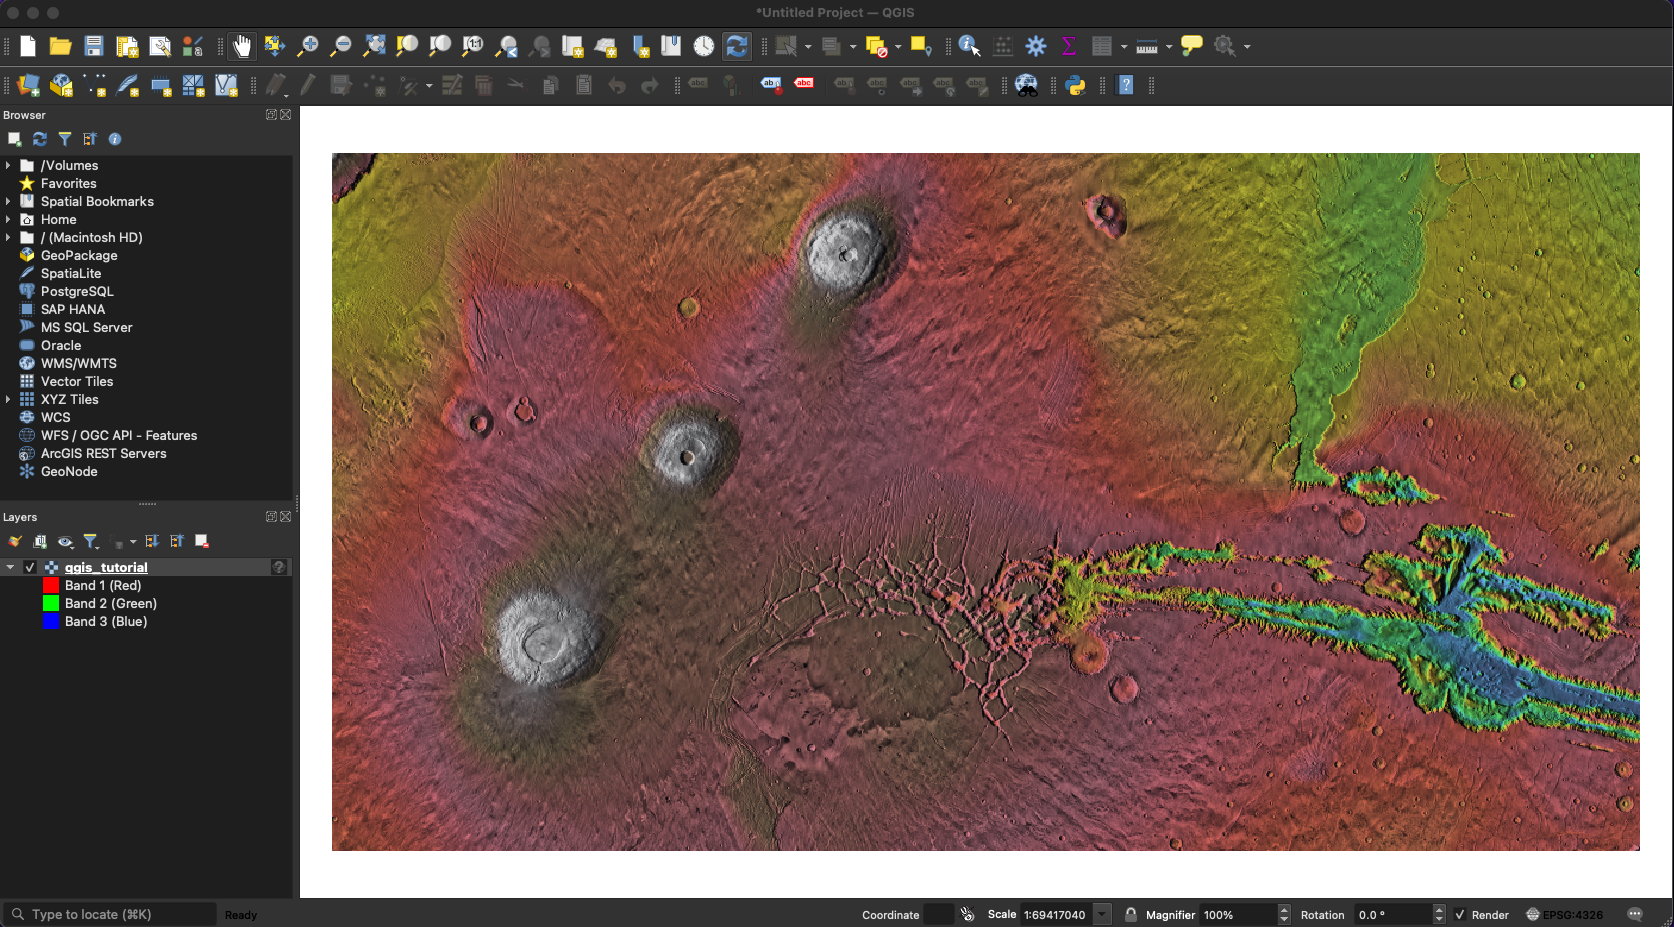
- You may notice that your image has a symbol next to the name of the file in the layer manager. Depending on the version of QGIS you may have, this could be a question mark or a globe. This indicates that the data needs projection information or that the information associated with it is invalid.
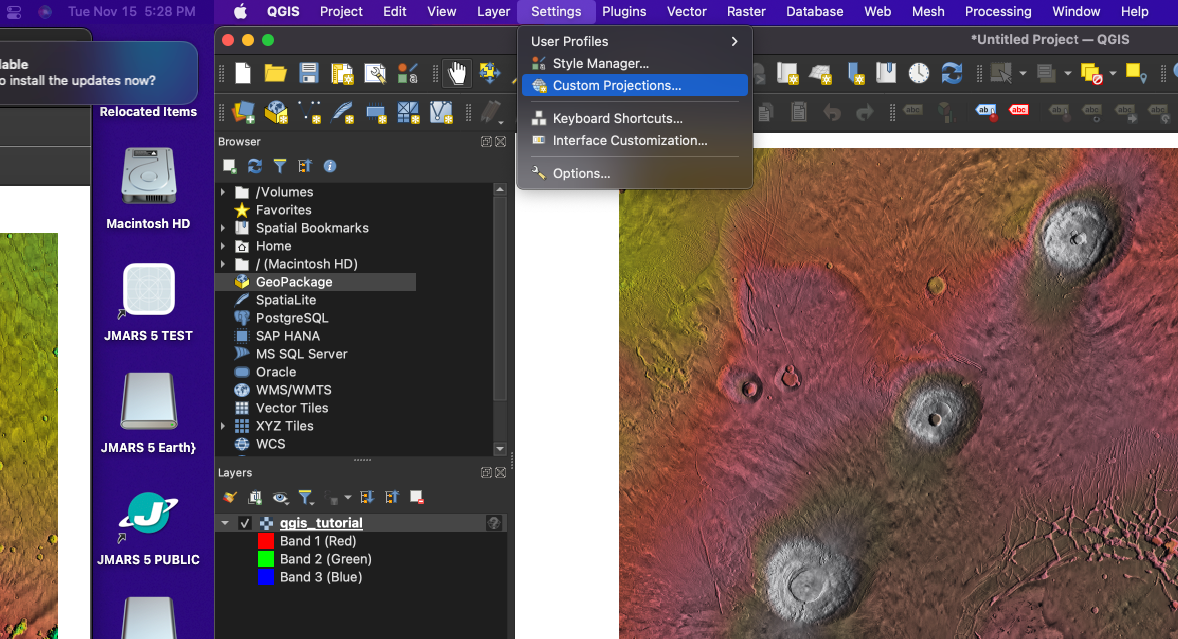
- Go to Settings --> Custom Projections to add our our projection.
- Under "Format" click "Proj String" and enter this string in the parameters: +proj=eqc +a=3386000.0 +b=3386000.0 +towgs84=0,0,0
- Click "Validate" to make sure you entered a valid proj string. Then click "OK". This will now save the projection for you. NOTE: this proj string is for images that were not re-projected before exporting out of JMARS. It will not work for reprojections or polar images.
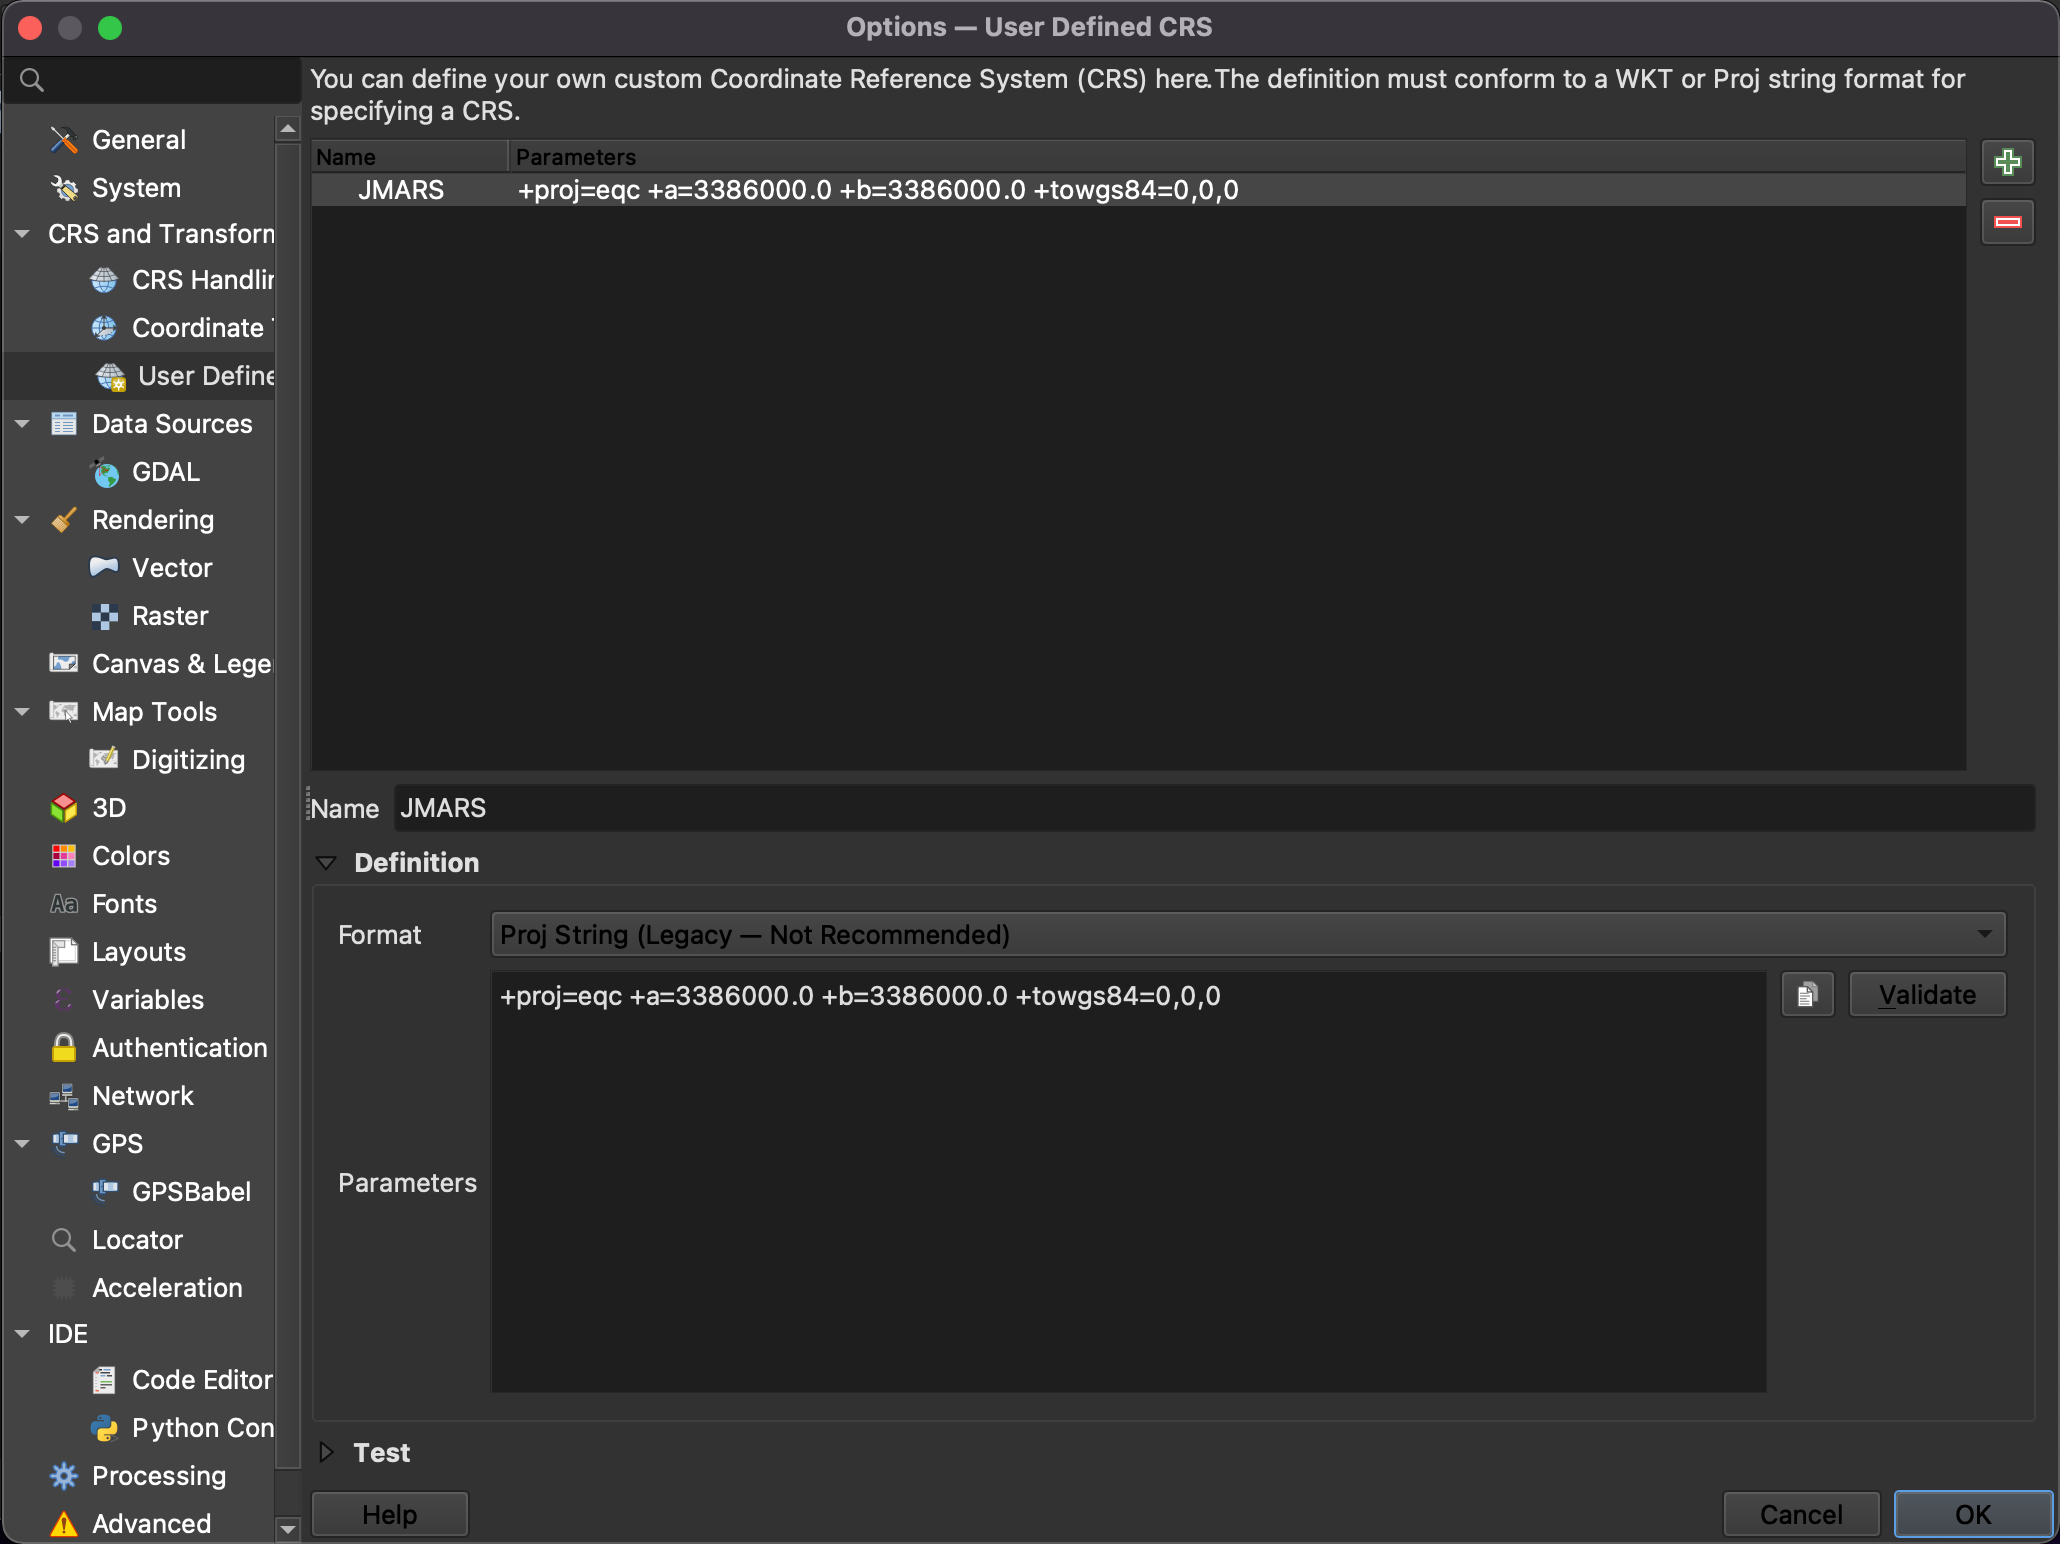
- Now, double click the raster layer to apply our new projection.
- Under "Assigned Coordinate Reference System", click the new projection we just created. Click OK. You should see that the symbol next to the layer is gone now.
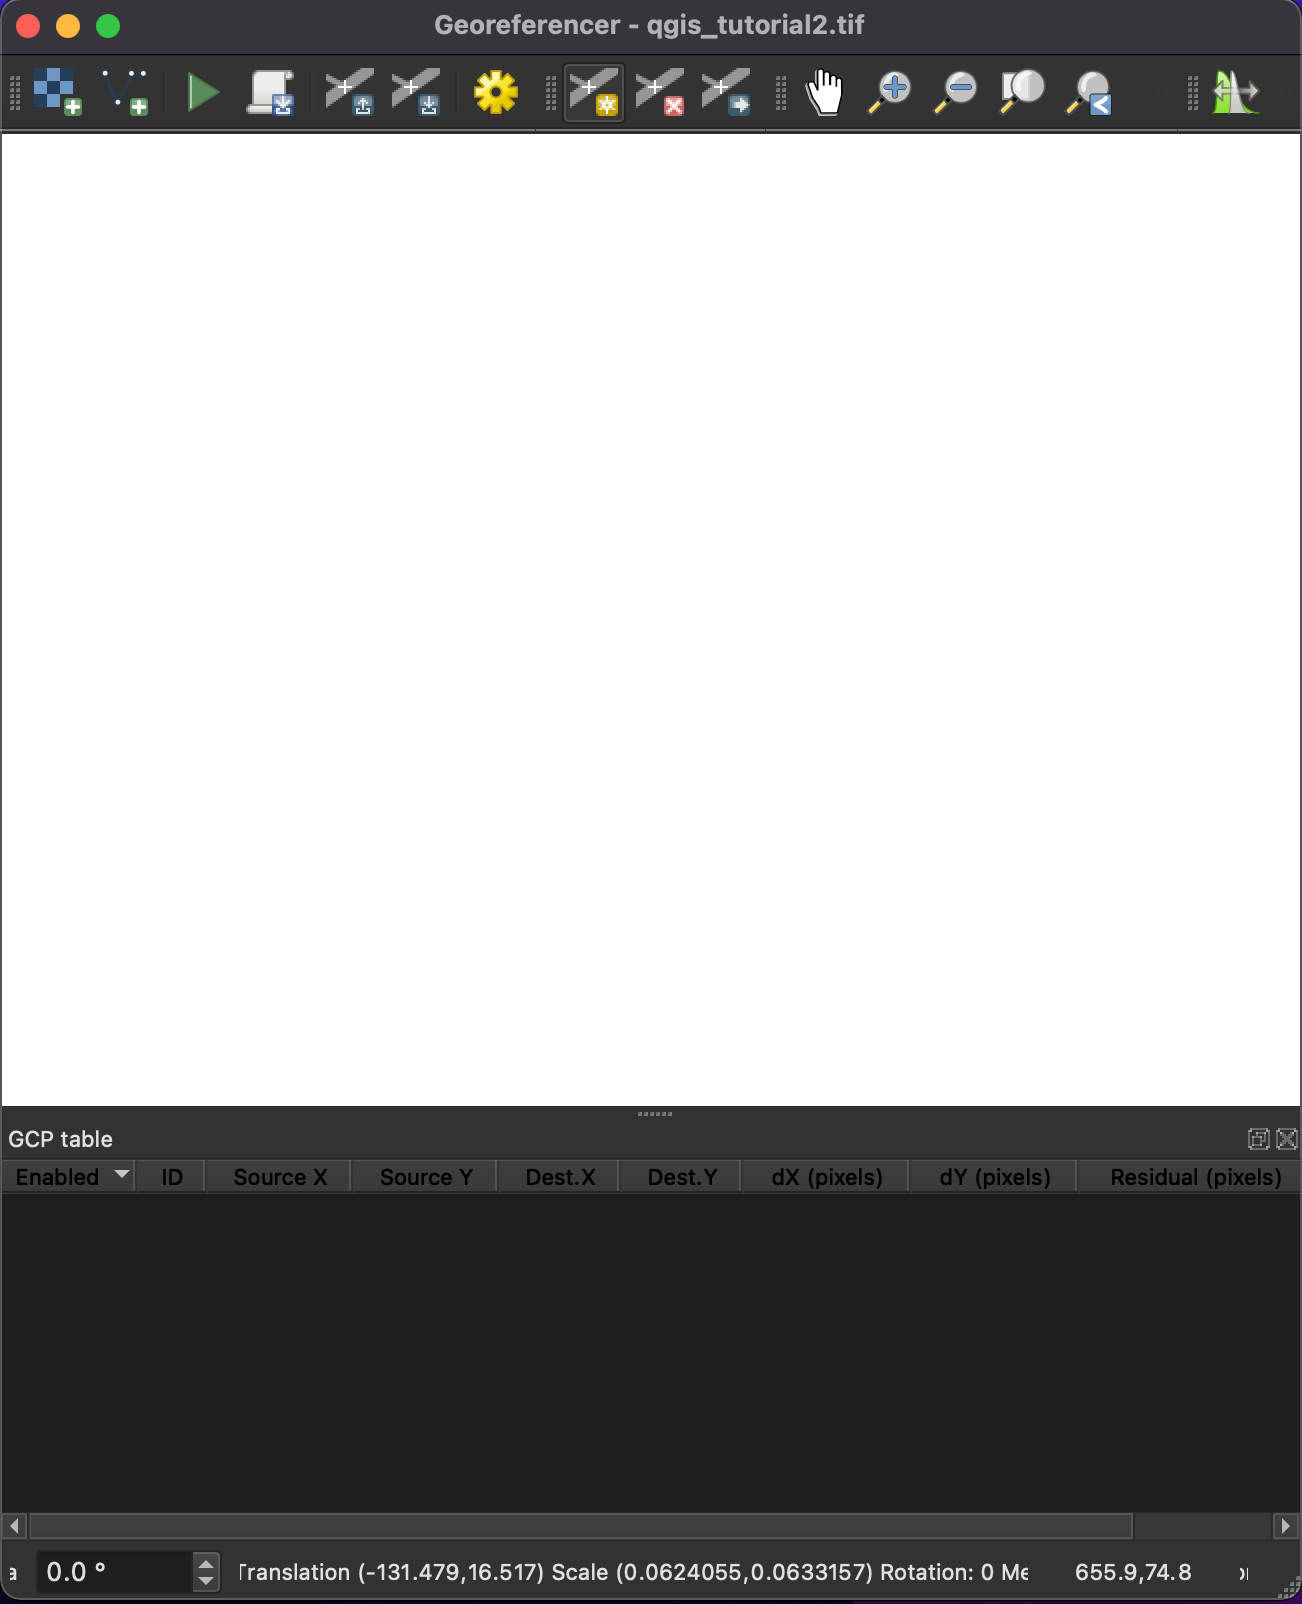
- Add the Raster to the georeferencer window by clicking the "Add Raster" plus symbol.
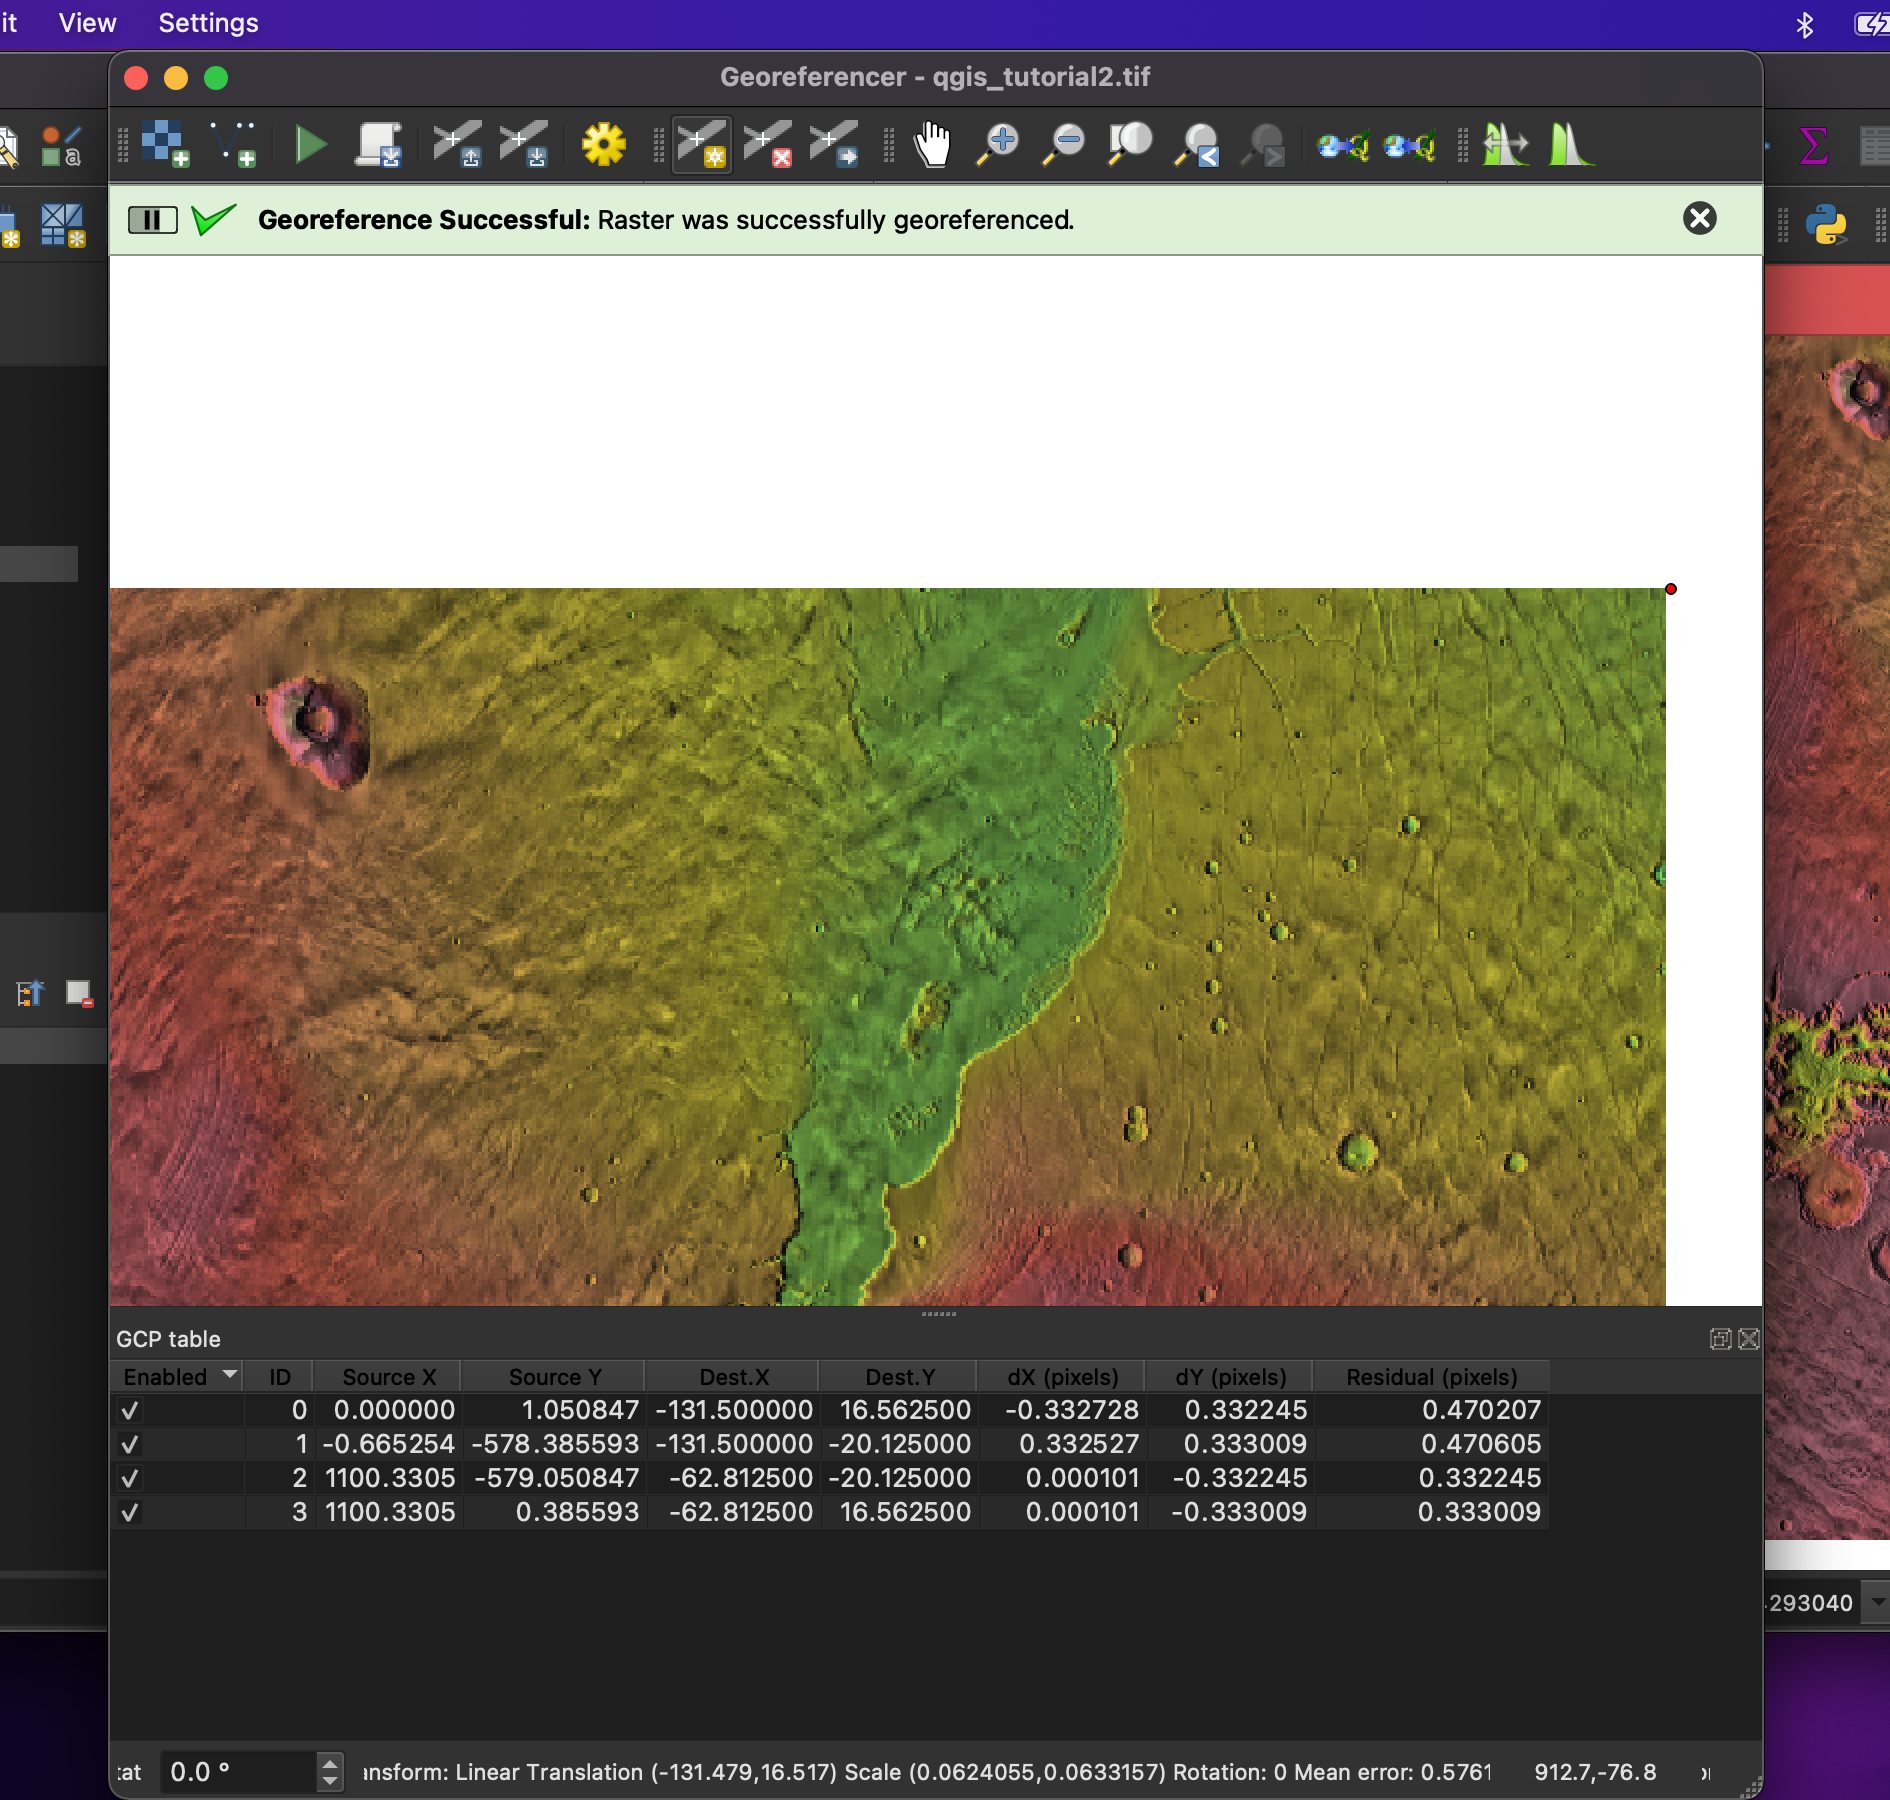
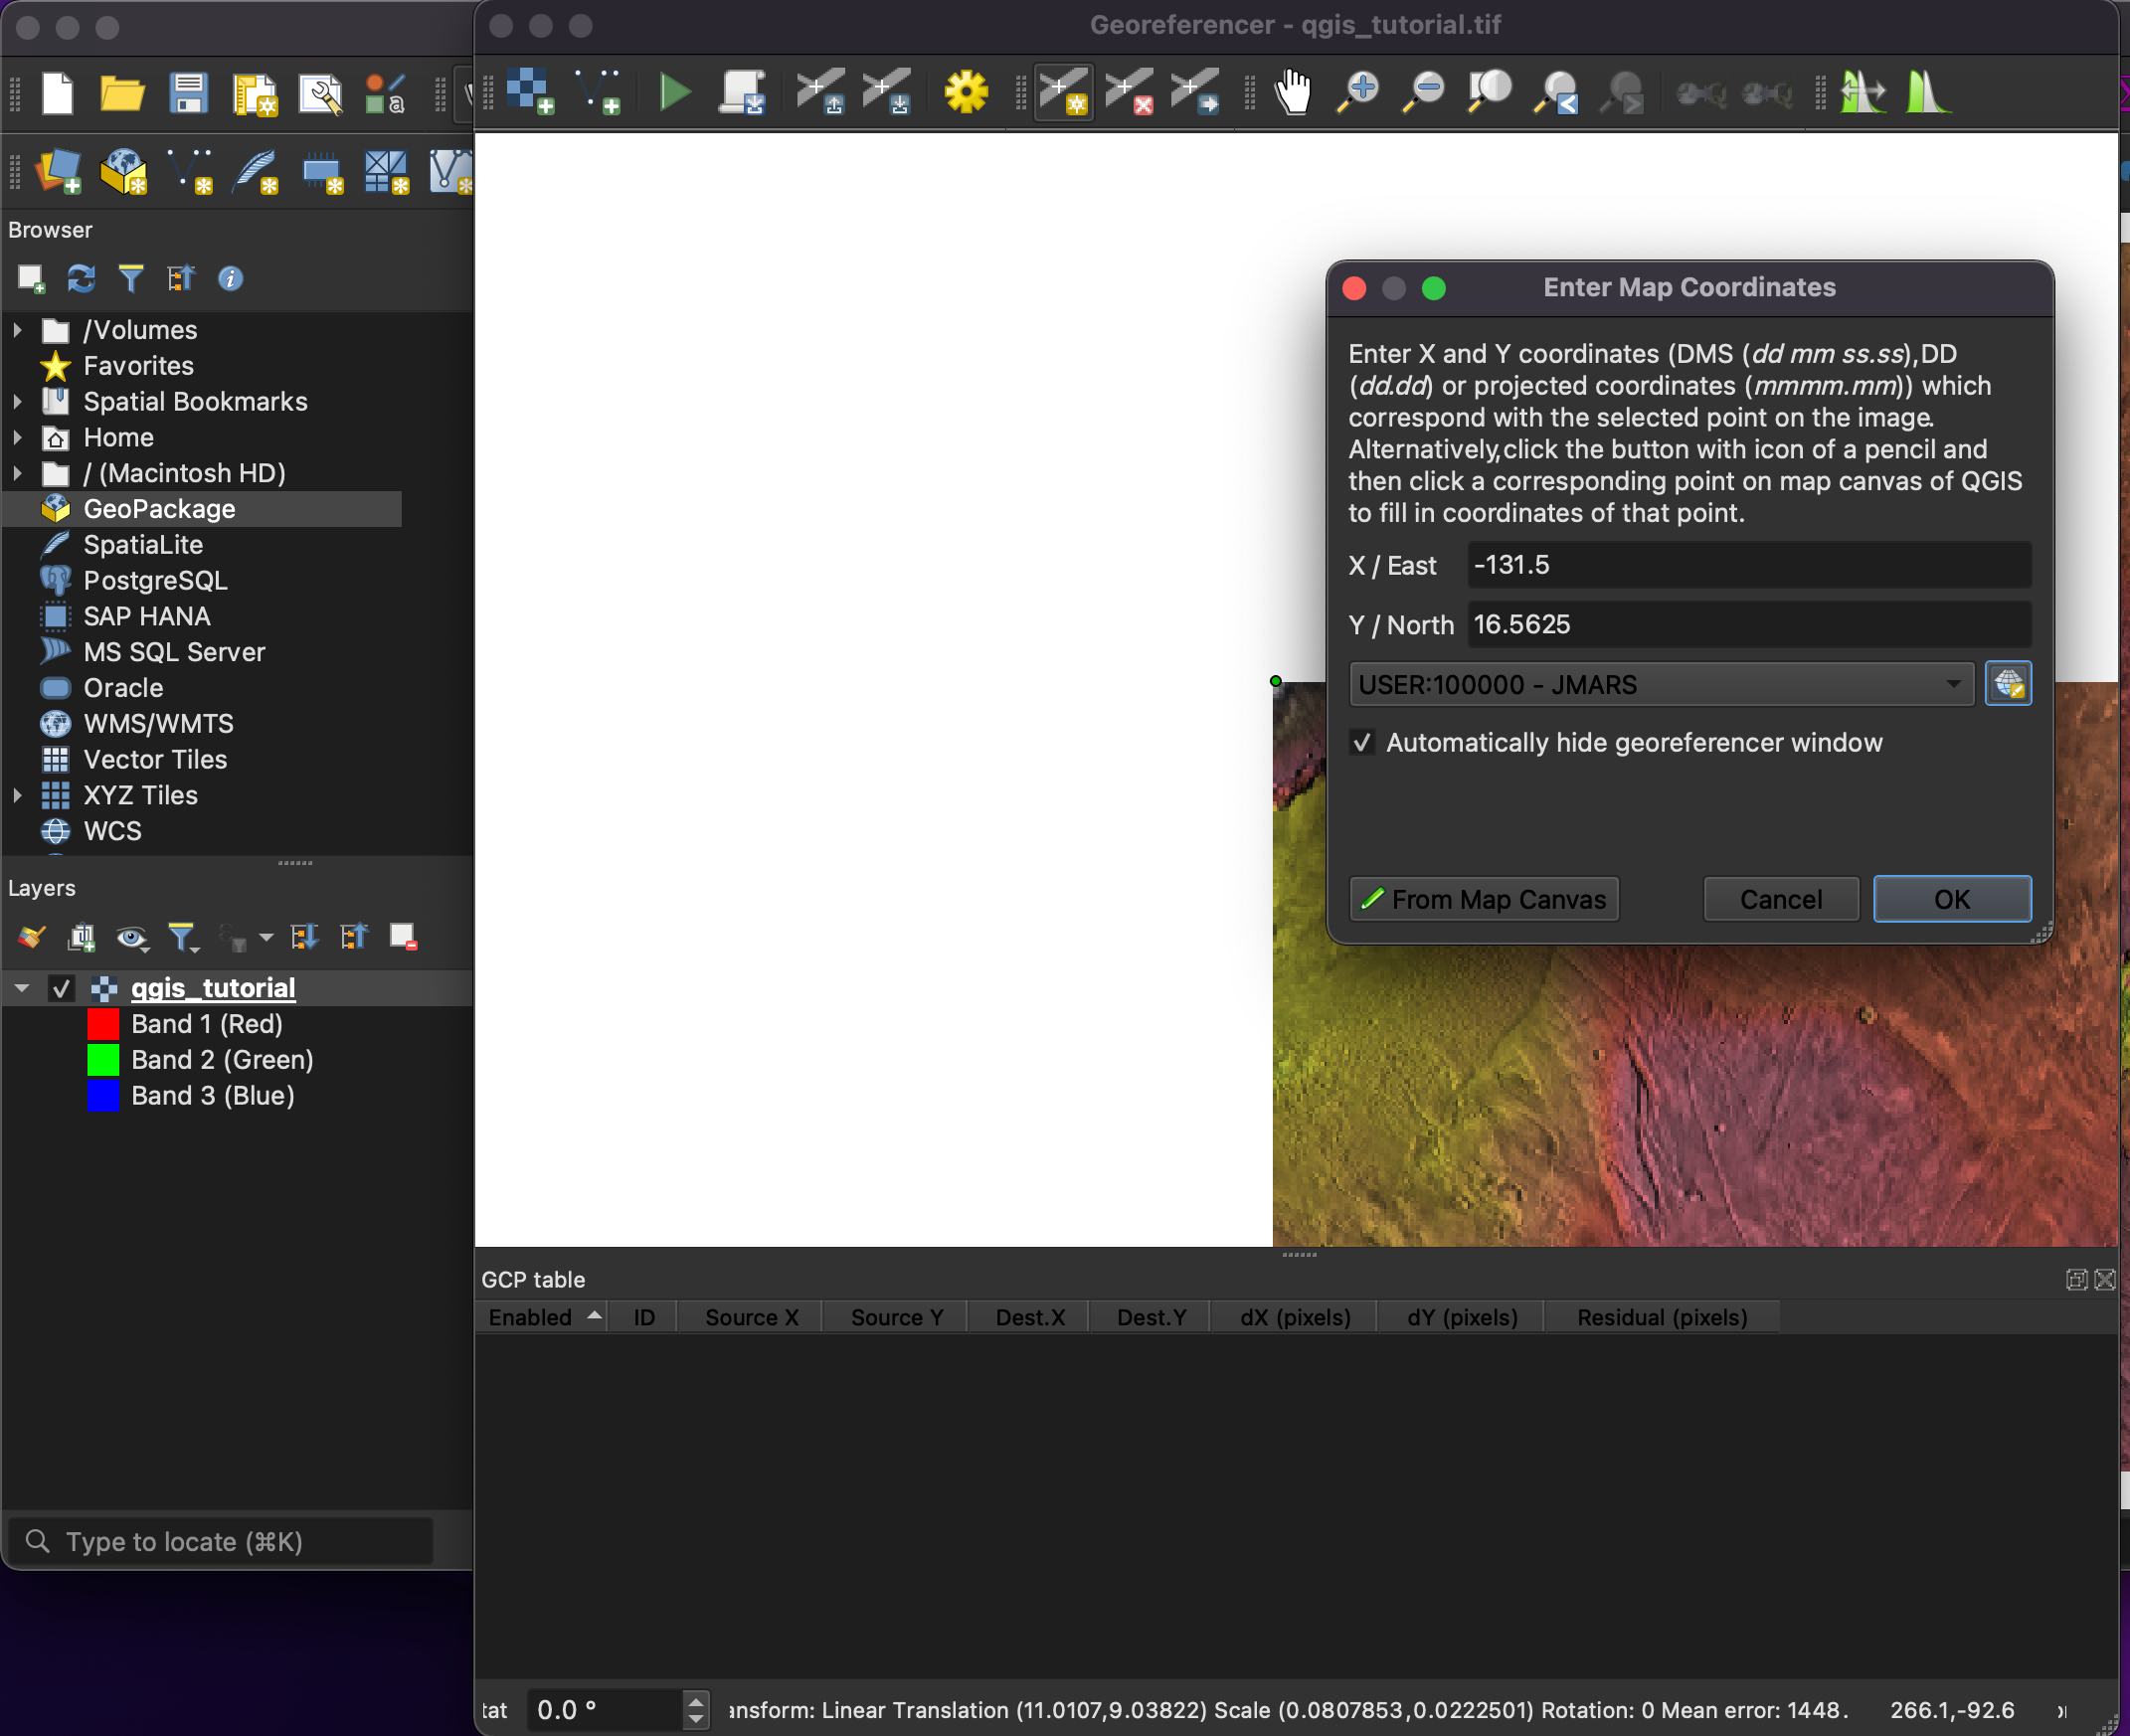
- Zoom into a corner and click "Add a point". Click the corner of the image. A dialog box will open to put in your coordinates for that point. You can use the .txt file that JMARS exported to get an idea of where the corner points should be. Don't forget to assign the projection to the projection we created. Click OK to add the point to the table below.
- Do this for all four corners.
- After all four corners are assigned points in the table, you need to apply a transformation. Click Settings --> Transformation. Fill the window out and press OK.
- Now we can make the transformation complete with the corner points by clicking the PLAY button in the Georeferencer window. When the transformation is complete, you will see a notice that it is complete and that map will add to your layers.
- UNCLICK the original image in the layer manager. Right - click the new layer that was just added to the layer manager from the georeference tool and select, "Zoom to Layers". As you scroll around, you can see the new image is georeferenced.
3. Add a projection and CRS to the image data: In order for the image to be georegistered, we need to add a Projection and a CRS.
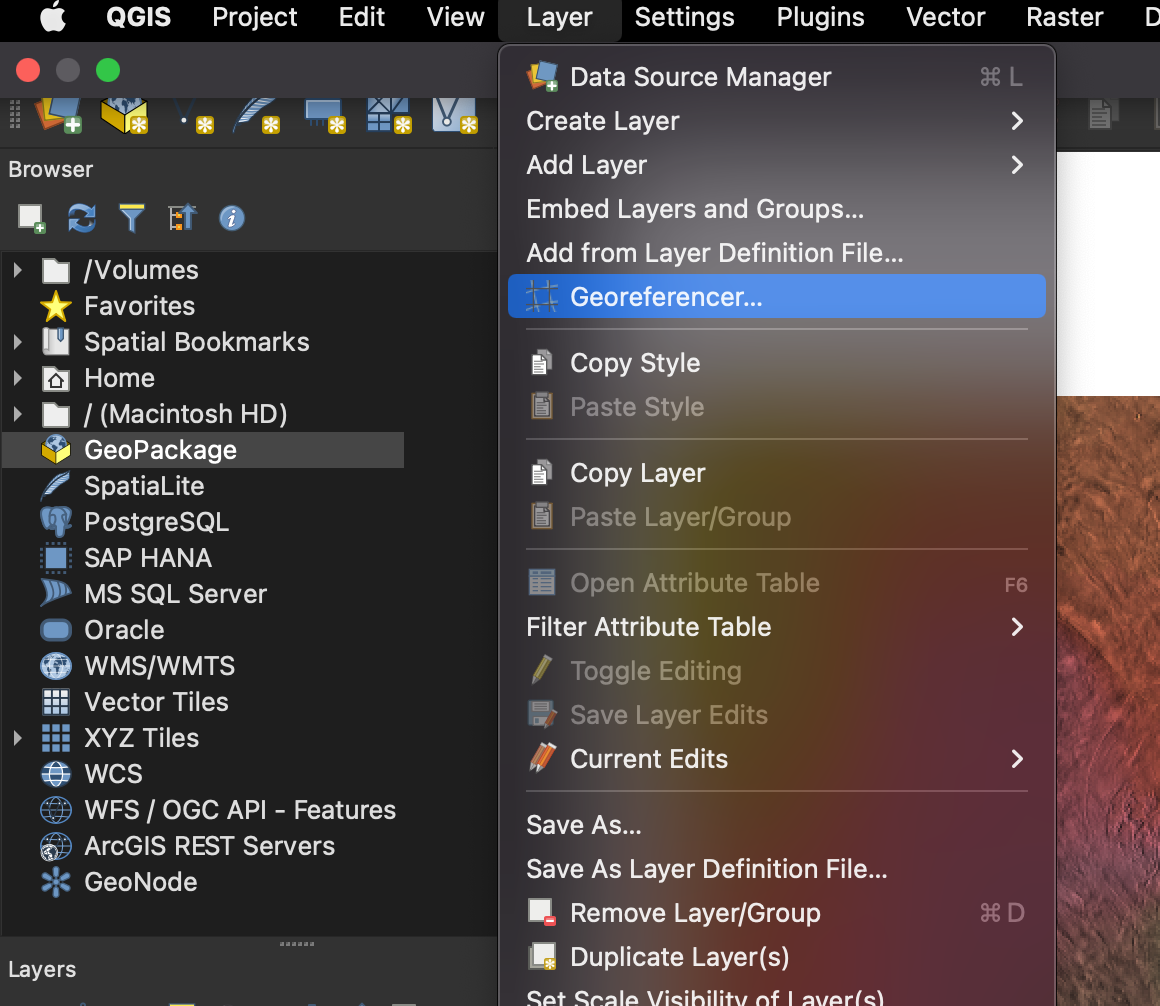
4. Georeference the Image: Now that we have our image and projection, we need to georeference our image. Go to Layer --> Georeferencer to open the georeferencing dialog

![]() .
. ![]()