- Home
- Getting Started
- Documentation
- Release Notes
- Tour the Interface
- Tour the Layers
- JMARS Video Tutorials
- Lat/Lon Grid Layer
- Map Scalebar
- Nomenclature
- Crater Counting
- 3D
- Shape Layer
- Mosaics
- Map
- Advanced/Custom Maps
- Graphic/Numeric Maps
- Custom Map Sharing
- Stamp
- THEMIS
- MOC
- Viking
- CRISM Stamp Layer
- CTX
- HiRise
- HiRISE Anaglyph
- HiRISE DTM
- HRSC
- OMEGA
- Region of Interest
- TES
- THEMIS Planning
- Investigate Layer
- Landing Site Layer
- Tutorials
- Video Tutorials
- Displaying the Main View in 3D
- Finding THEMIS Observation Opportunities
- Submitting a THEMIS Region of Interest
- Loading a Custom Map
- Viewing TES Data in JMARS
- Using the Shape Layer
- Shape Layer: Intersect, Merge, and Subtract polygons from each other
- Shape Layer: Ellipse Drawing
- Shape Layer: Selecting a non-default column for circle-radius
- Shape Layer: Selecting a non-default column for fill-color
- Shape Layer: Add a Map Sampling Column
- Shape Layer: Adding a new color column based on the values of a radius column
- Shape Layer: Using Expressions
- Using JMARS for MSIP
- Introduction to SHARAD Radargrams
- Creating Numeric Maps
- Proxy/Firewall
- JMARS Shortcut Keys
- JMARS Data Submission
- FAQ
- Open Source
- References
- Social Media
- Podcasts/Demos
- Download JMARS
Install JMARS on Mac
The purpose of this tutorial is to walk users through the process of downloading JMARS on a Mac OS.
NOTE: The JMARS Installer for Mac only works for Mac OS X v10.6 (Snow Leopard) and higher.
Step 1: Installing JMARS
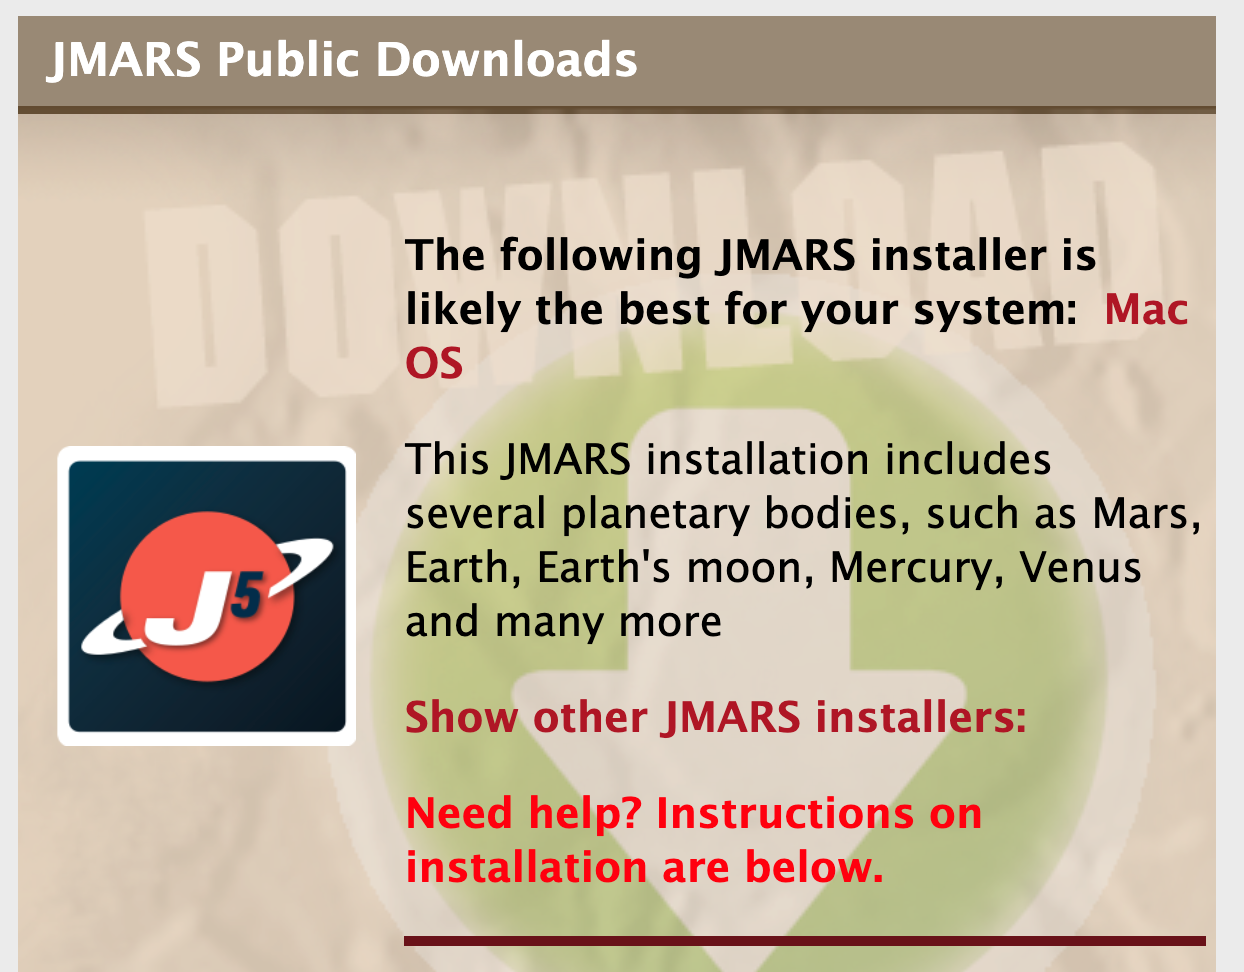
- Go to the JMARS home page
- Under "JMARS Public Downloads" click the link that is most appropriate for your computer size and platform. The website will automatically try and detect the system you're on.
Step 2: Downloading the .dgm file
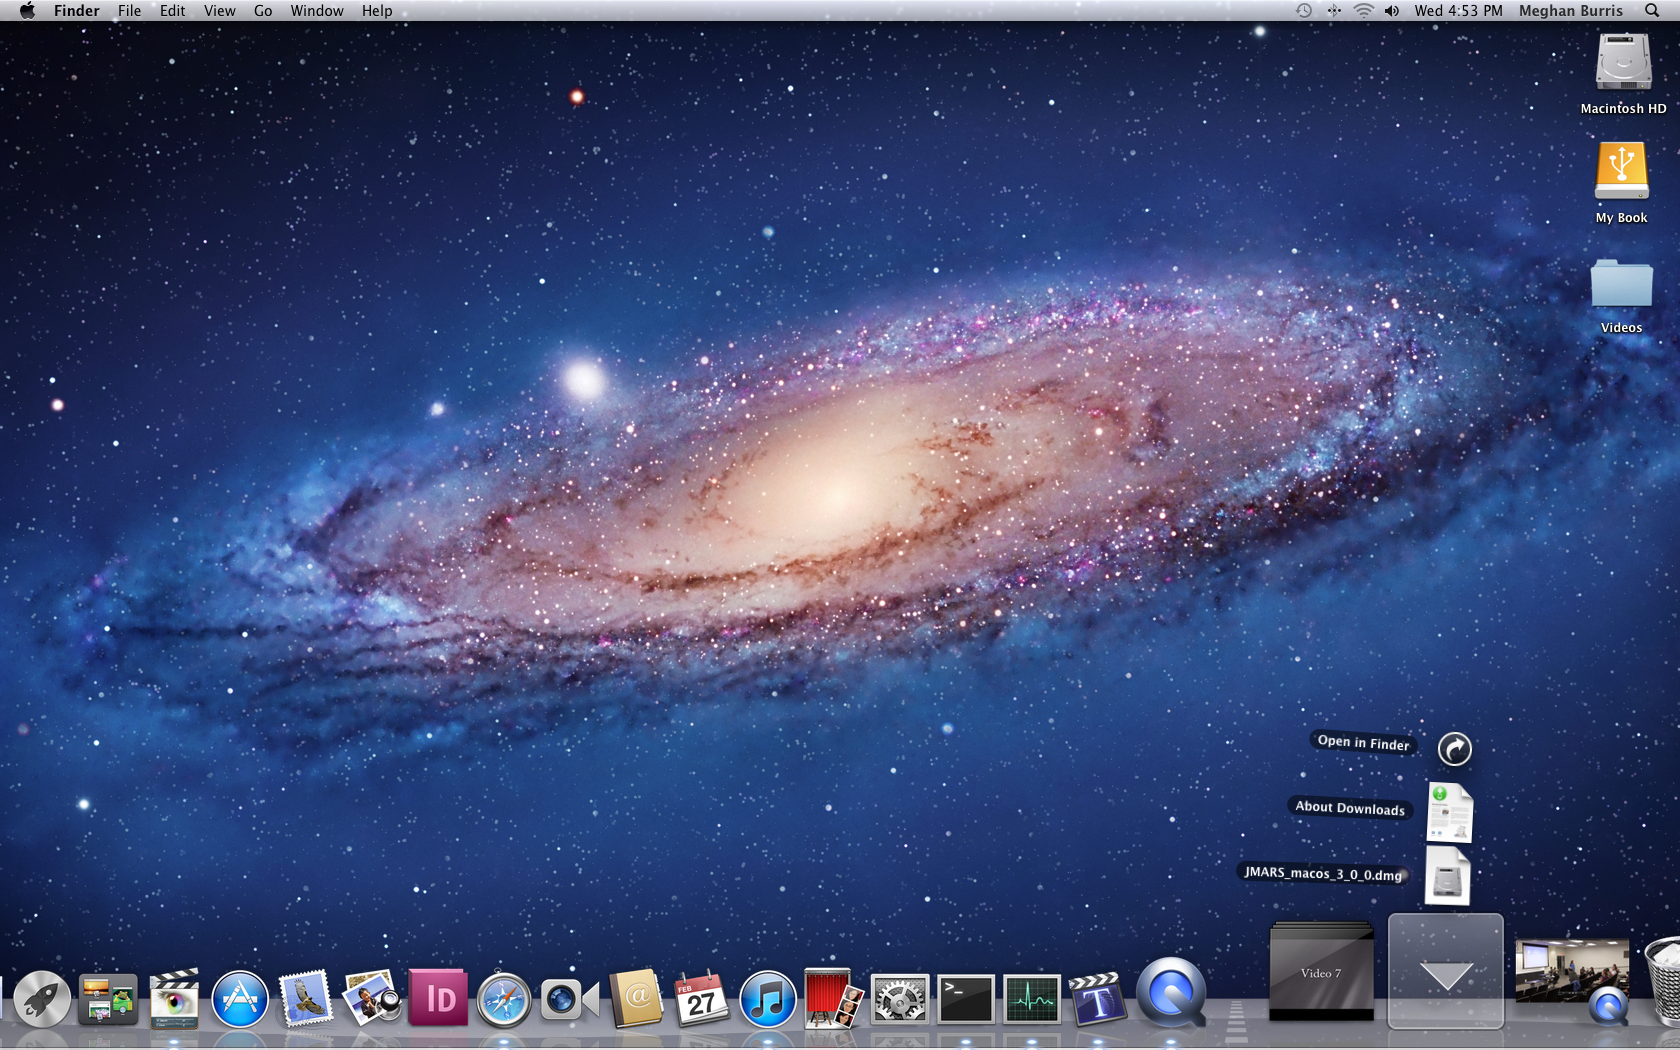
- Drag and drop the dmg file to the desktop. Then a pop up will open with the JMARS icon, double click the icon.If a window does not pop up, double click the dmg file.
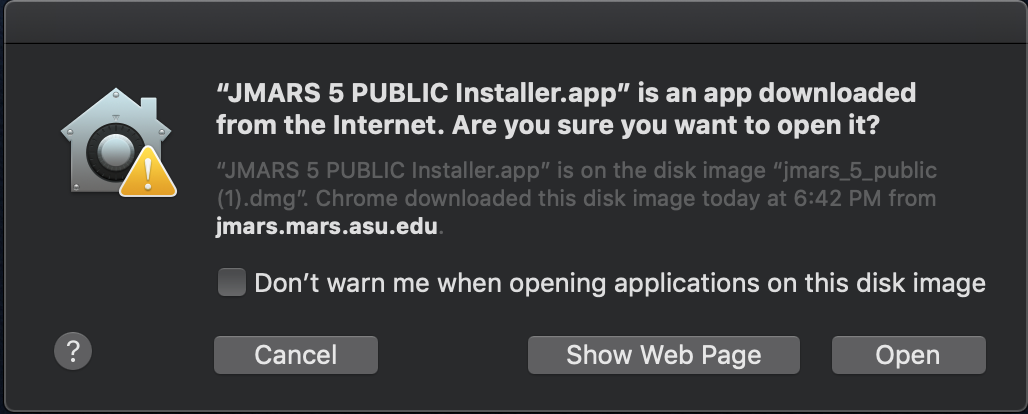
- A window may pop up asking you if you are sure you want to download the application. Click "Open"
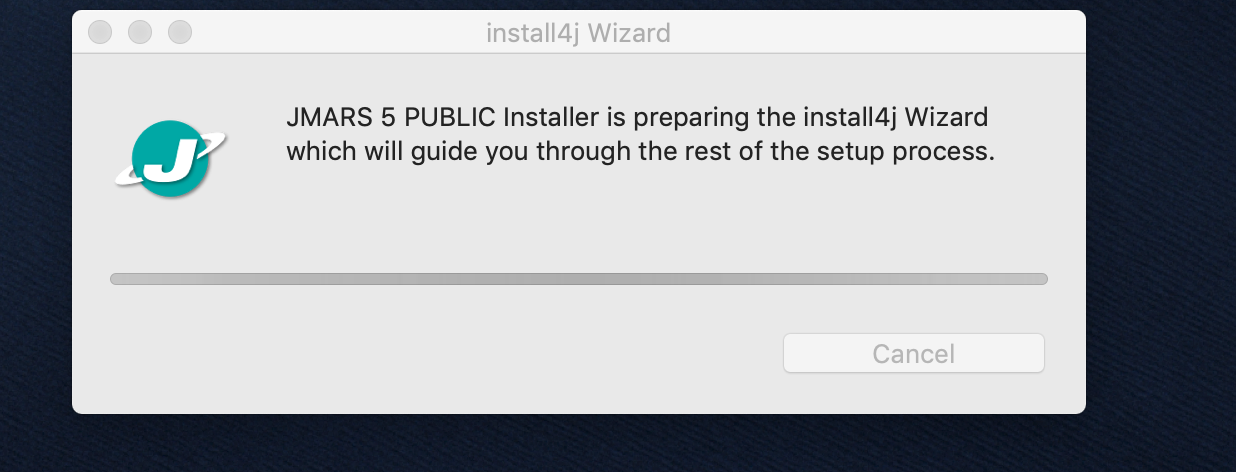
- A window will pop up showing the progress of the download
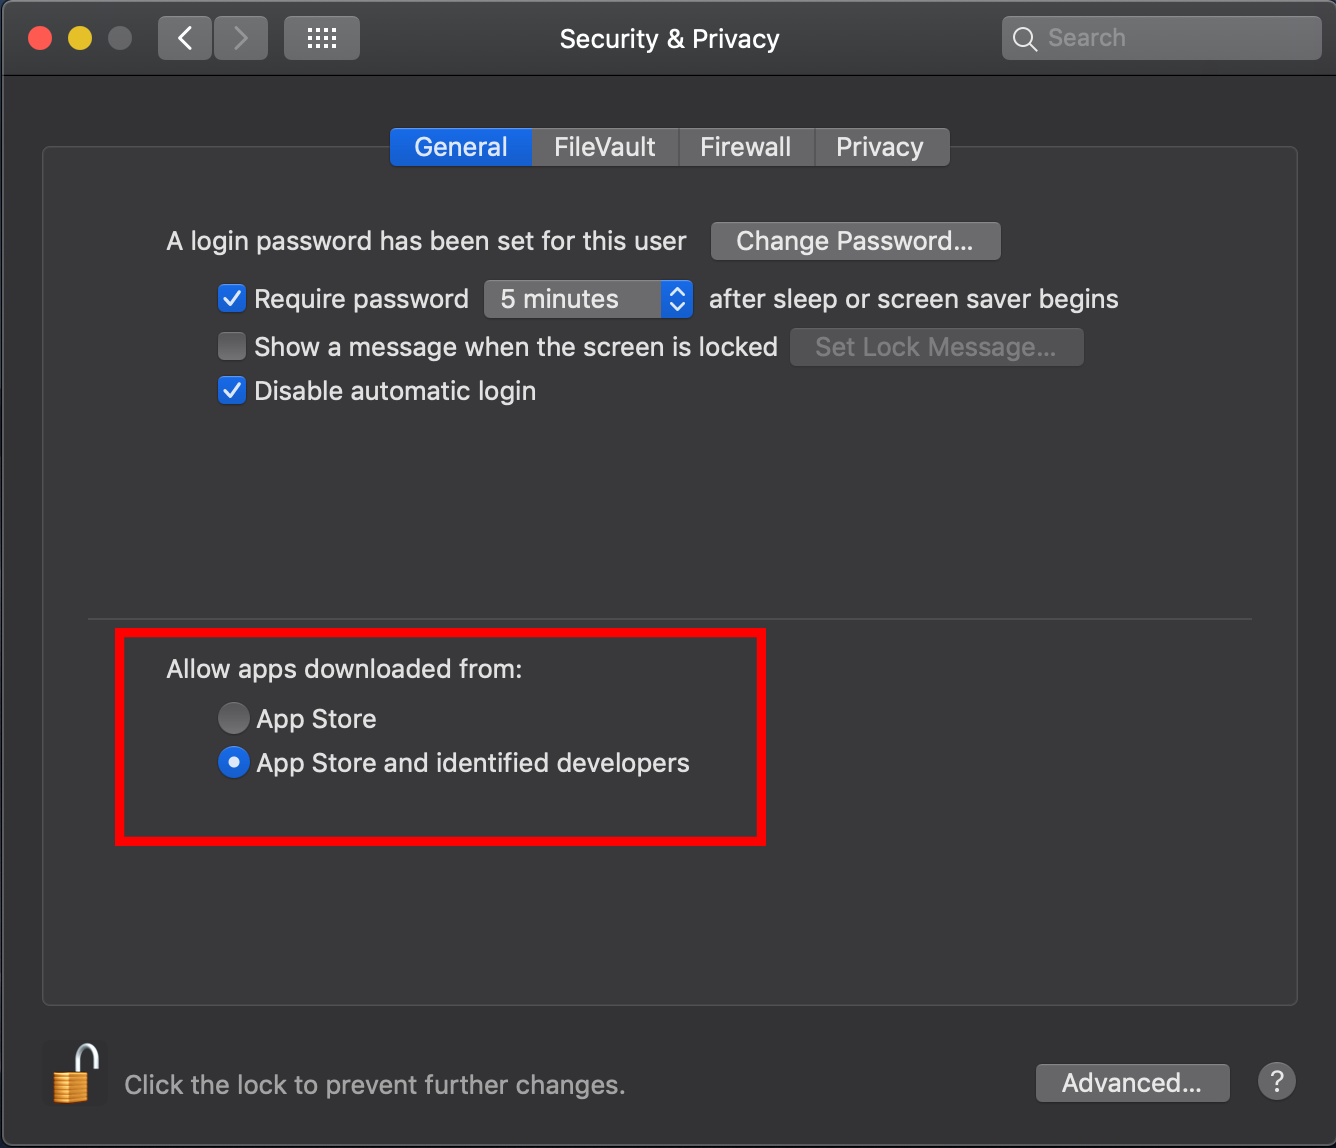
- If you are getting errors similar to : " “JMARS 5 PUBLIC Installer” can’t be opened because Apple cannot check it for malicious software", you may need to change the permission settings on your Mac.
- To do this, go to "Security and Privacy".
- Under "Allow apps downloaded from", make sure "App Store and identified developers" is selected.
After the file has downloaded, go to your downloads folder. In this example, the folder is at the bottom of the page.
HAVING TROUBLE OPENING?
Step 3: Set up user preferences
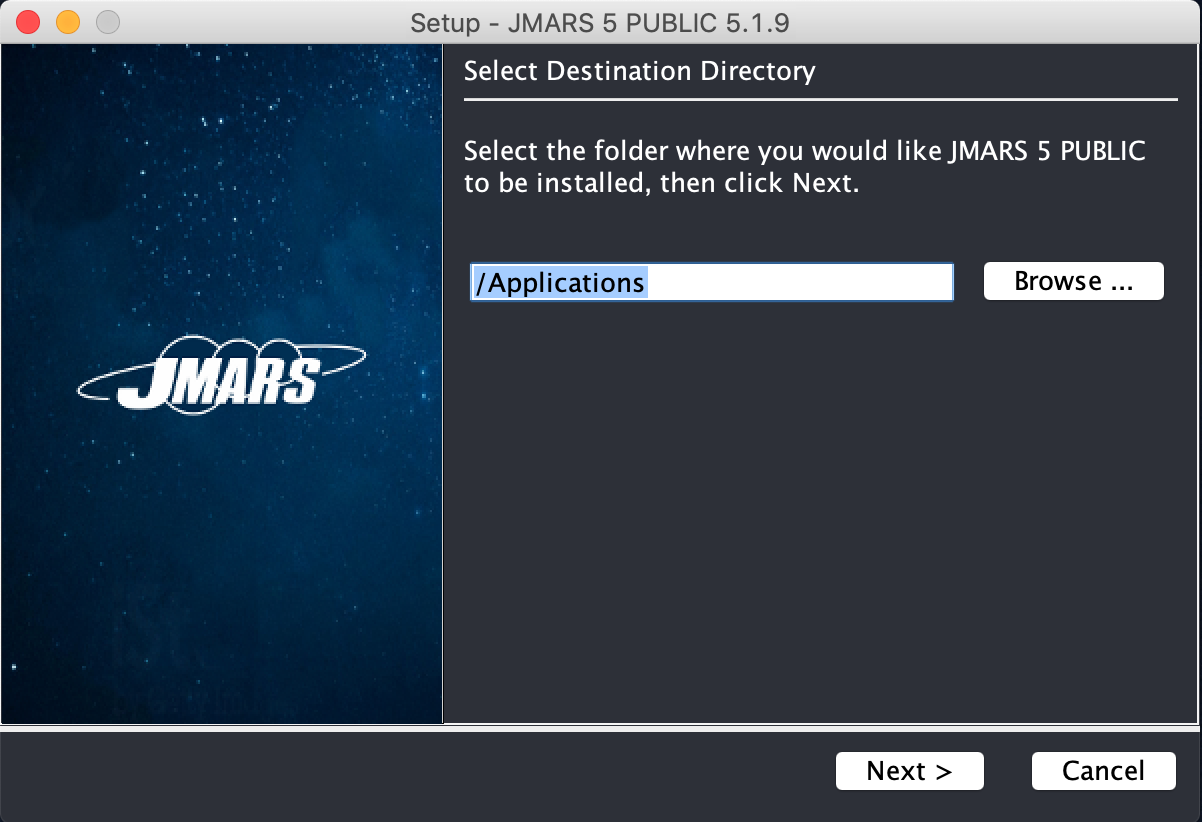
- The first screen will ask you to select a Destination Directory for the JMARS application. Keep in mind that once a directory is selected, you cannot change it. It is strongly recommended to leave the default directory on any Mac OS but you may change it. After the directory is selected, click "Next"
- NOTE: When you install JMARS on a Mac, the default option is the /Applications folder. If you do not have administrative privileges it will not run JMARS if it installs here. If you do not have administrative privileges, go to the application folder through users, /users/Applications. IF you are installing on multiple machines or installing multiple users on one machine, it is strongly suggested to get administrative privileges and then install JMARS.
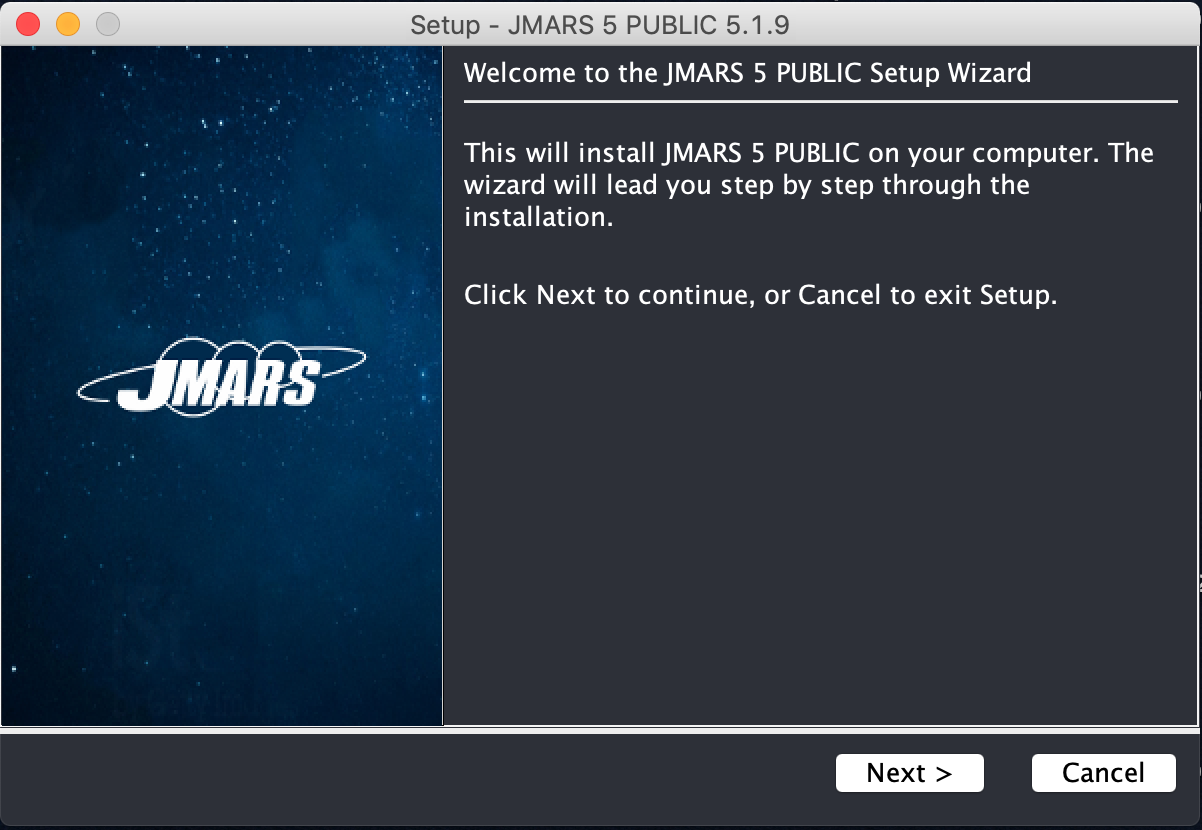
- The next window that pops up is the Welcome window.
- Click "Next" on the "Welcome to the JMARS Setup Wizard" to start the process.
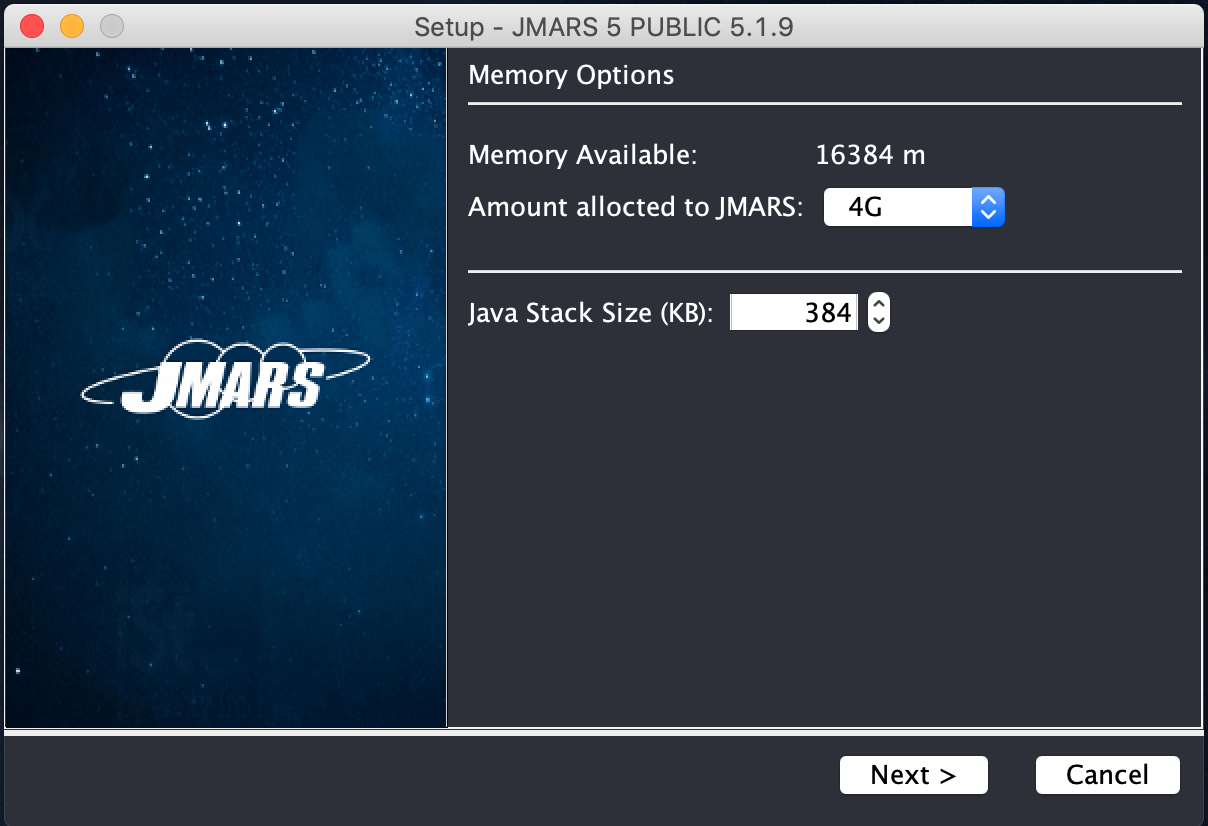
- This window is the memory window. There are two questions on this window, the first one indicates how much RAM you would like JMARS to use. The advanced section is for power users. It specifies the amount of memory each thread is allowed to use. It is strongly suggested that you leave the default to this option.
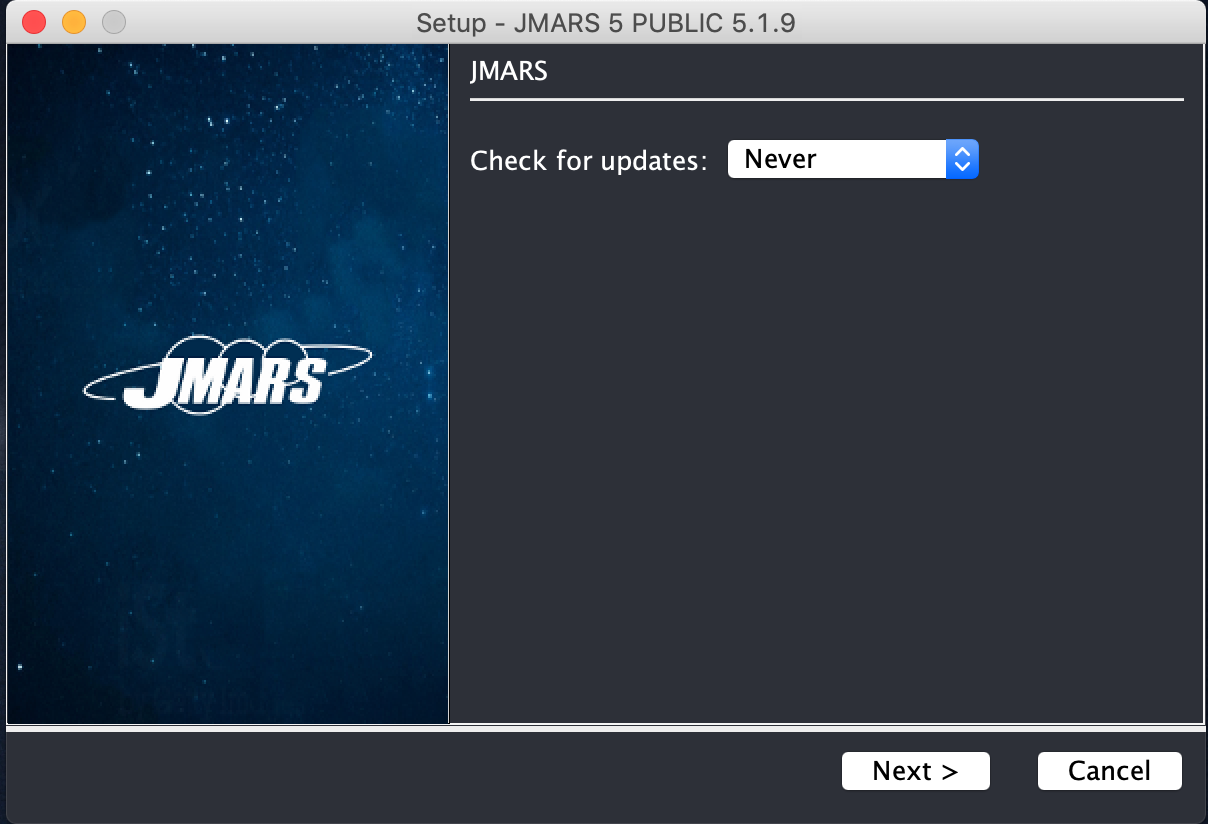
- Here, you can specify how often you would like to update your JMARS application. If you click the drop down menu, there are five different options. "On Every Start" indicates that the JMARS application will search for any available updates every time you start JMARS up. "Daily" will check once a day, "Weekly" will check once a week, "Monthly" checks for available updates once a month and "Never" indicates that JMARS will never automatically check for updates. The user can check for updates whenever they please when JMARS opens.
NOTE: When you download a new installer, you have the option to change the update schedule. Once you have selected an Update schedule, click "Next" - The next window shows a quick summary of the installation. If everything looks right, click "Next".
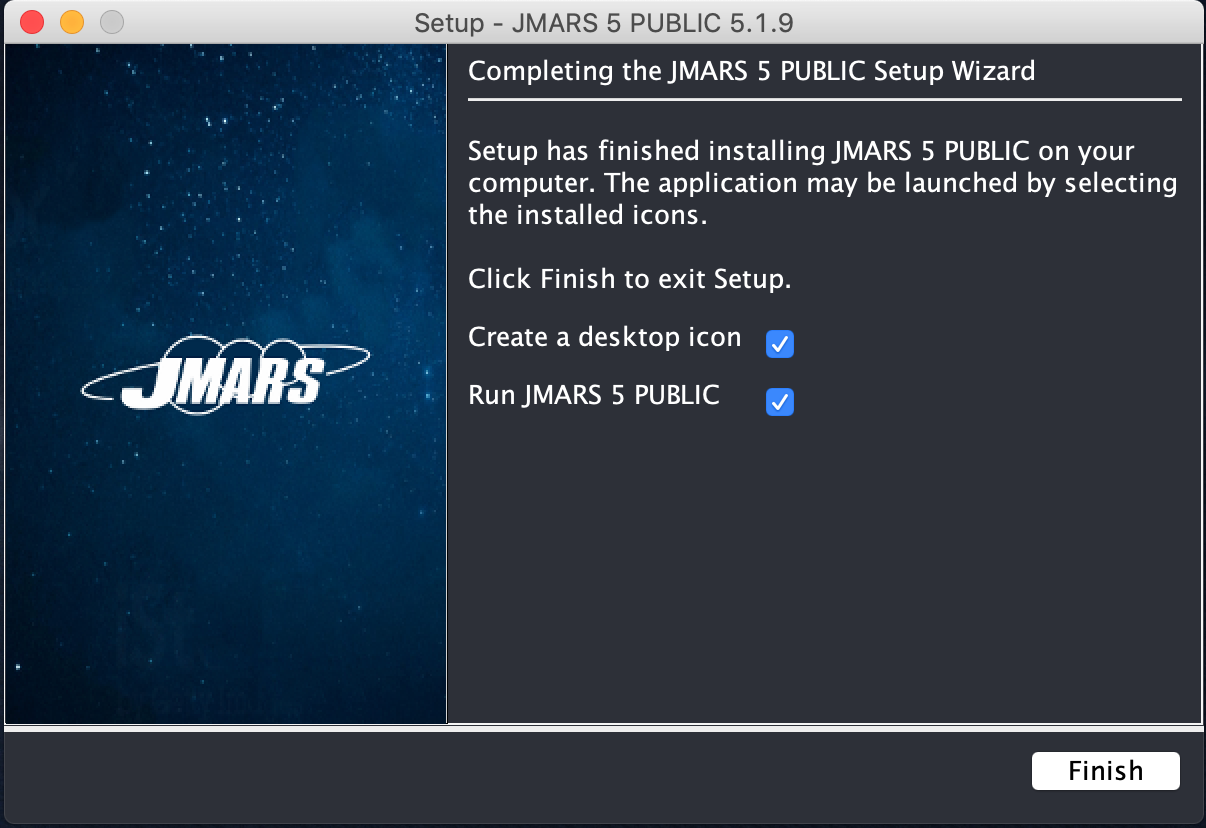
- Lastly, you will be asked to add a desktop Icon and to run JMARS. Select if you would like a start Menu or not for the JMARS application, then select "Next"

Step 4: Opening JMARS
- JMARS should automatically run after you complete the last window in step 3 but if it does not, double click the JMARS icon to open the application.
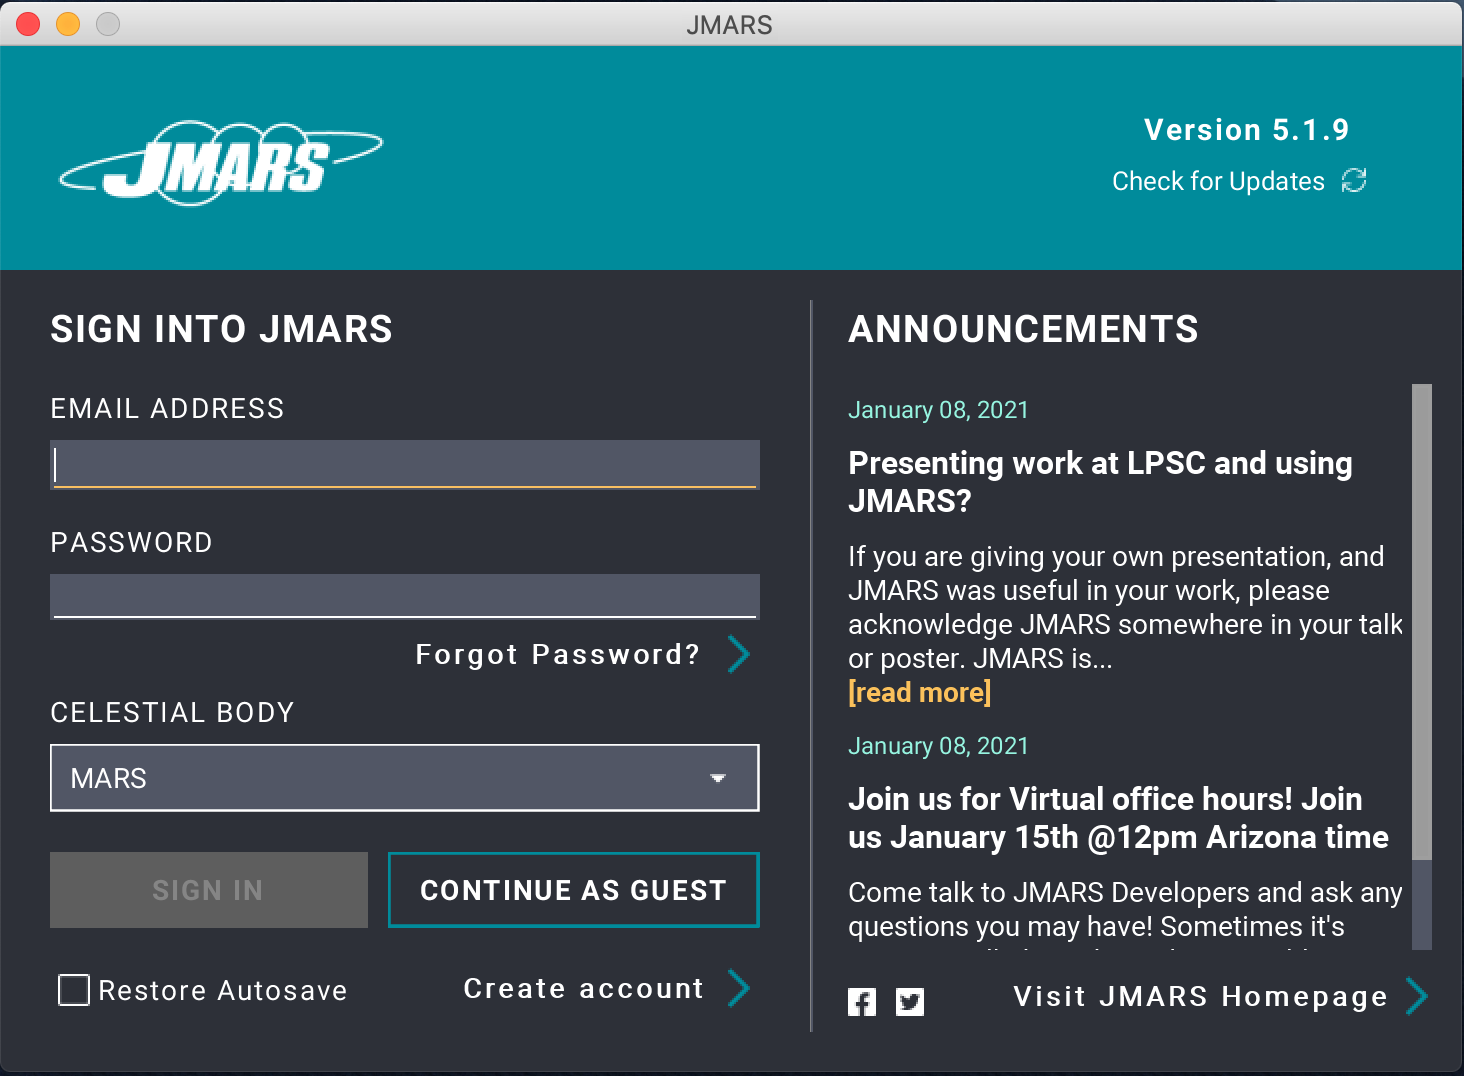
- Next, depending on what update schedule you selected, two pop ups will happen. The first one will ask you if you would like to do an update. Before you answer, you must sign into JMARS first. You will be prompted to fill out your email and password. Fill out your email and password and select "OK". If you have not registered your email/password, you can do so on the JMARS home page. Under "Login" you can click "Create new account". You may login as a guest, but some functionality will not be available to you.
- The JMARS Main screen will open.
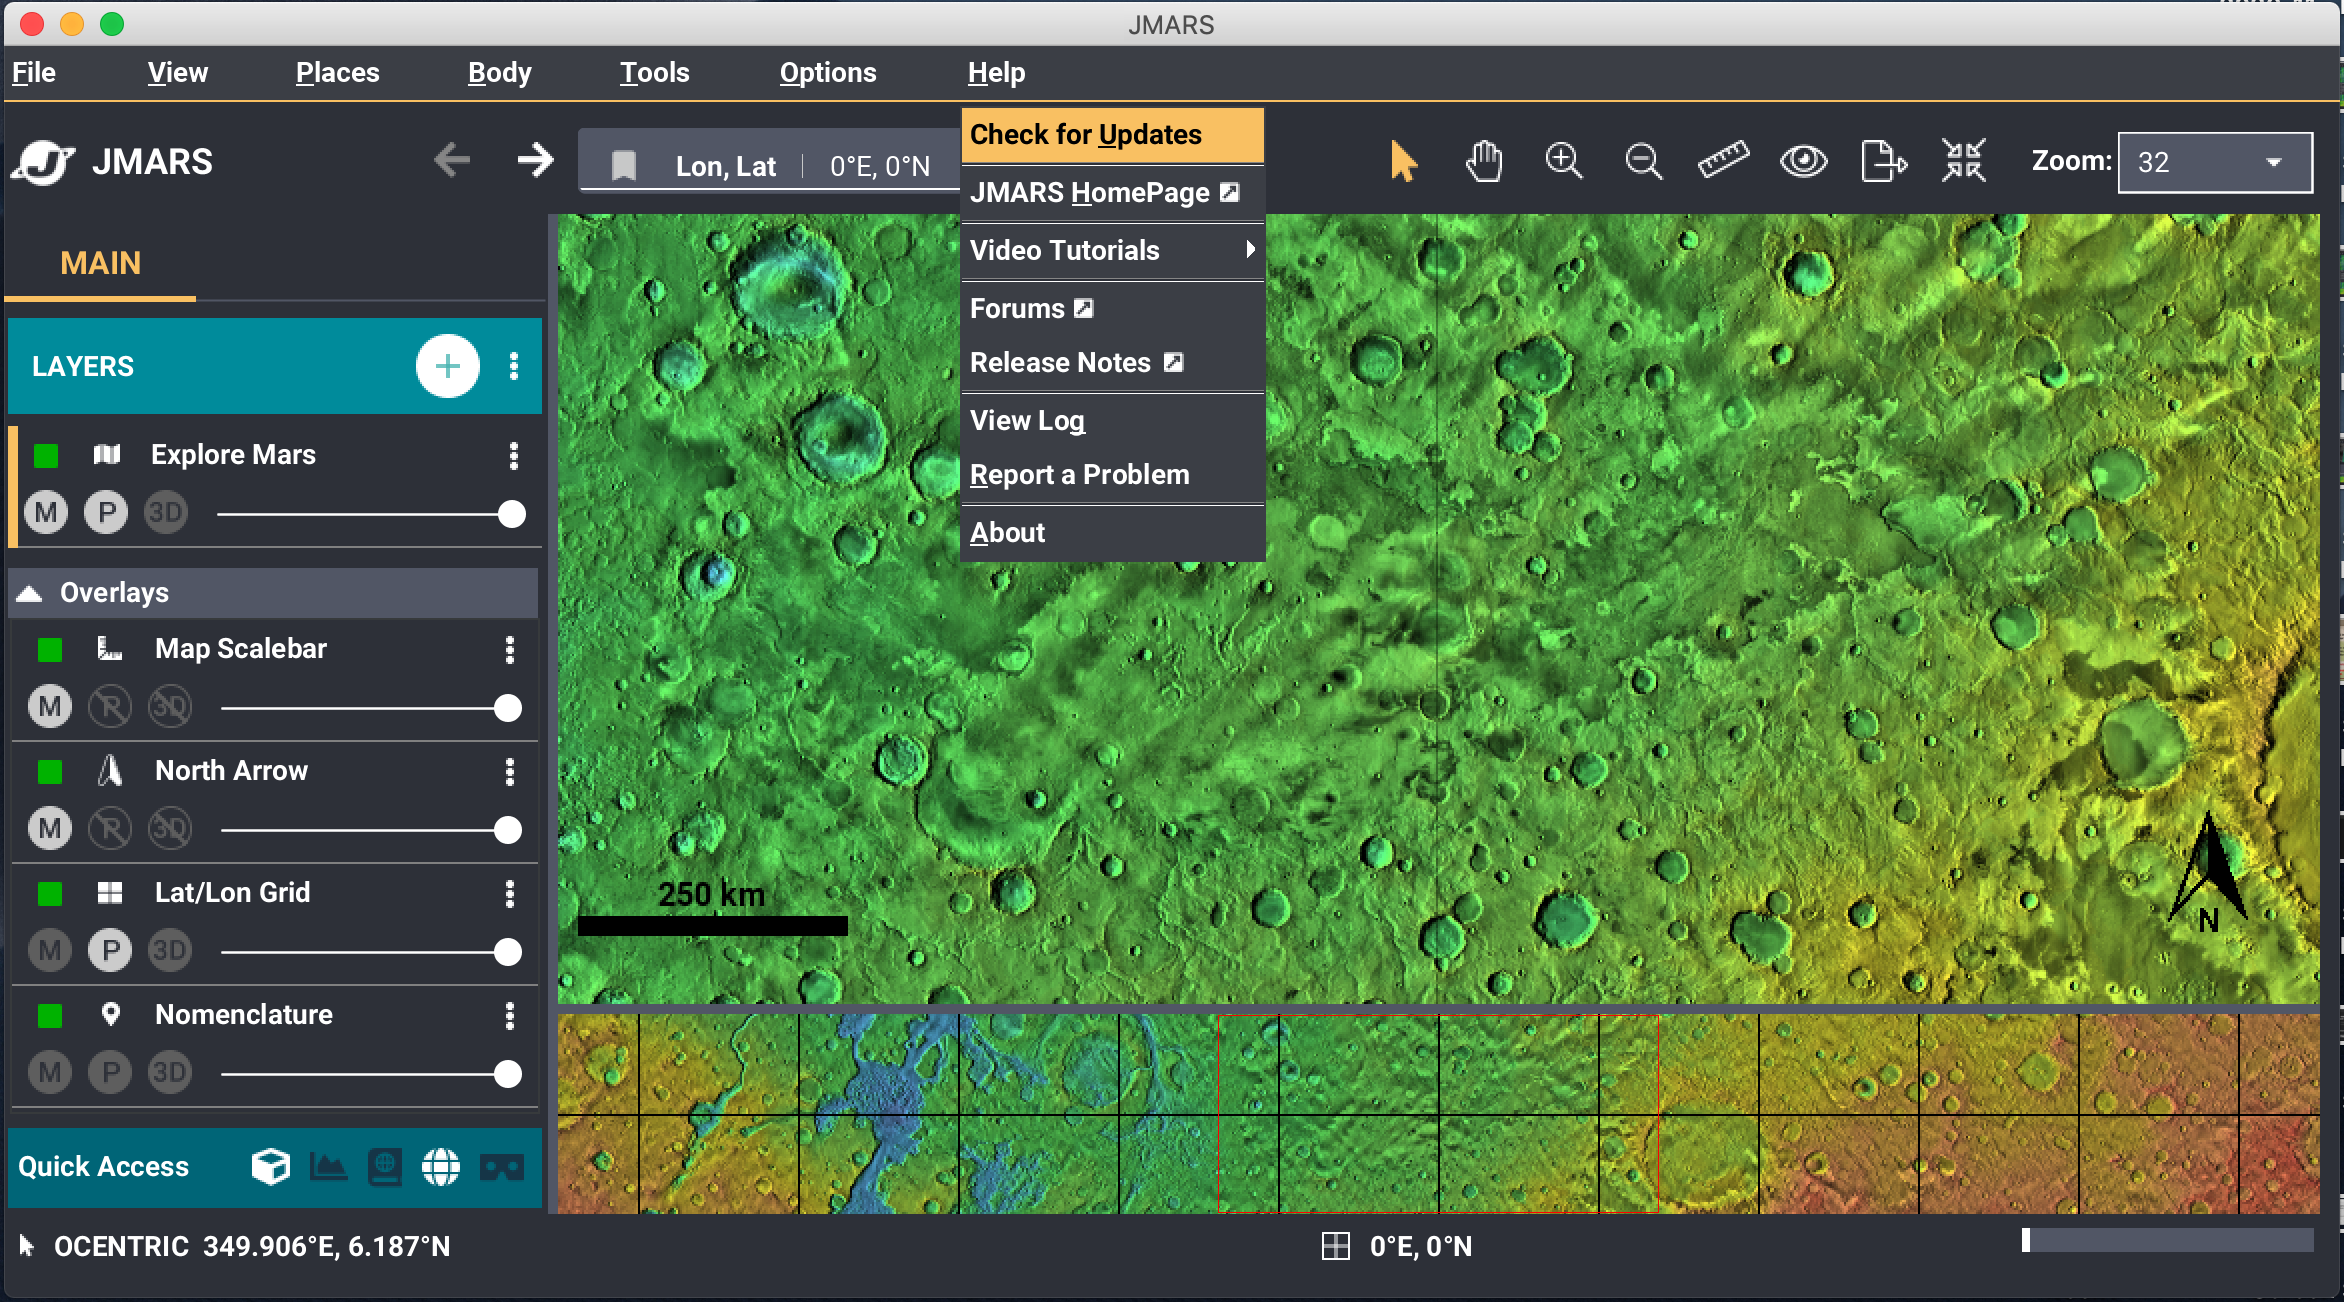
- UPDATES:If your update has not been satisfied, and you would like to look for available updates, you can do so by going to the "Help" tab at the top of the JMARS screen and selecting "Check for updates".
- If you open JMARS and your schedule is due for updates, a pop screen will ask you if you want to update. If you press cancel, you will only be able to update JMARS when you restart the application. The "Check for updates" will not work because you already pressed cancel.
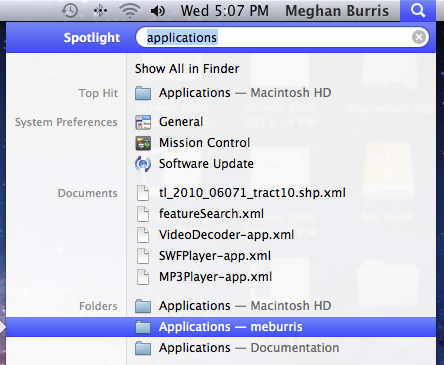
Step 5: Removing JMARS
- To remove JMARS from your Mac machine you can go to the investigation tool at the top right hand corner of the screen and type "Applications" or type in the name of the directory you placed the JMARS download. In this example, we find the applications folder
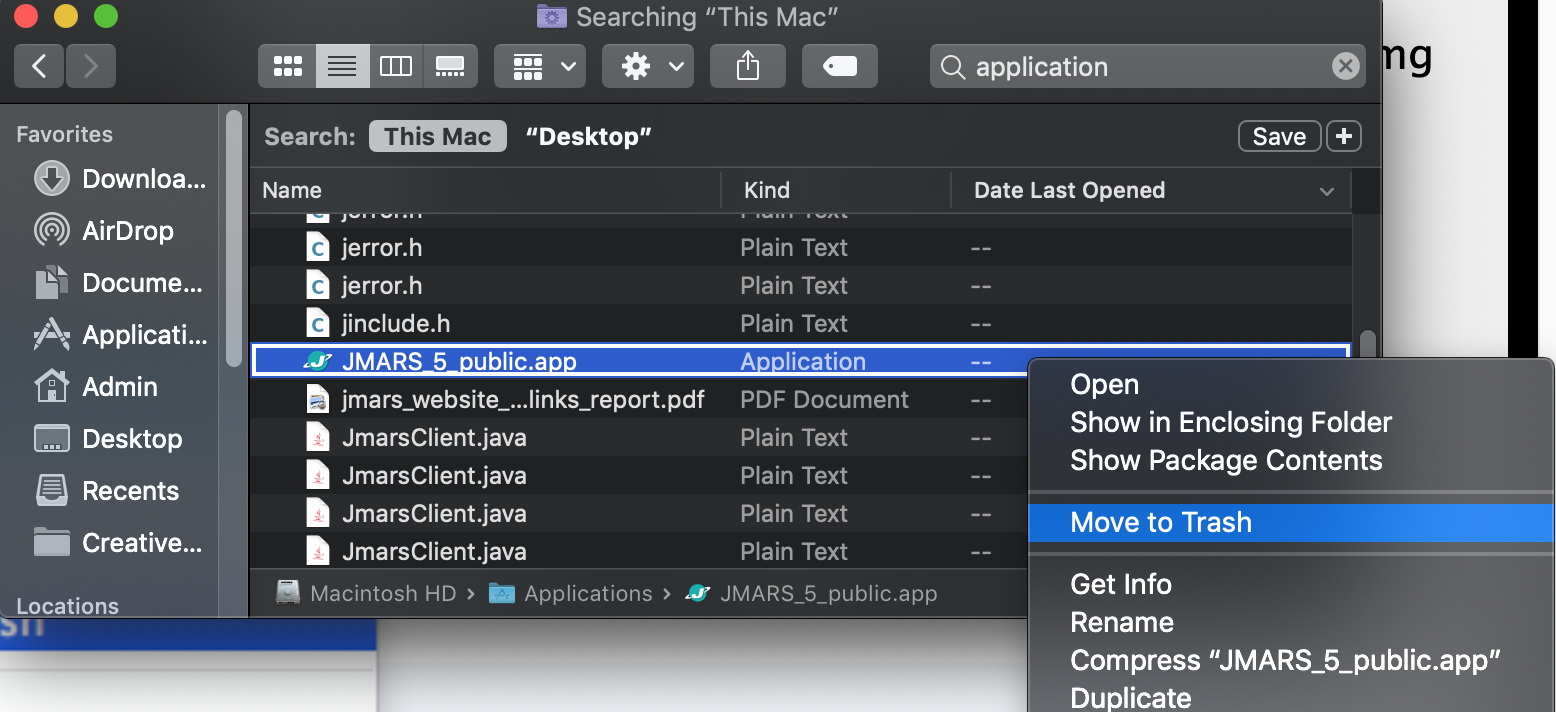
- Locate the application and double click it.
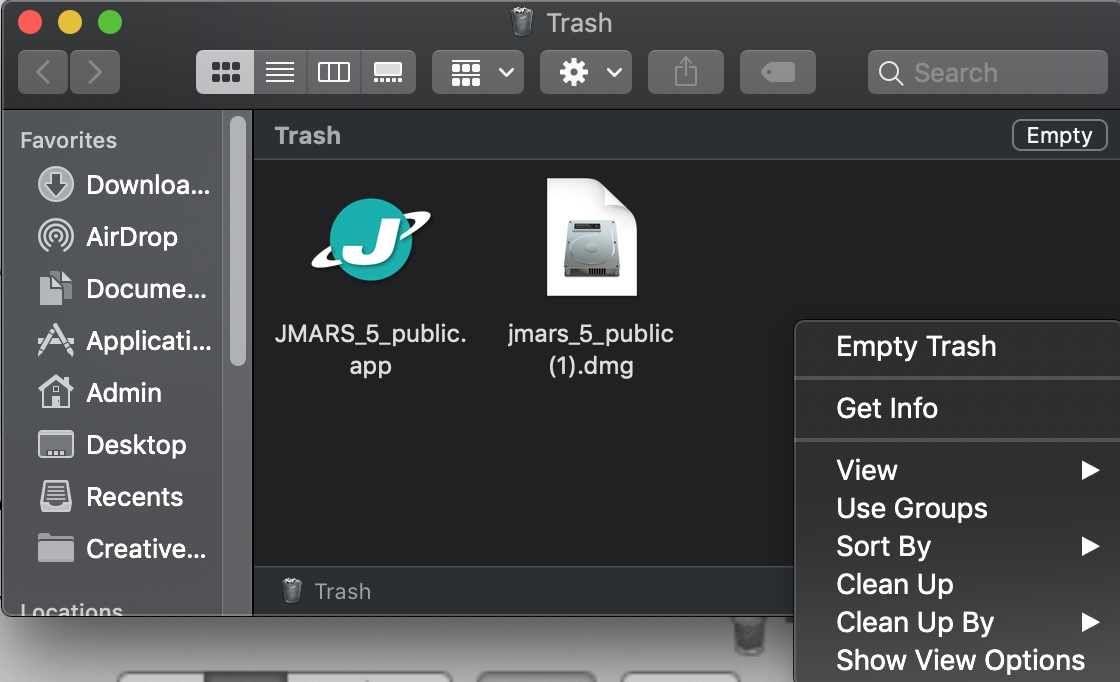
- The application folder will open. Drag the JMARS file to the trash or right click and select "Move to Trash". Also if your .dmg file is still in your downloads or on your desktop, drag that to the trash
- In order to fully remove JMARS, you must empty your trashcan.