- Home
- Getting Started
- Documentation
- Release Notes
- Tour the Interface
- Tour the Layers
- JMARS Video Tutorials
- Lat/Lon Grid Layer
- Map Scalebar
- Nomenclature
- Crater Counting
- 3D
- Shape Layer
- Mosaics
- Map
- Advanced/Custom Maps
- Graphic/Numeric Maps
- Custom Map Sharing
- Stamp
- THEMIS
- MOC
- Viking
- CRISM Stamp Layer
- CTX
- HiRise
- HiRISE Anaglyph
- HiRISE DTM
- HRSC
- OMEGA
- Region of Interest
- TES
- THEMIS Planning
- Investigate Layer
- Landing Site Layer
- Tutorials
- Video Tutorials
- Displaying the Main View in 3D
- Finding THEMIS Observation Opportunities
- Submitting a THEMIS Region of Interest
- Loading a Custom Map
- Viewing TES Data in JMARS
- Using the Shape Layer
- Shape Layer: Intersect, Merge, and Subtract polygons from each other
- Shape Layer: Ellipse Drawing
- Shape Layer: Selecting a non-default column for circle-radius
- Shape Layer: Selecting a non-default column for fill-color
- Shape Layer: Add a Map Sampling Column
- Shape Layer: Adding a new color column based on the values of a radius column
- Shape Layer: Using Expressions
- Using JMARS for MSIP
- Introduction to SHARAD Radargrams
- Creating Numeric Maps
- Proxy/Firewall
- JMARS Shortcut Keys
- JMARS Data Submission
- FAQ
- Open Source
- References
- Social Media
- Podcasts/Demos
- Download JMARS
JMARS ›
Using the formula field: Custom Shape Layer
Using the Shape Layer and Formula Field
Step 1: Open the Shape Layer
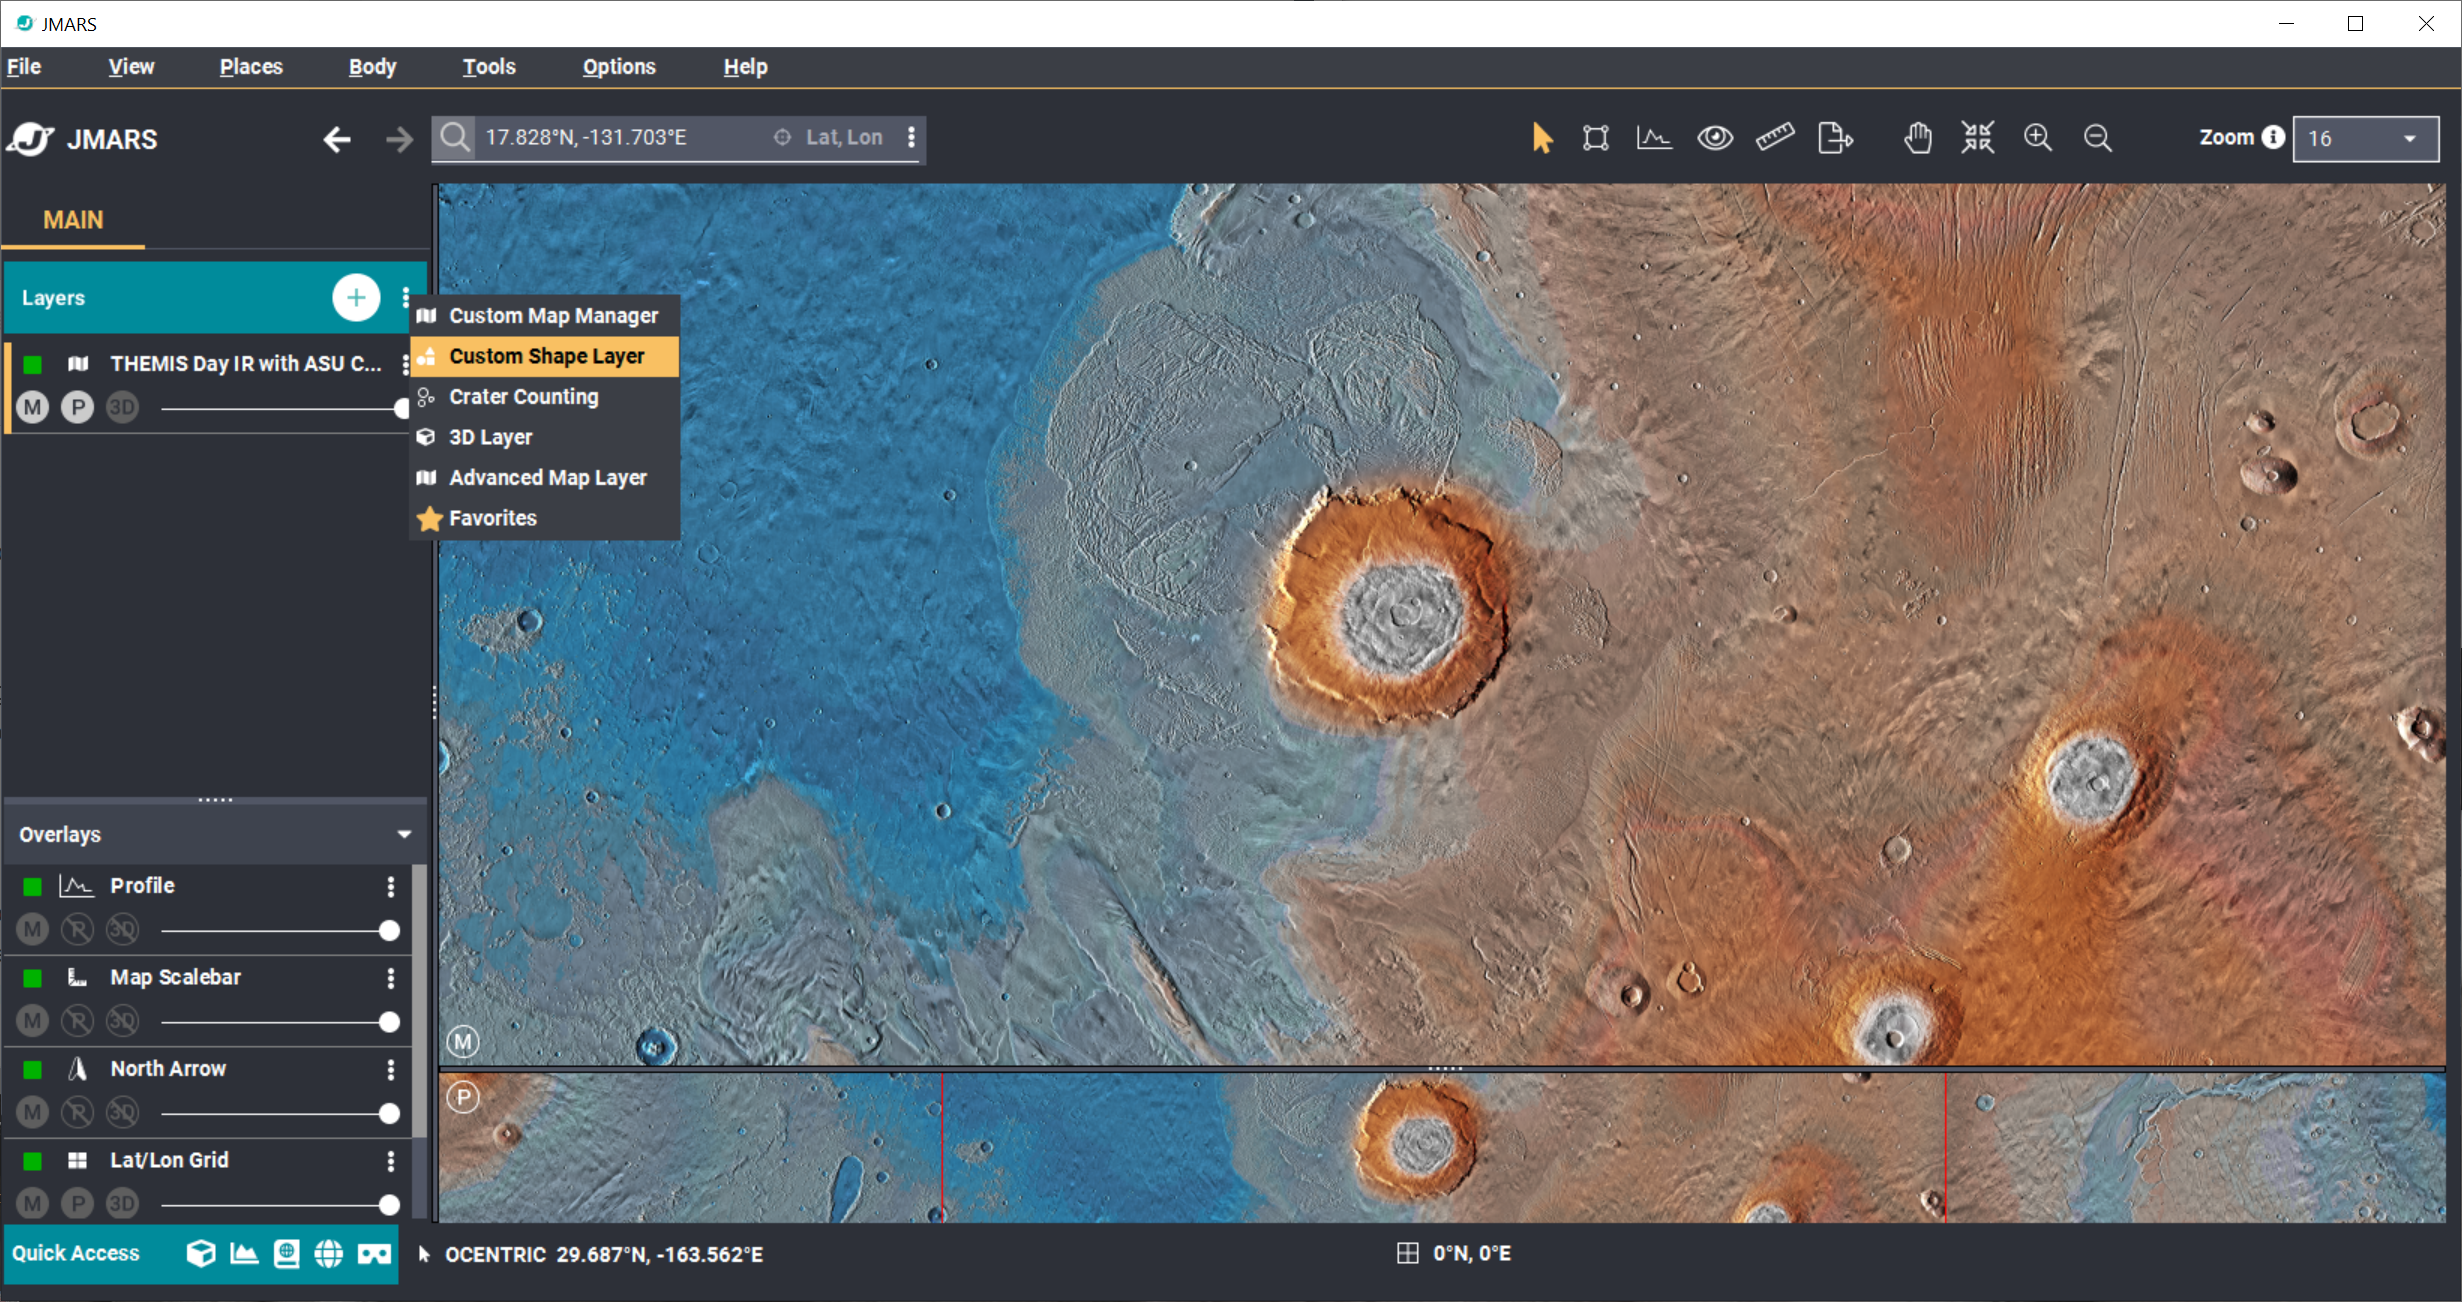
- Launch JMARS and navigate to the "Layers" panel.
- Click the three dots icon under the "Layers" section.
- Select "Custom Shape Layer" from the dropdown menu.
Step 2: Add Shapes to the Layer
- To add shapes, either create new shapes or import an existing shape dataset.
- For this tutorial, we'll add the USGS Mars Dune Database:
Step 3: Edit Columns
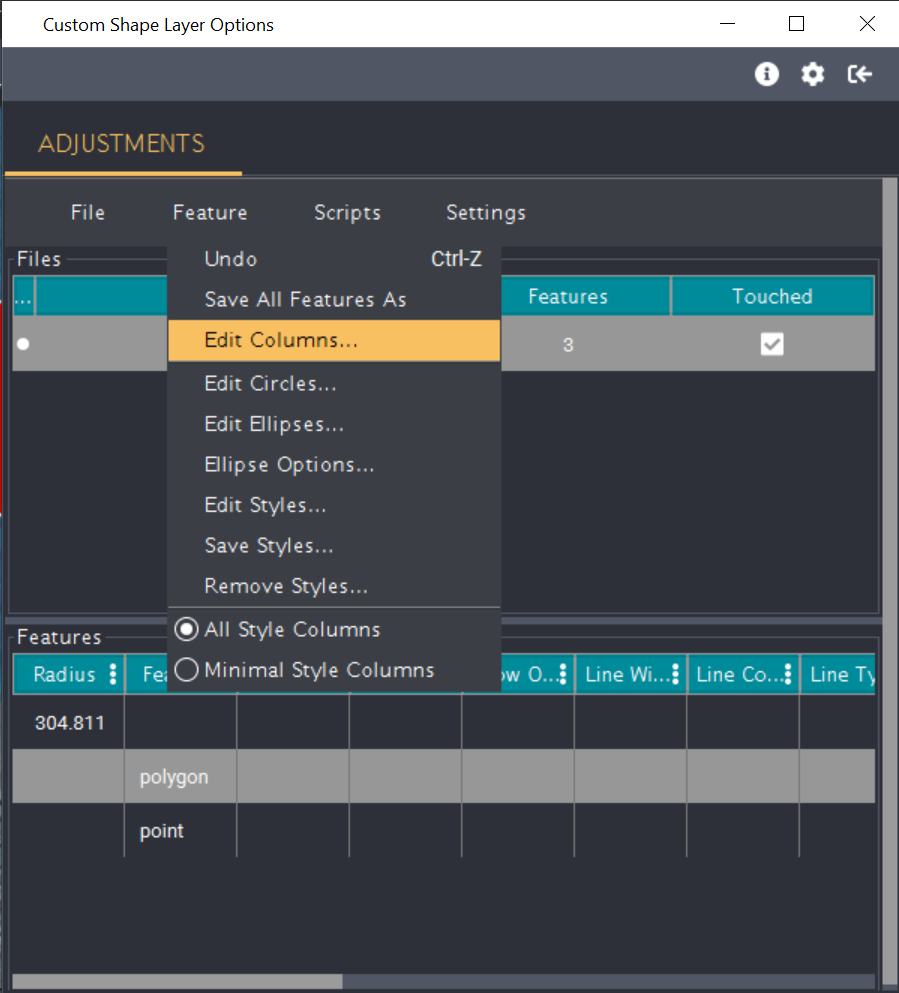
- In the Custom Shape Layer window, find the "Feature" dropdown list.
- Select "Edit Columns" from the list to open the Edit Columns window.
Step 4: Create a New Column
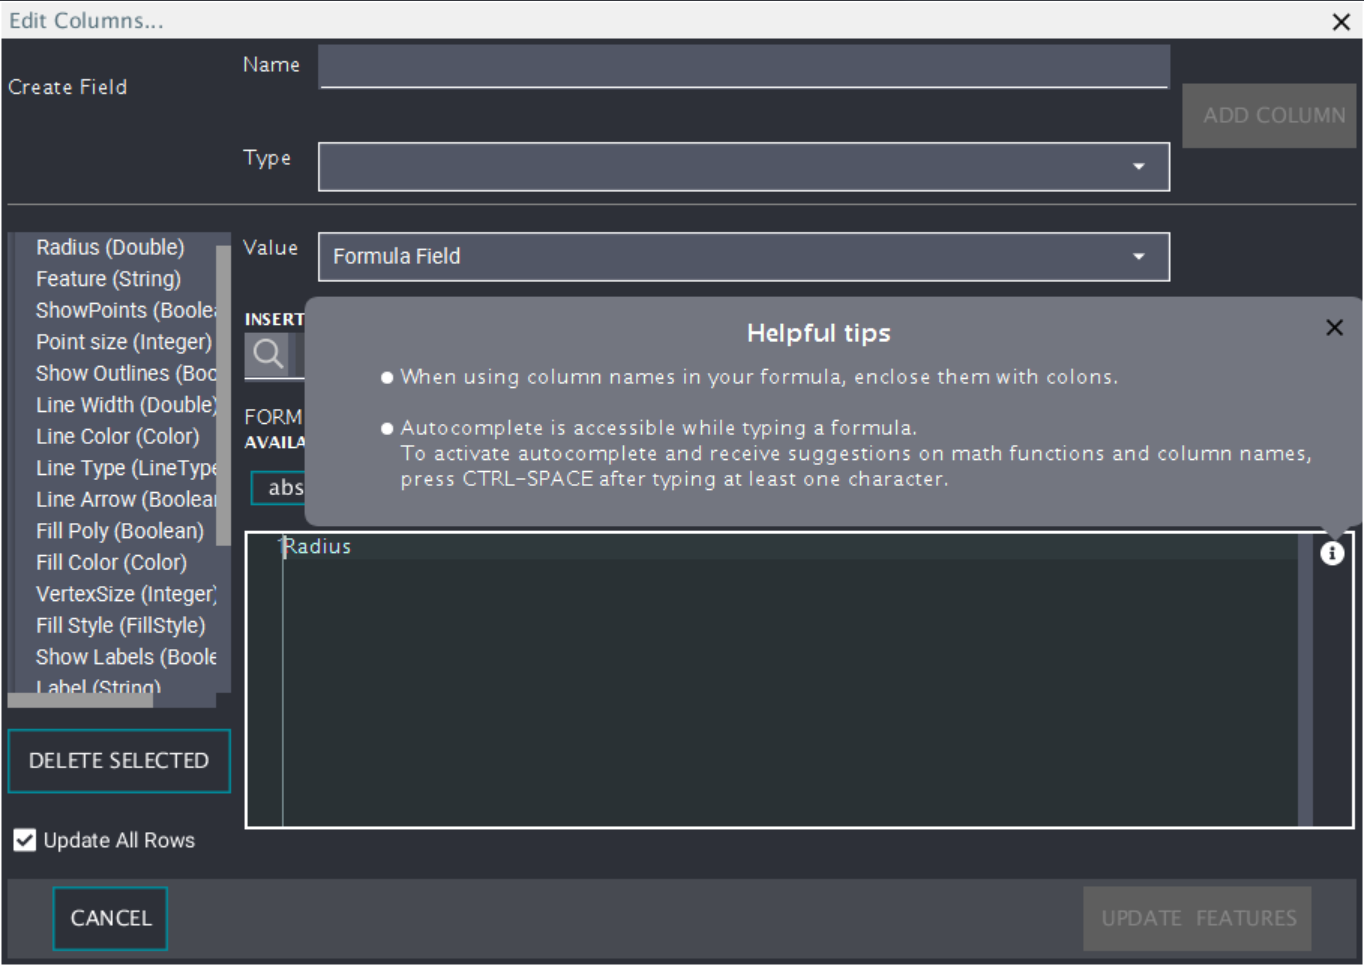
- In the Edit Columns window, you'll create a new column that will hold the results of a formula calculation.
- Set a "Name" for the column, such as "Tutorial Test".
- Choose the column "Type". Since we will be using a formula that produces a real number, select "Real Number".
- Click "Add Column" to add the new column to your dataset.

Note: It's important to match the column type with the expected output of your formula. For instance, if the formula result is an integer and you're using an integer column for the calculation, your new column should also be an integer.
Step 5: Set the Formula Field
- With your new column added, set the "Value" by selecting "Formula Field".
- When prompted, choose the "Real Number" expression type to match the column type.
Step 6: Create the Formula
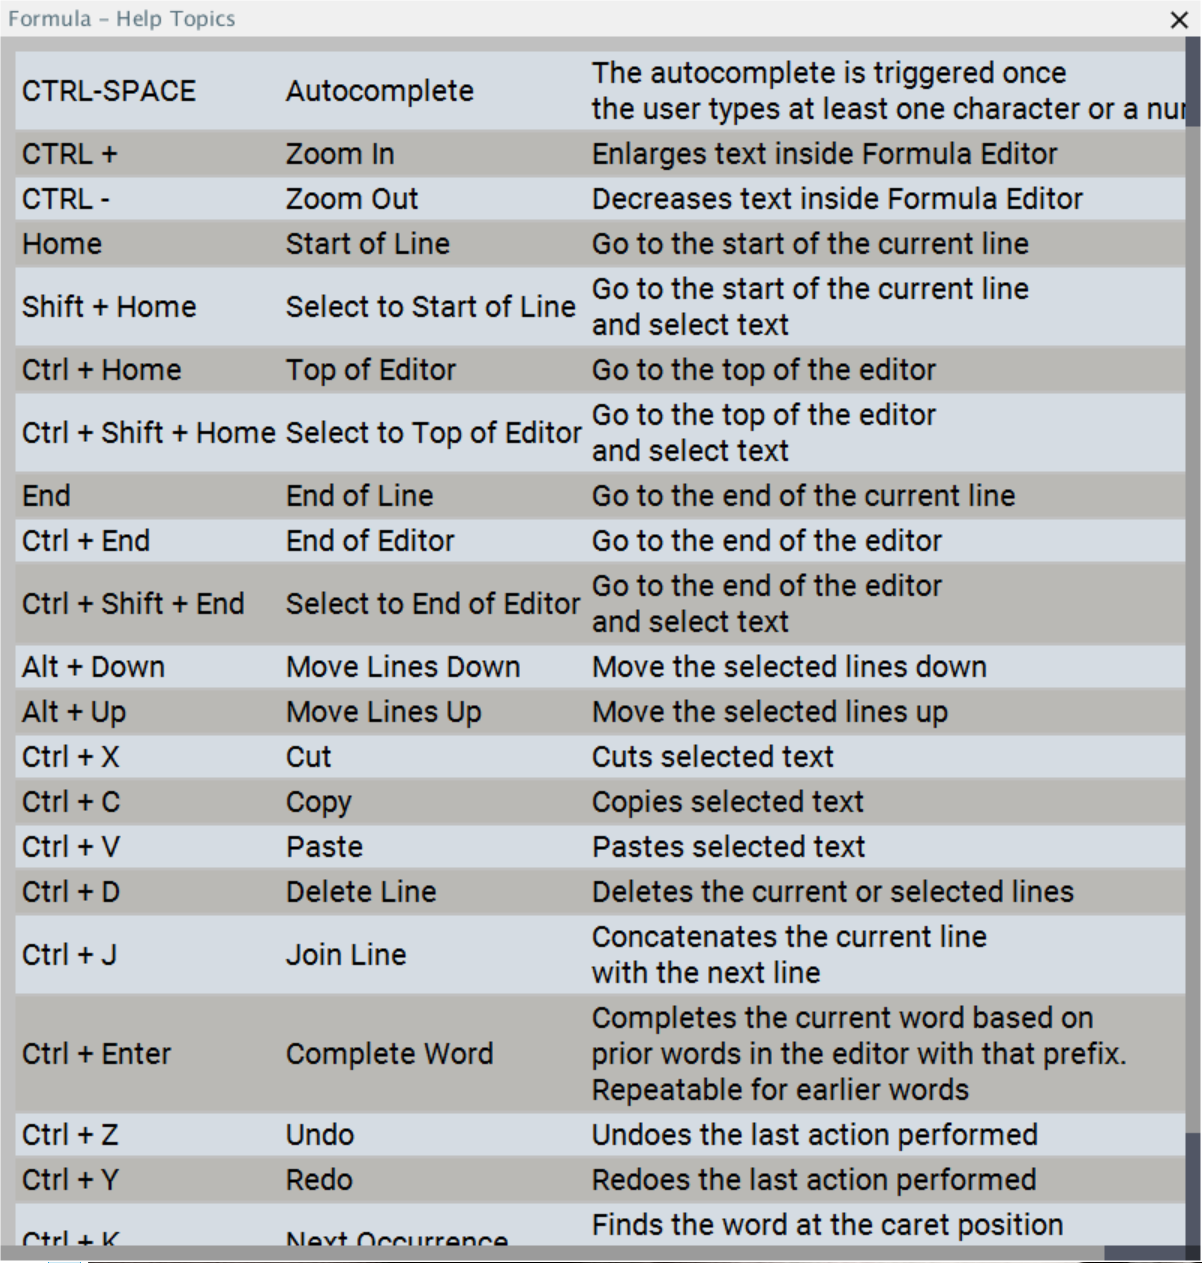
- Notice the icons next to various sections of the Formula Editor:
- In the formula area, you can use various features to help build your formula:
Step 7: Enter the Formula
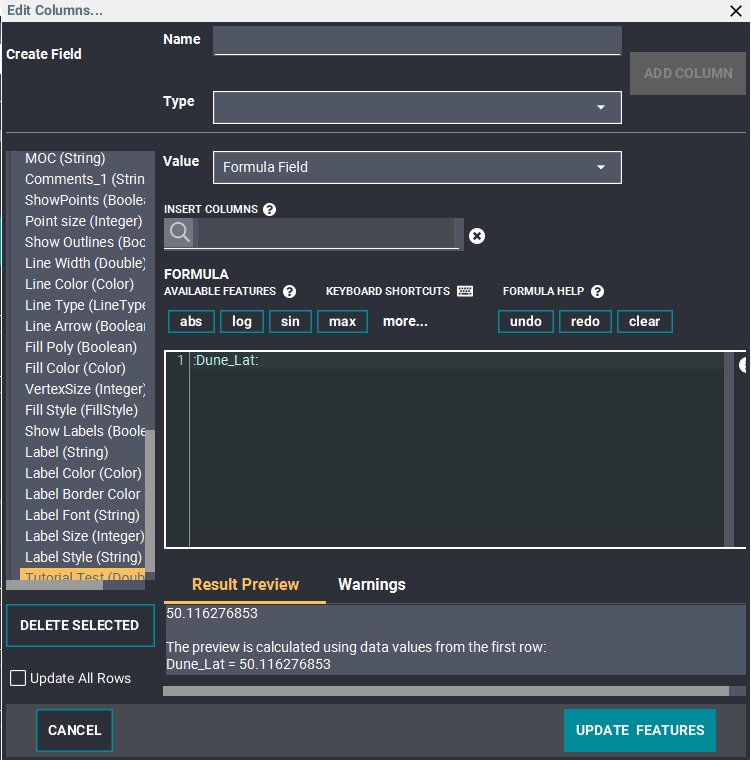
- After adding "Dune_Lat" to your formula, you’ll see a result preview at the bottom showing an example value from the Dune_Lat column.
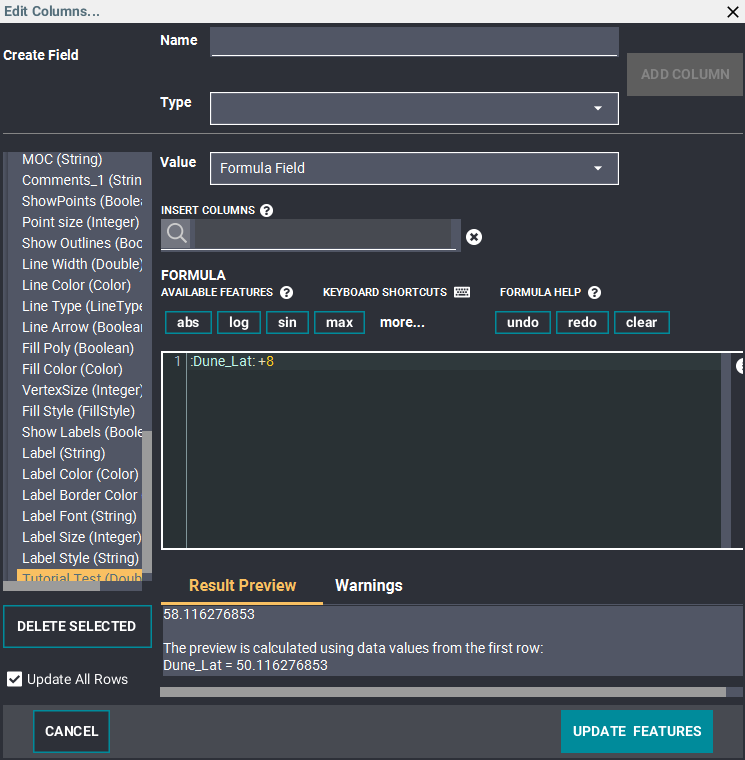
- To modify this, type
+ 8next toDune_Latso the formula reads:Dune_Lat: + 8. - Observe the result preview updating accordingly.
Step 8: Apply the Formula
- Check the "Update all Rows" checkbox in the bottom left corner to apply the formula to all rows.
- Click the "Update Feature" button in the bottom right corner.
- Your new column, "Tutorial Test," will now display the calculated values.


You have successfully used the JMARS formula field to modify a column in the shape layer!


